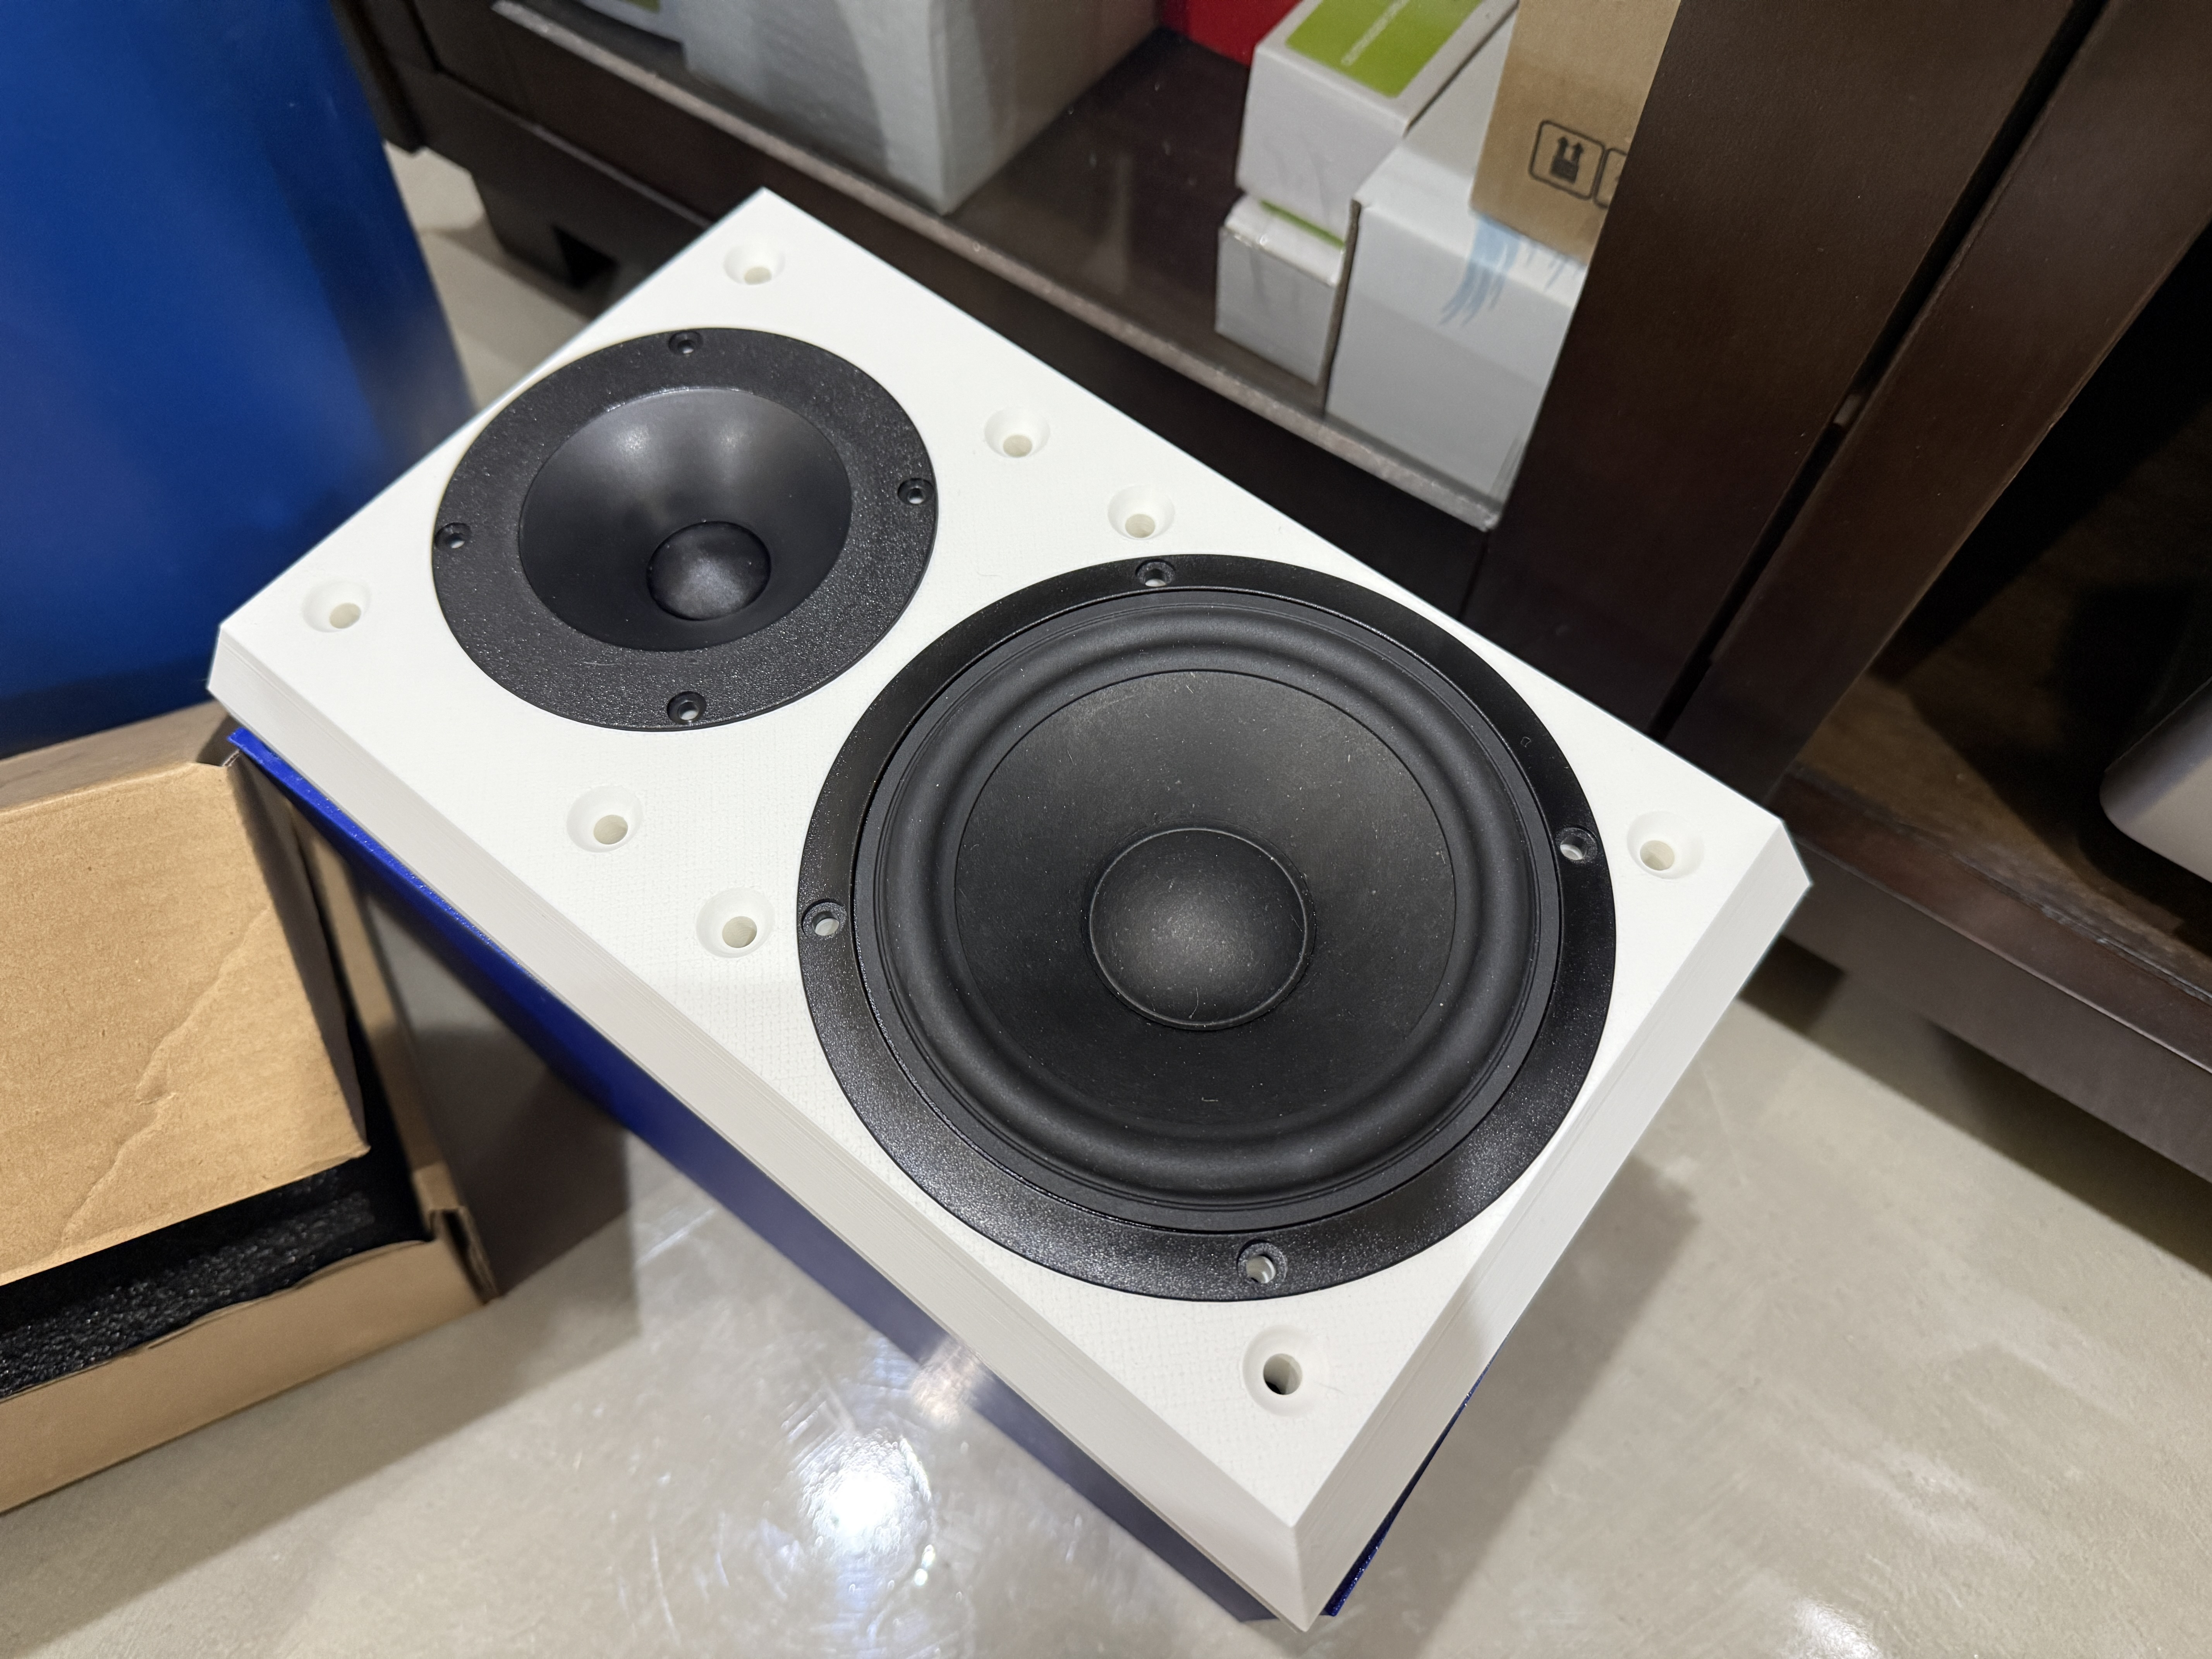
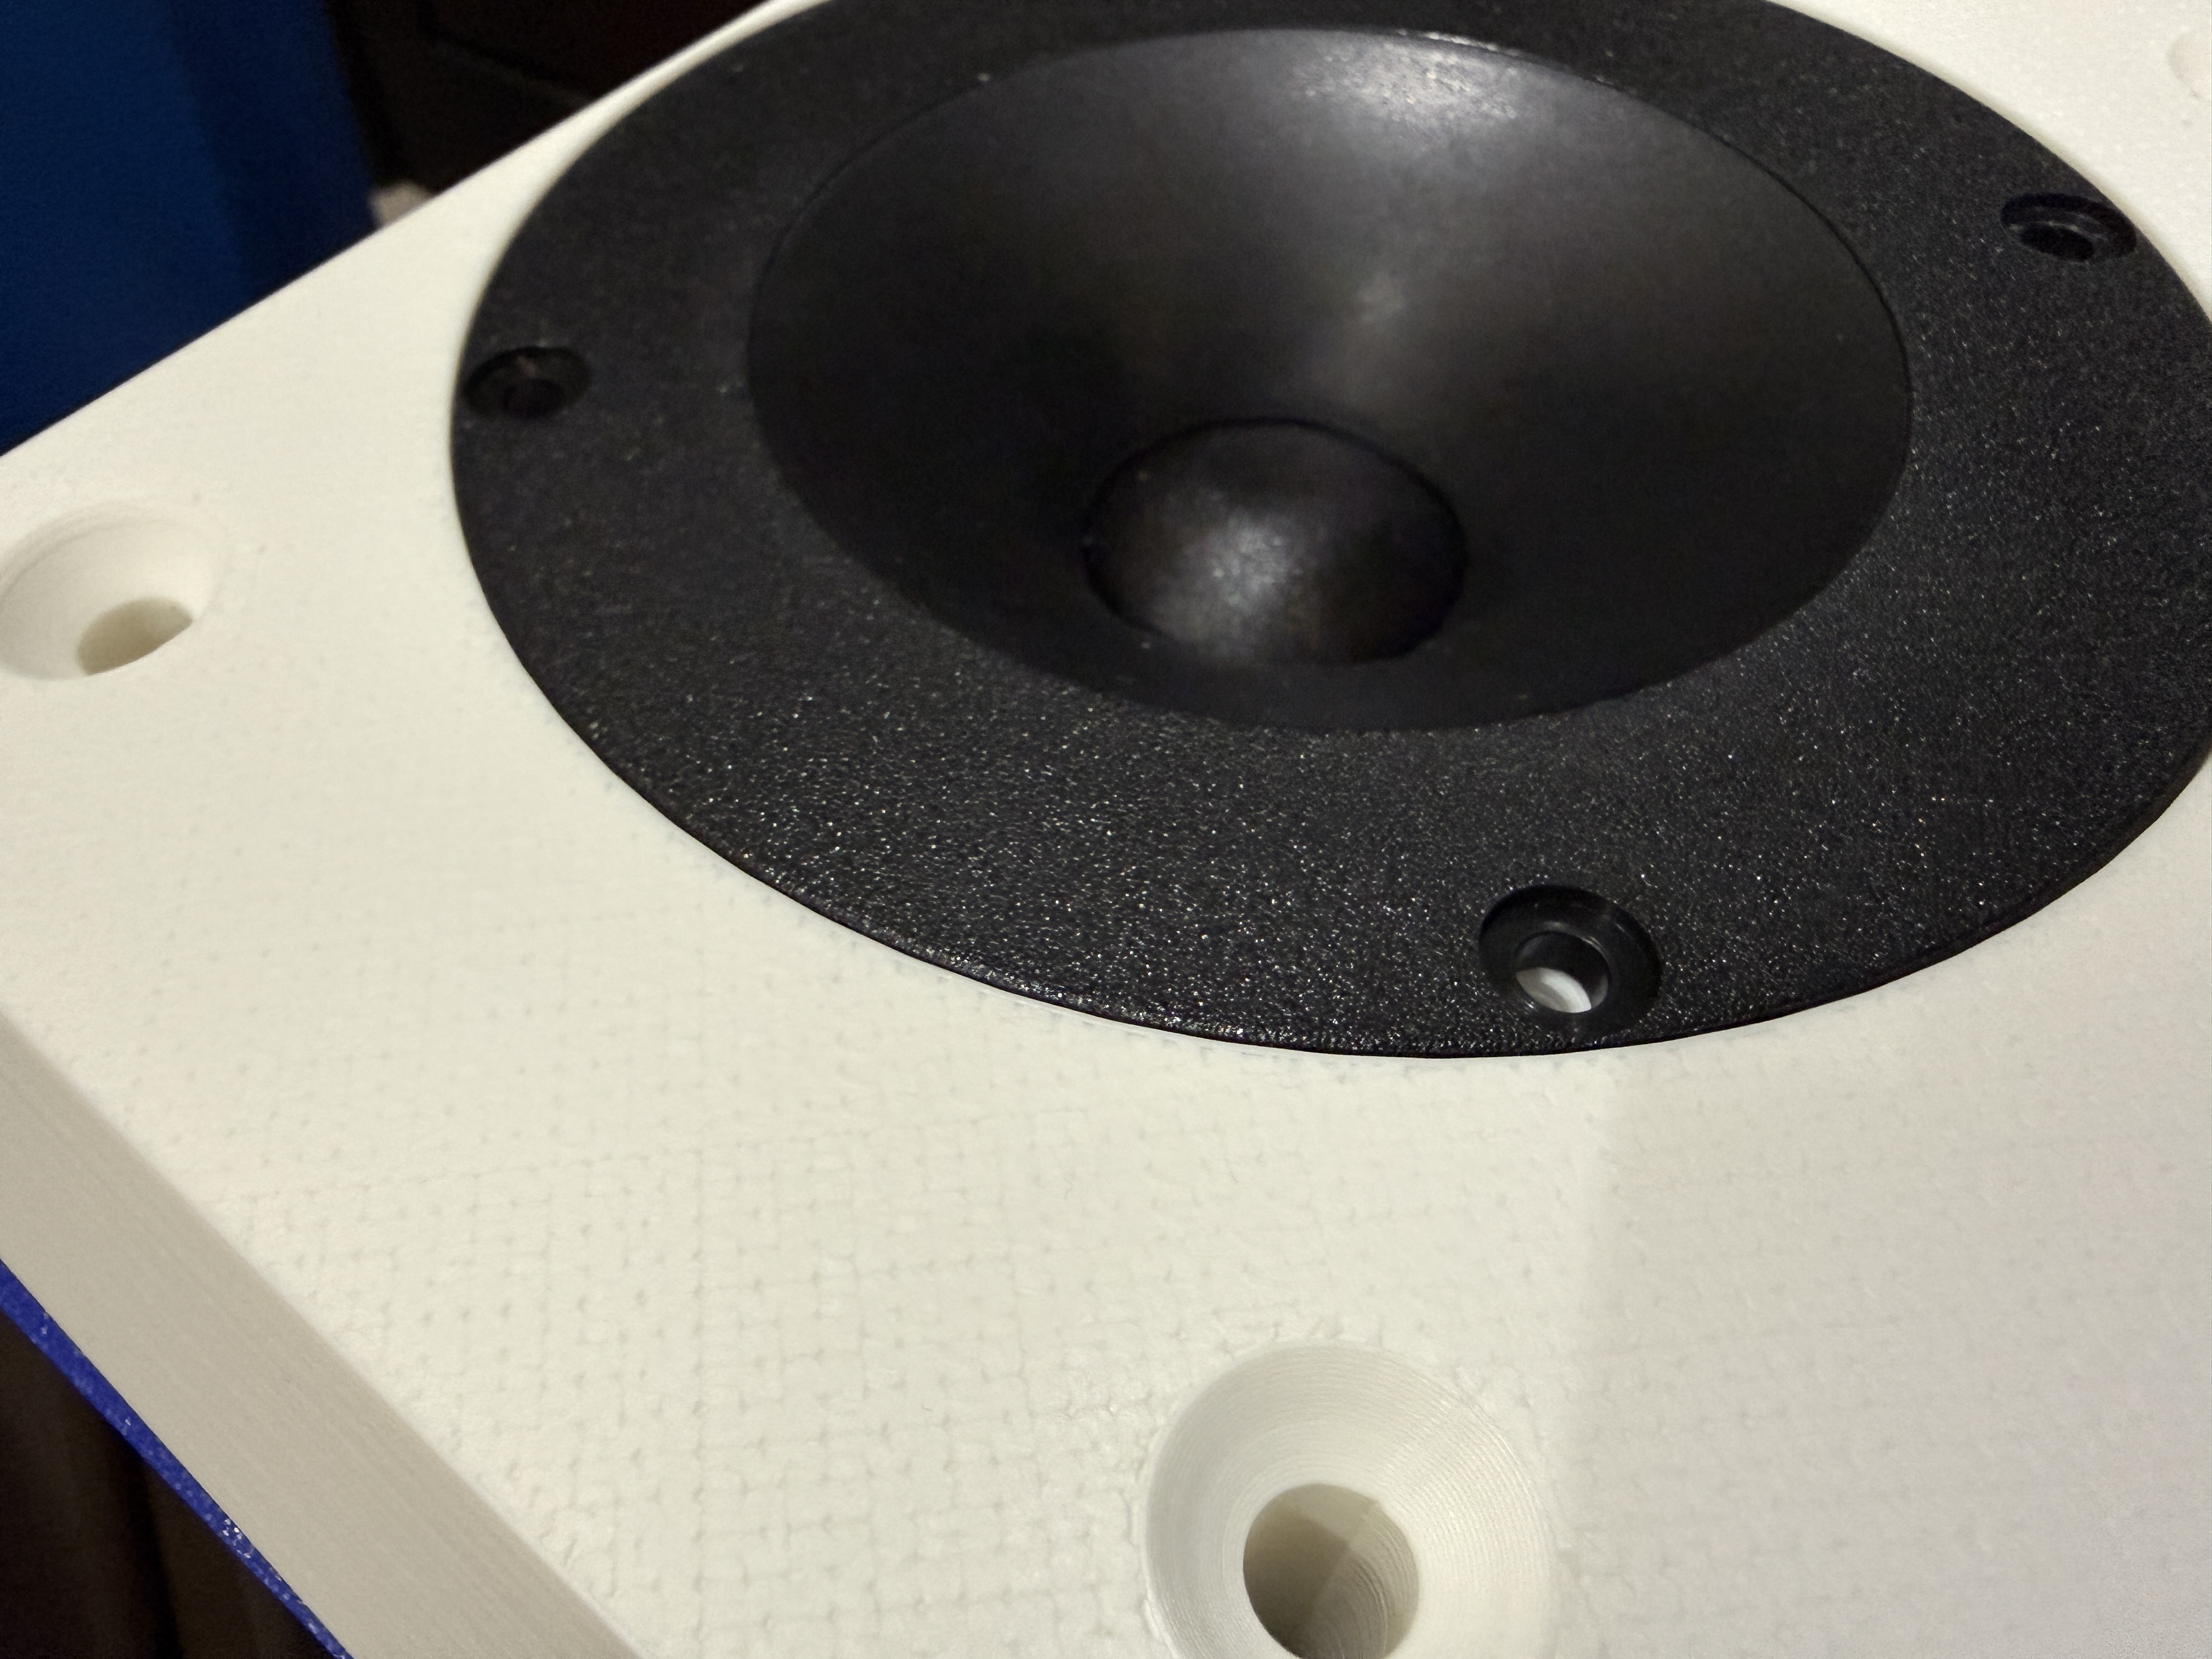
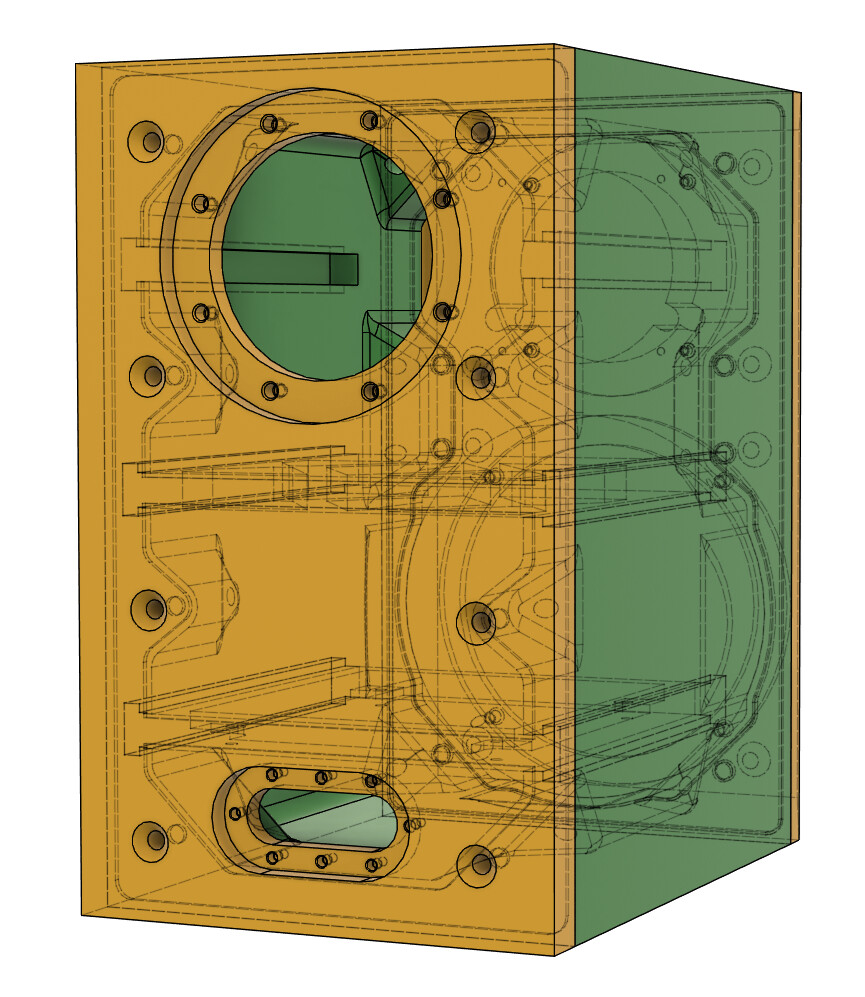
A gift for many? The Mechano23

The SB15CAC is one of the best budget drivers out there but also probably the most expensive on the typical list that would still be called a “budget” driver. After that you are getting into Scanspeak and Seas, etc. SB15CAC will go lower than the MAC-05, for box modelling recommendations look at the SB15NBAC-8 at Madisound (they don’t have the box recommendations for the CAC versions or the NBAC-4).

The MAC-05 is unfair as a comparison because it is sold well below market price to raise funds for MAC. I would say it would be in the $45-$60 range like the SIG150 or RS150 if it was sold at PE or Madisound. I would guess that the SB15CAC is technically better, but not twice as good and surely not 4 times as good. It would be a tough choice between MAC-05 at $65 and SB15CAC at $105. If you are trying to get the most bang-for-the-buck, MAC-05 all the way. If you are trying to get the absolute best performance within the budget, and being at the top of the budget is fine, then SB15CAC makes sense.

As a disclaimer, I think my speaker I am most proud of is the one that uses the MAC-05. Not because it is my “best” speaker, but because it is such a great “value” speaker. If you want some SPL and distortion measurements on a real baffle, I can post them.

I have seen posts in the past that designing a waveguide for the Corundum tweeters has proven difficult, although there is one on diyAudio for the 32TX (edit: see wolf’s post below for that WG). I have the NE149’s and am really thinking that with a waveguided 25TX, that would be one heck of a speaker.

2 Likes
1 Like

Kartesian woofer, 32TX with waveguide by Lifu.

1 Like

Good stuff guys, thank you! More to think about, for sure.

I thought I had settled on the MAC-05; it’s very high value and when I put it next to the purple test baffle I made it looks FANTASTIC. However, I started modeling it and I’m having a hard time with it in an 8L box. It just seems to want a larger enclosure. Anyone have some experience with that they could share?

Edit: Given the low cost I could ponder a 2.1 situation for folks I suppose, then I could just go sealed with an F3 around 86 Hz.

Edit 2: Though for the cost associated with a sub and sub amp I could just do the Anarchy 558. It probably doesn’t play as clean (or look as pretty) but it can sure go low in a bass reflex cabinet (F3 of 48 Hz). For gift speakers to family and friends that probably aren’t audiophiles - and this includes a child (my goddaughter) - bass and simplicity may be a more important factor.

I used my MAC-05s in an intentionally smaller-than-optimal cabinet of 10L. Brad/Hifiside/JF Components used them in 14L.

Mark has the Caritas for a very good price. I have built 2 sets and they are a great value.

So um…this ‘simple’ project kind of blew up.

Maybe it’s because I didn’t sleep much last night, but I started thinking about other possibilities. Perhaps I shall have more than one design ready to go depending on parts availability? I’m am now considering making all of the following designs as “ready to manufacture”. Volume needs to stick around 8-10L total with a baffle no taller than ~12" in order to fit on my printer. Width can vary, but 7-8" seems most likely. If possible, I will try to use the same cabinet for each build. Crossovers need to be reasonably simple and elegant to fit in the cabs.

Mechano23 - CAD work nearly complete. New test baffle complete and looking like it may be the final version. Awaiting crossover PCB manufacture and arrival before finalizing the crossover brace(s). One set of tweeters and woofers in hand, so it’d be silly to not make at least one, but both parts are readily available and the BOM crossover parts are only around $100 USD shipped (sourced at Solen). I don’t think I’ll stray too much away from that design and will probably make several of these since I ordered 10 crossover boards (they were cheap and the minimum orders were either 5 or 10 so it made sense). This is kind of the baseline for comparison to the others, and costs around $162 for a pair of tweeters/woofers (Madisound).

Gifties - SB Acoustics SB26ADC tweeter in an augerpro elliptical waveguide and Midwest Audio Club MAC-05 midwoofer. Note I chose the aluminum (ADC) tweeter for this pairing because I was concerned the ceramic (CDC) tweeter color would not match the MAC-05 silver well. Part of the rationale for this tweeter is the ready availability of various elliptical waveguides from augerpro’s website - a round waveguide may be too ‘tall’ given the height restriction of the speaker. My intent is to integrate the waveguide into the baffle as one piece and also have a version where the waveguide is simply attached to the baffle. Why? Mostly for color options. I have a weird intent to make a bright green cabinet, bright yellow baffle/rear, and bright orange waveguide/port. There will probably also be a white/light pink/light blue variant, among others. Anyway, I confirmed I have two MAC-05 drivers and will acquire some more shortly. I do not have any of the ADC tweeters, but they seem to have high availability. Around $166 USD for a pair of woofers and tweeters (Madisound and Jule Fidelity), should be a great value.

Gifties Extreme - SB Acoustics SB26CDC tweeter in an augerpro elliptical waveguide and Cinergy / Denovo Audio Anarchy 558 midwoofer. Same as above, probably make two different baffles here. Should be simple enough. I seem to have six 558 midwoofers (with more apparently available at Cinergy Audio for $66) and four of the 554. I’m also pretty sure I have a pair of the CDC tweeters lying around, though I didn’t look for them this morning (and they may be dedicated to another project already). Basically $132 for a pair of these (for 2x tweeters, Madisound) unless I decide to make more than three sets, in which case it would be around $264 per pair. This would be the most expensive of the three variants if starting from scratch.

Gifties Supreme - Peerless DA25TX tweeter and FaitalPRO 5FE12X midwoofer. The 5FE120 has a sort of truncated bracket, the 5FE125 is round, either is easy with 3D printed baffles so it’s mostly just a preference thing…and what will fit on the baffle given the large size of the Peerless mounting plate. I looked through my parts this morning and found 11 DA25TX tweeters, so all I’d need are the midbasses, which seem to have high availability at the time of this writing. Since I have 11 tweeters, I considered trying to tear one apart to see about making it fit one of augerpro’s waveguides. Is that worth the effort given the stock performance? I’m open to thoughts. Since I have so many tweeters it’d just be the cost of the woofers, so the ‘Supreme’ would actually be the most affordable of any of these at $110 for a pair of the woofers (US Speaker), or $222 if starting from scratch (US Speaker / Parts Express).

So that’s a lot, but I’ll be indoors a lot too (due to the pending heat) and the CAD work is relatively simple, just time consuming. So then it’s just the measurements and crossover work, which could be fun!
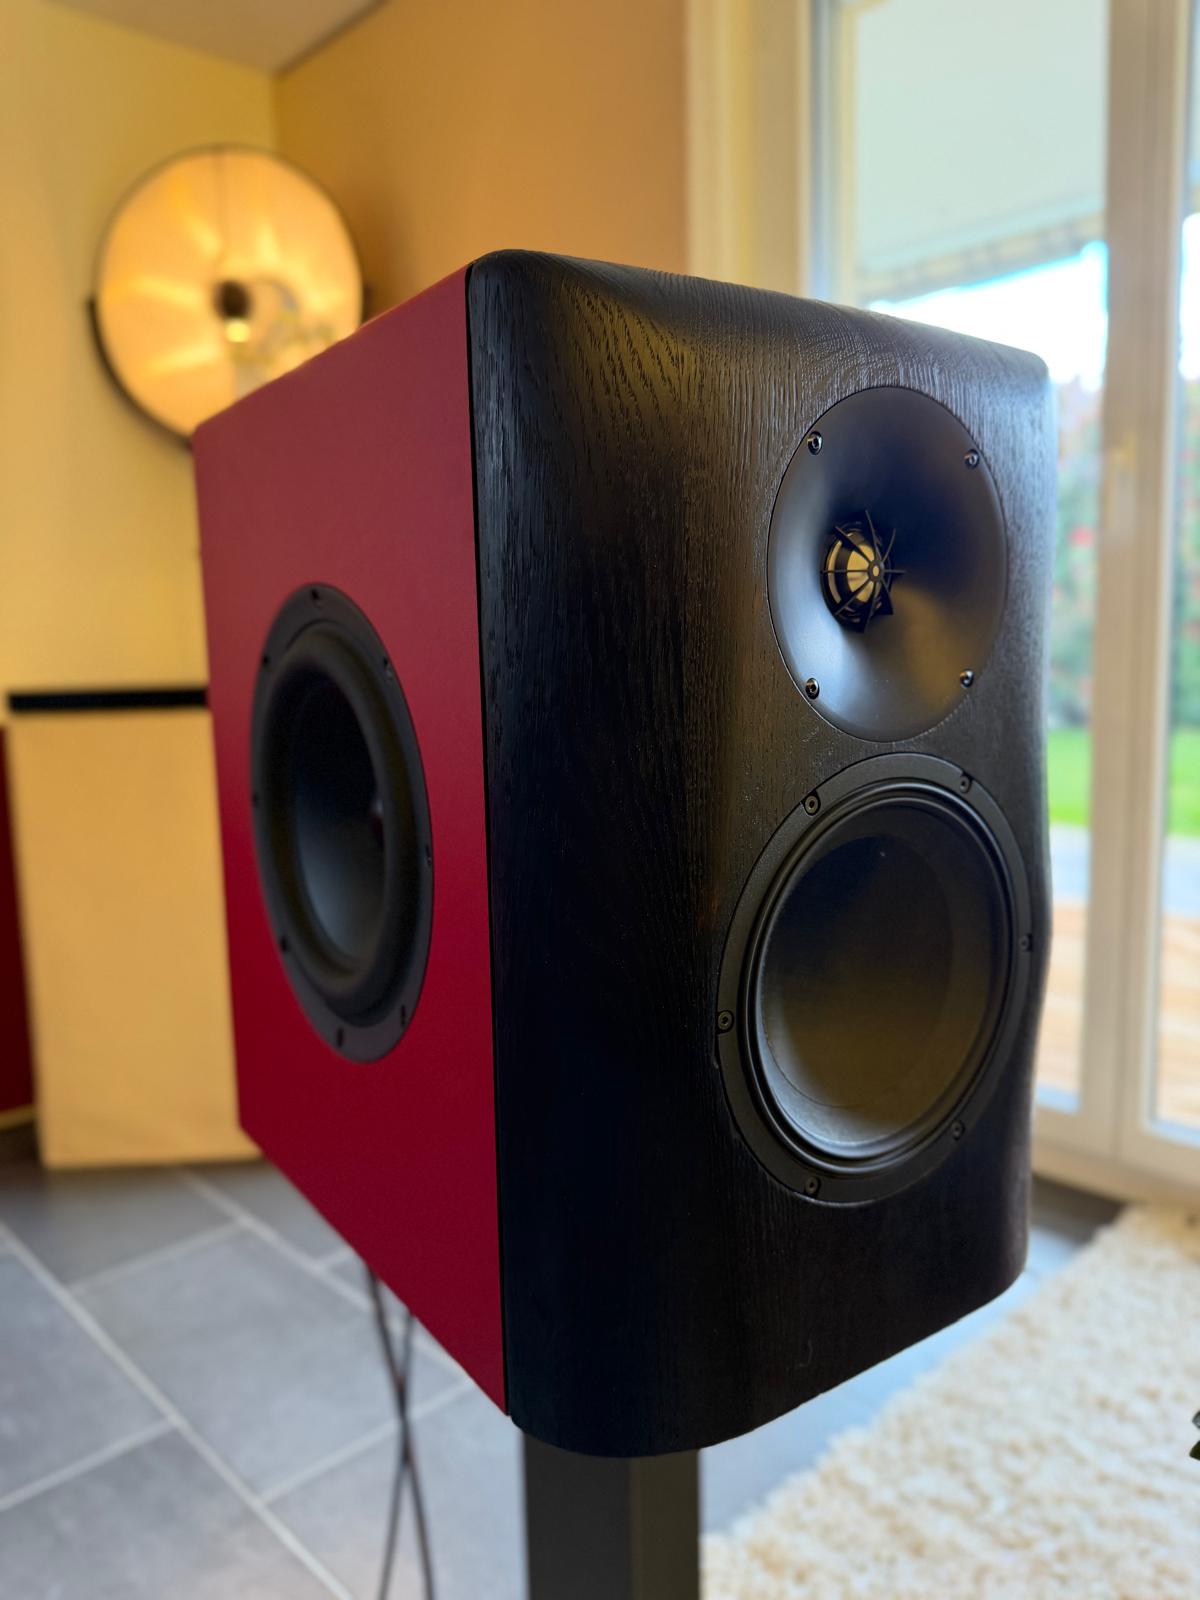
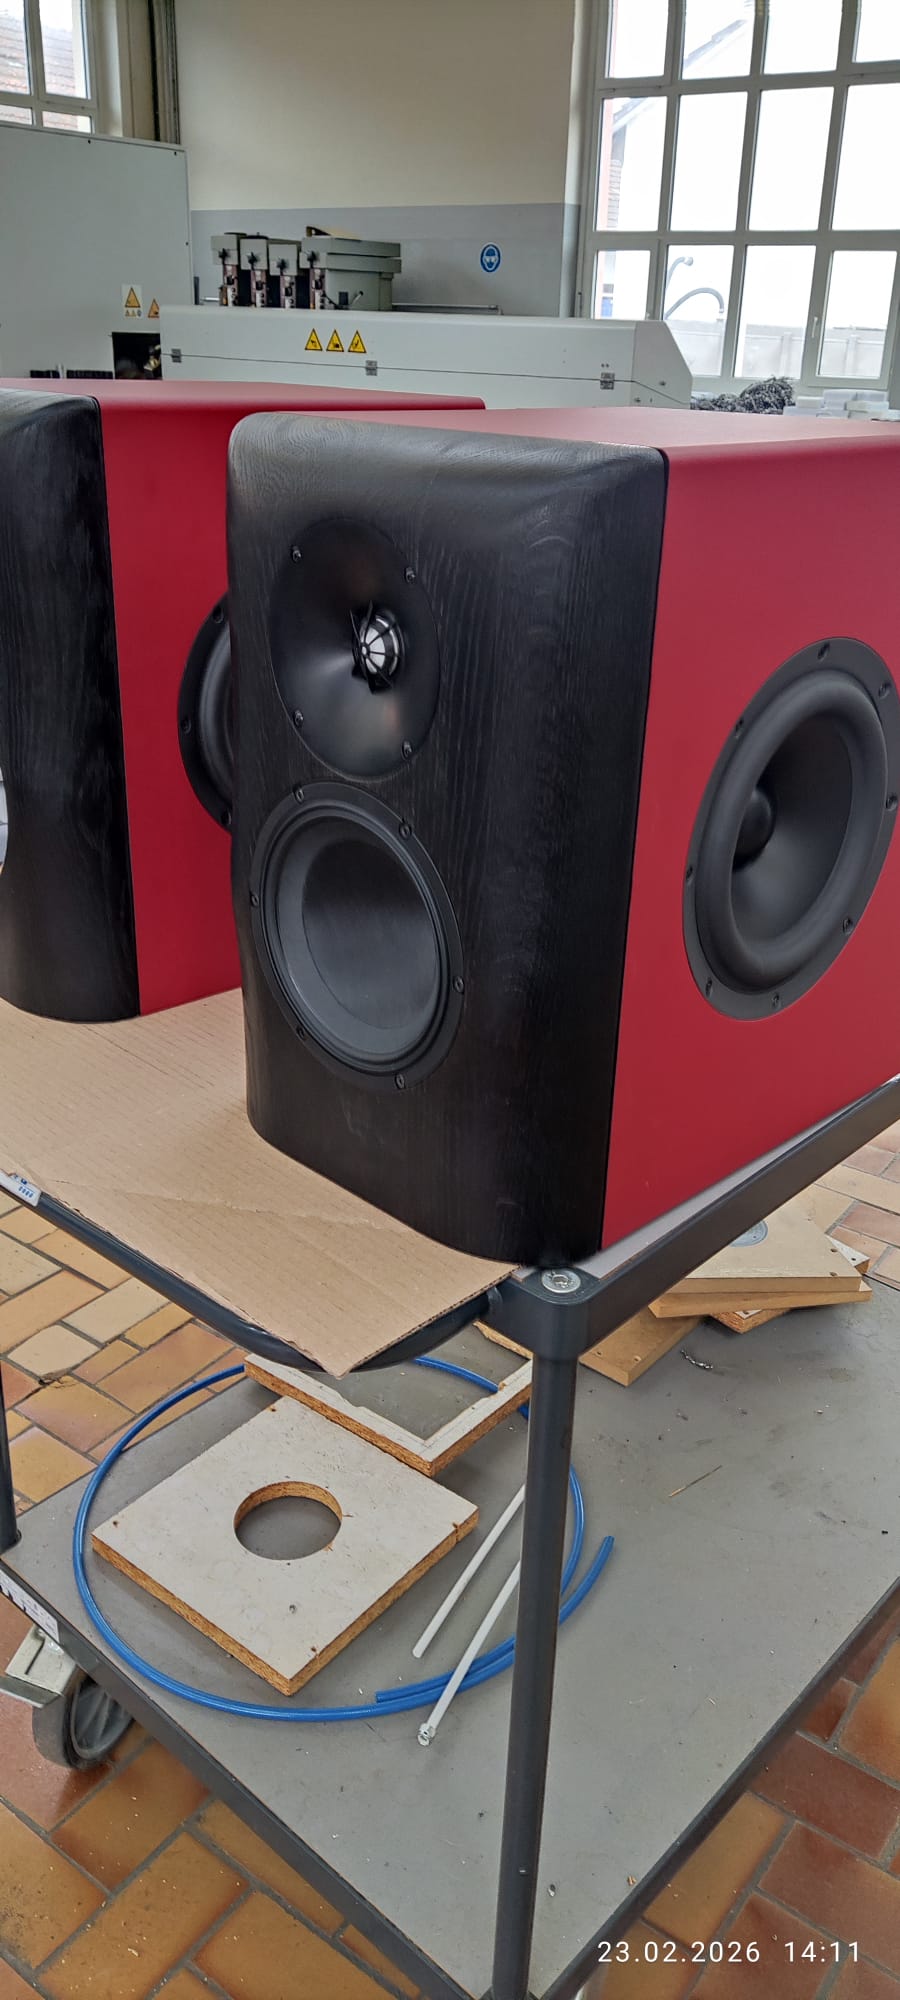
1 Like

Do it!

1 Like

I didn’t know Mark was still active. Those look really nice!

  1. Add up the crossover cost for the Mechano23, those might be the most expensive of your builds :slightly_smiling_face:, but of course you won’t know the xo cost of the others until you have designed them.
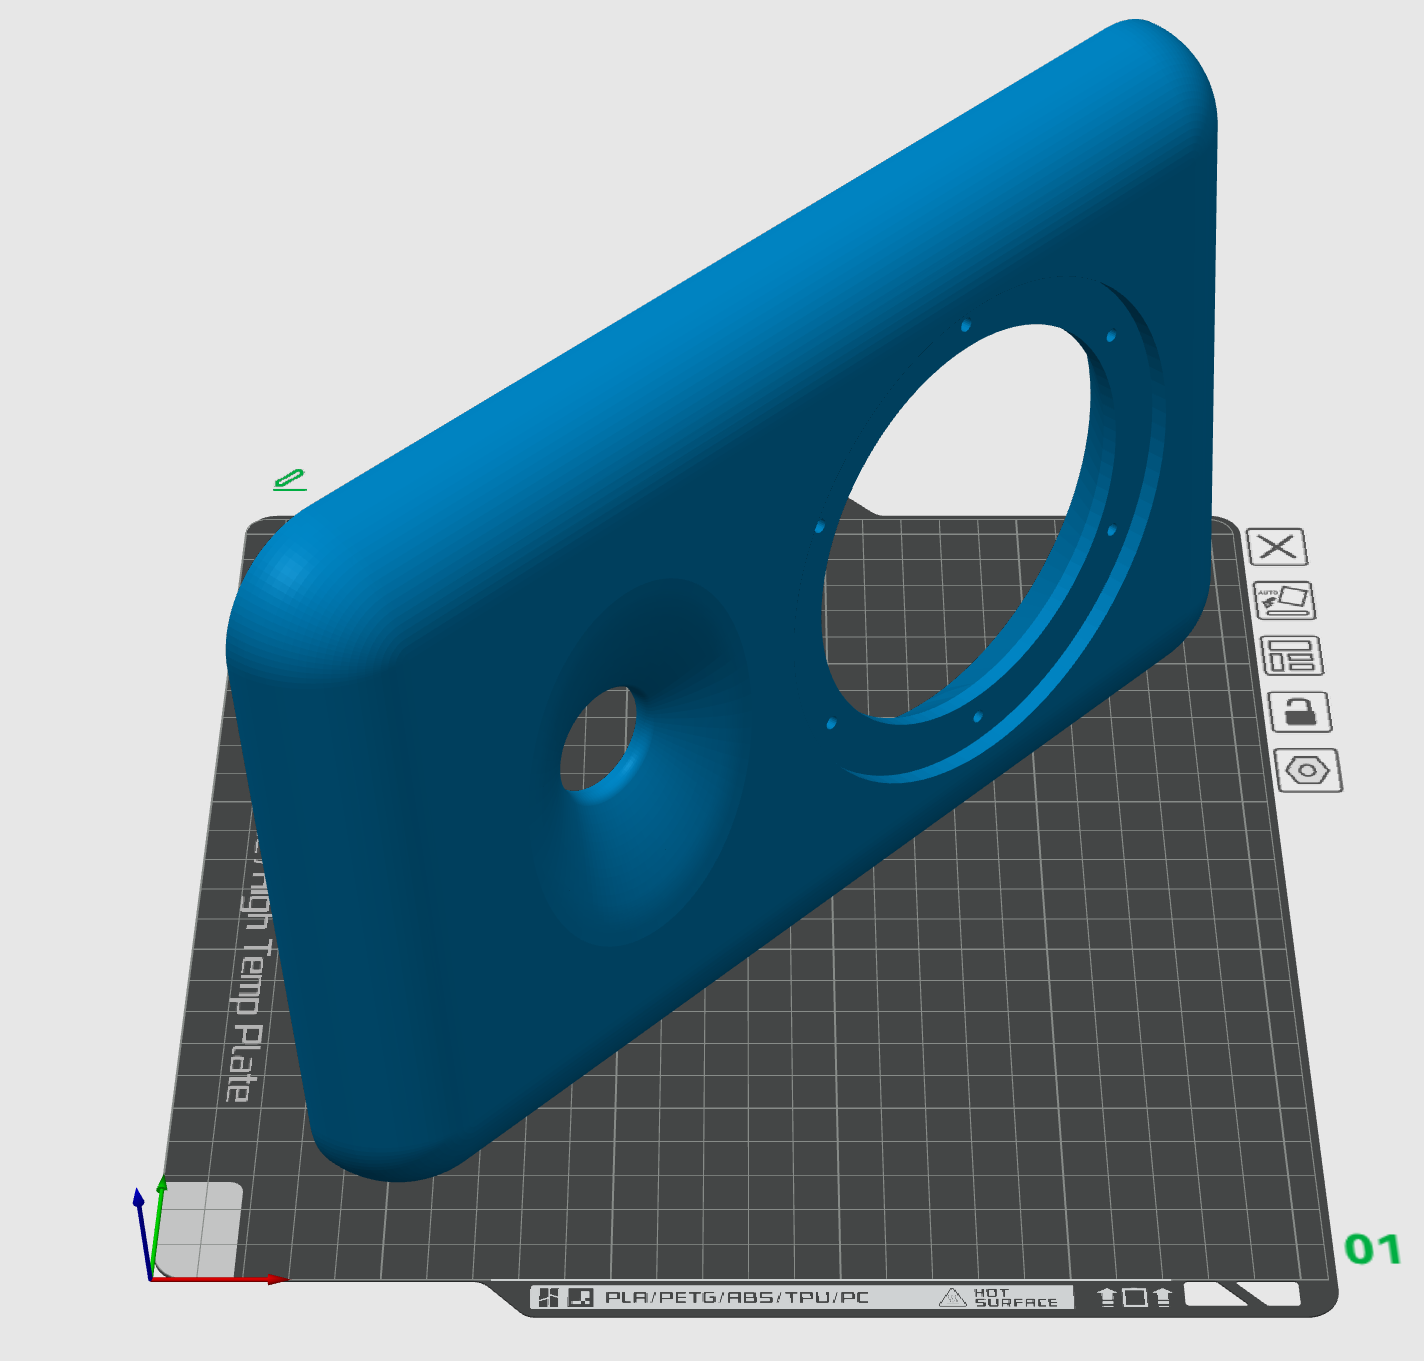
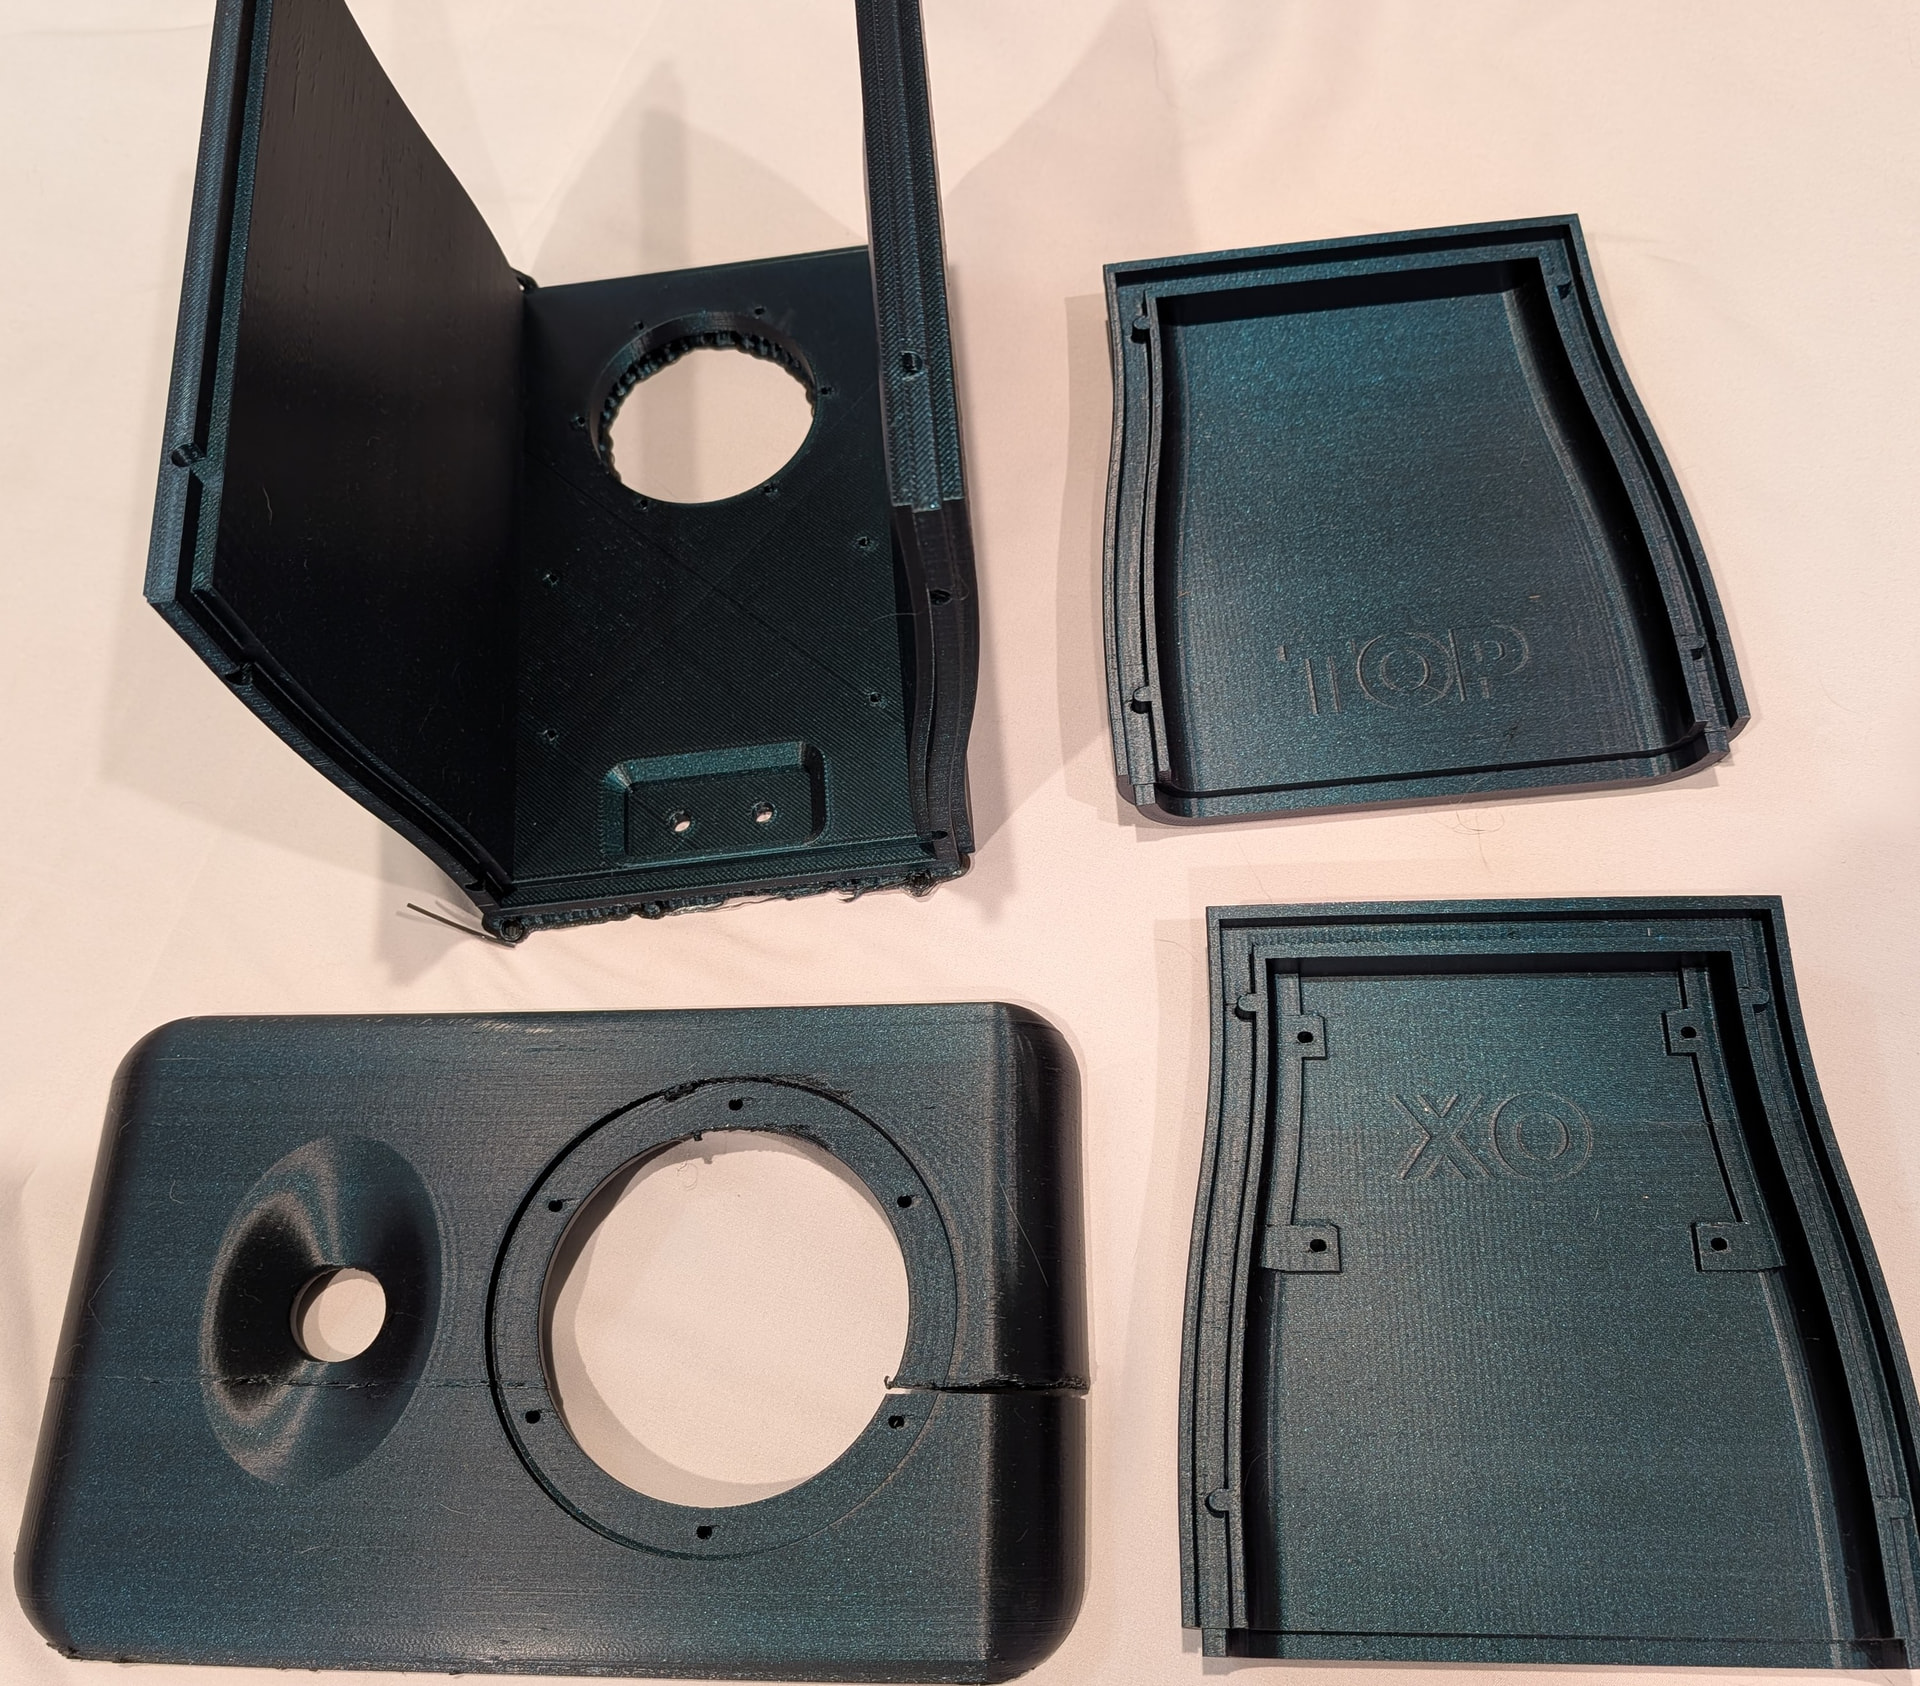
  2. An idea for how to 3D print a bigger speaker, probably even much bigger on your printer compared to my P1P.

The main constraint is the size of the baffle that can be printed in one piece diagonally. Print on its side. If it has a roundover (and maybe even a chamfer) lean it back 10 degrees or so add a little extra space to the top of the supports so they break off easier and you don’t have much of a rough edge. I’m not sure how clean it will be if you are just trying to print and assemble, but I am experimenting with wet-sanding PETG.

Print the sides and back as one piece. The main body is as tall as I can fit on my print bed. But, the top and bottom have a transition to the sides, so that I can add an inch, or two, or three to the height of the top and bottom piece. This way I have symmetrical seams on the top and bottom rather than a seam right around the middle like some 3D printed speakers I have seen.

My alignment pins are asymmetrical so that I can’t put the baffle on upside down and I can’t switch the bottom and top. (The bottom and top are identical except I have printed a standoff and screw holes for a xo board on the bottom.) I’m printing with 15% Gyroid infill an will fill with Deep Pour epoxy resin that has the consistency of water.

I’m still just experimenting, so don’t know what works for sure yet, but just wanted to share the ideas.

3 Likes

I’ve considered the diagonal baffle as soon as you showed it a couple days ago. That’s an interesting concept though the cracked one you showed is a bit concerning. What sort of infill did you use for that? I’d think gyroid would help with it (it’s generally my go-to) but who knows. I’m still experimenting with how much infill I want on the baffle and sides. That’s a whole other thing to deal with once the CAD work is done!

I might have just bought the last of the MAC-05s, unless the website just doesn’t allow for more than 8 at a time. :smiley:

Edit: Now I remember it was a filament change thing…that is really unfortunate.

I was using 15% or 20% gyroid. (I switched at some point from 20 to 15%). I’m pretty sure the crack was because I ran out of filament and didn’t change the filament for probably 24 hours after it paused and cooled down to whatever level it cools down in “pause” mode. I’m pretty sure I started the print and went to work and didn’t realize it had run out. In the future I will either keep a close monitor on it or just make sure I have enough filament for the full print.

The gyroid is supposed to be particularly good for filling with epoxy because of the way the layers leave unconnected paths where the epoxy can flow through.

I’m definitely interested in the answer to that. The last time I asked, Brad and/or JR made it seem like there was more in stock than the site implied (which was 8 back then, which was months ago).

Minor status update on the Mechano23. The baffle is at the 95% mark and should be good to go. Only tweaks remaining would be those necessary to get a quality print, and perhaps tweaking the heatsert holes.

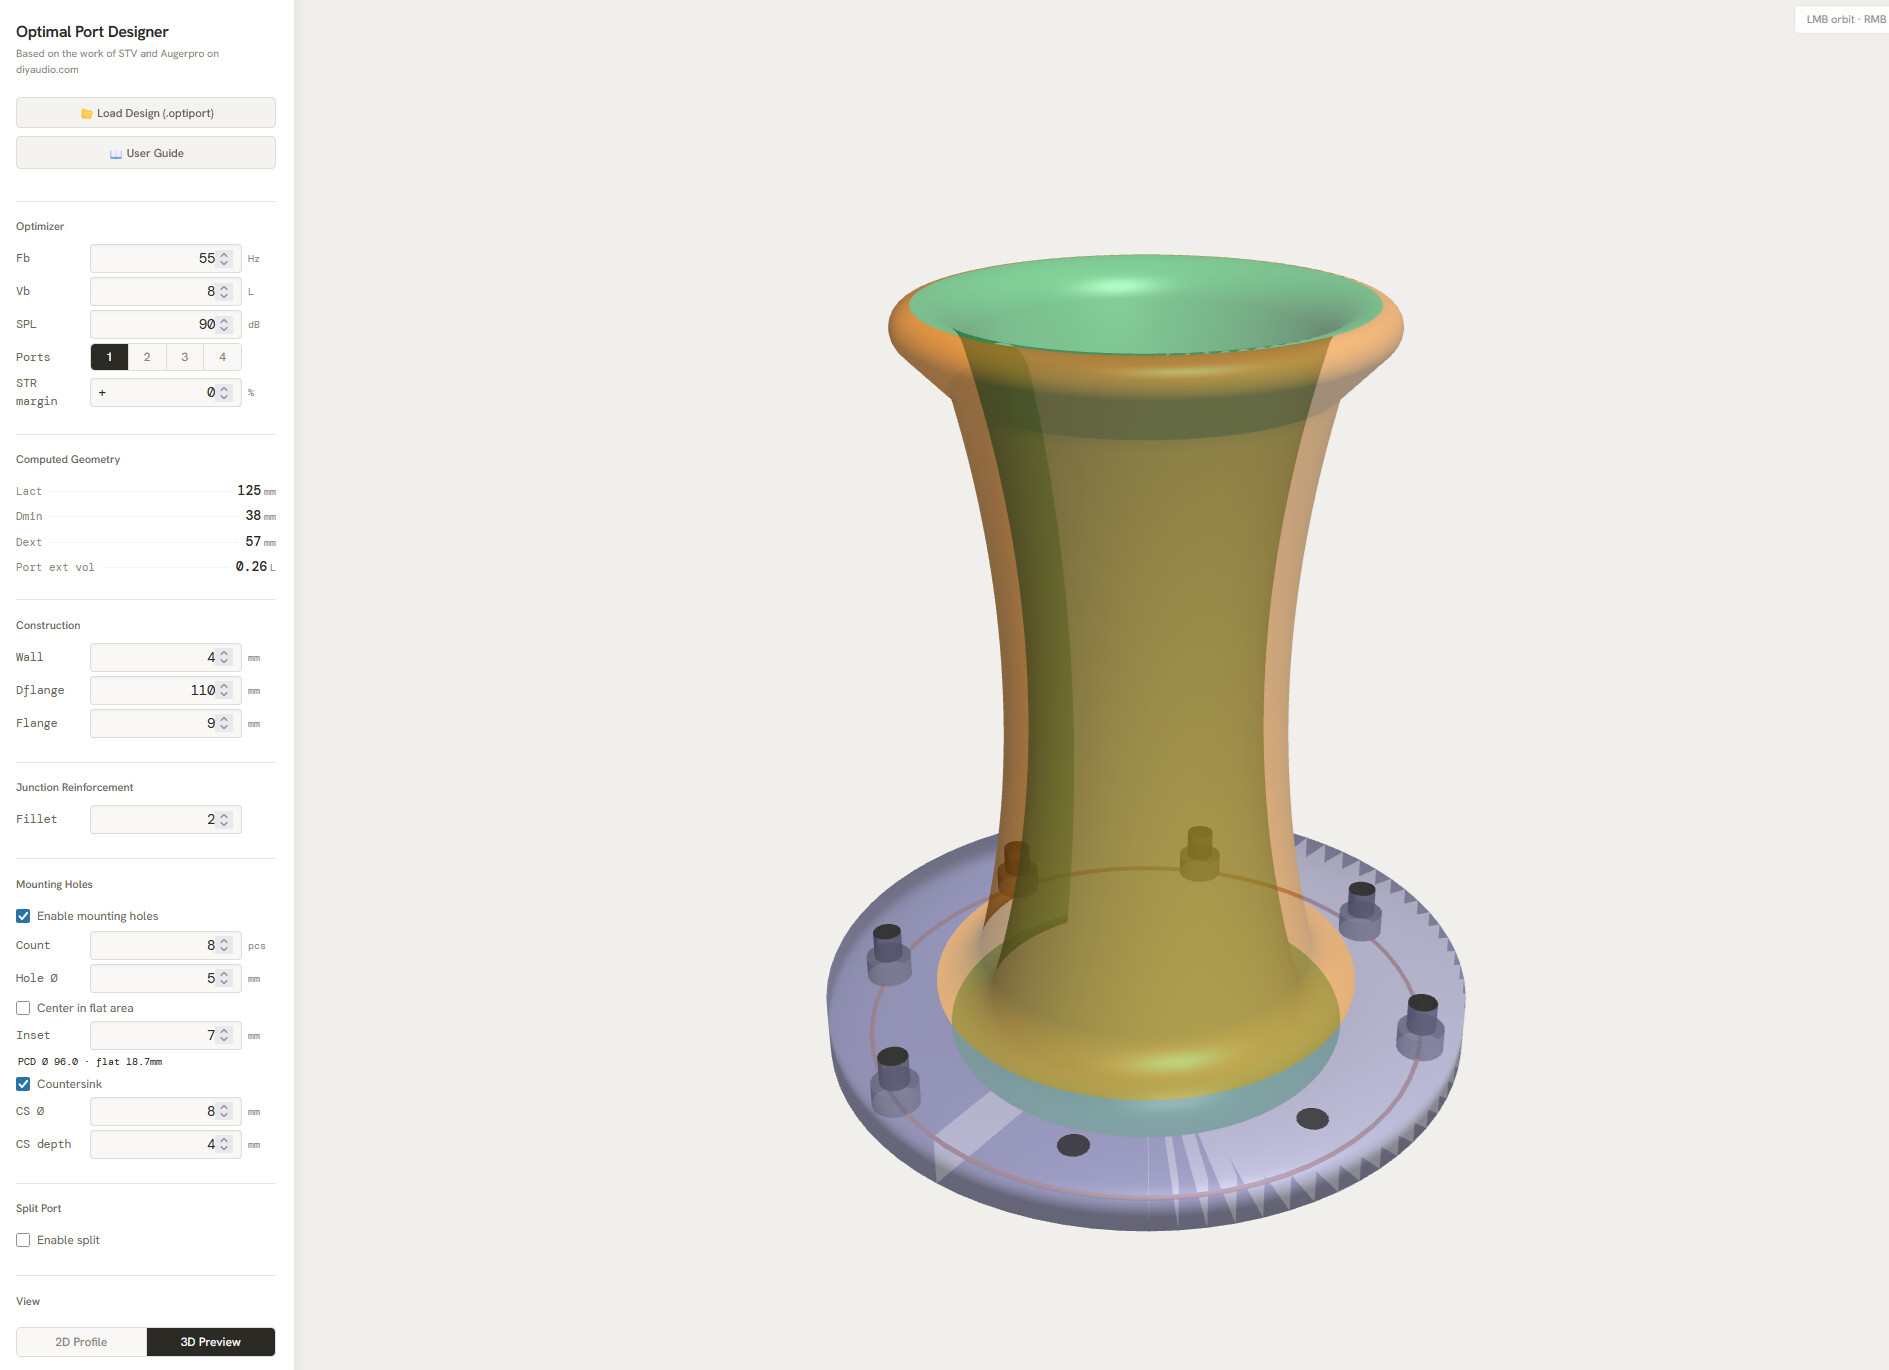
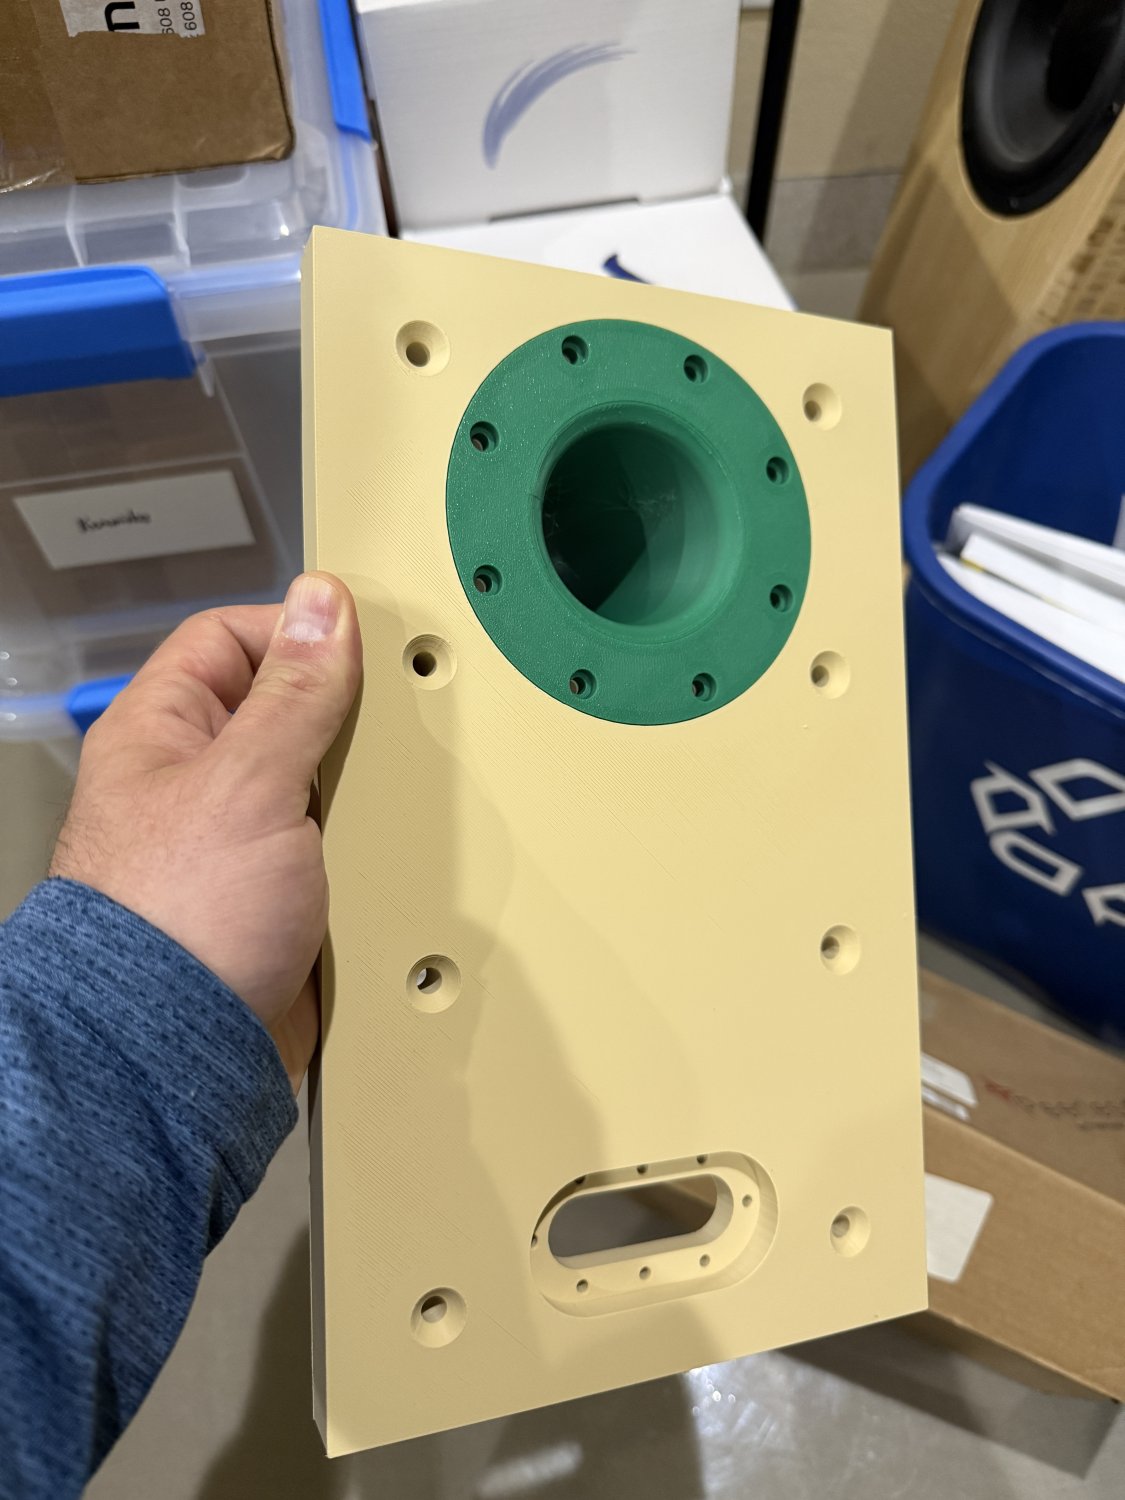
Crossover and THD boards will be here in a couple of days so I’ll fix those braces (if needed) once I have them in hand. Plan here is to make the lower brace and middle brace identical with mounting options for both boards on them. We’ll see if I can make that work. Upper brace I’m working on this morning, current plan may include attaching it to the top of the speaker cabinet as well as the sides. In the meantime, I made several ports using the Optimized Port Designer. This is the one I’ll try first - 8L/55Hz/90dB SPL. The flange being 110mm is somewhat important to ensure the through hole can be sufficiently large for a variety of port tunings. This one is set up for eight socket head bolts countersunk into the port flange - I elected to make the bolts in this design a feature throughout the project.

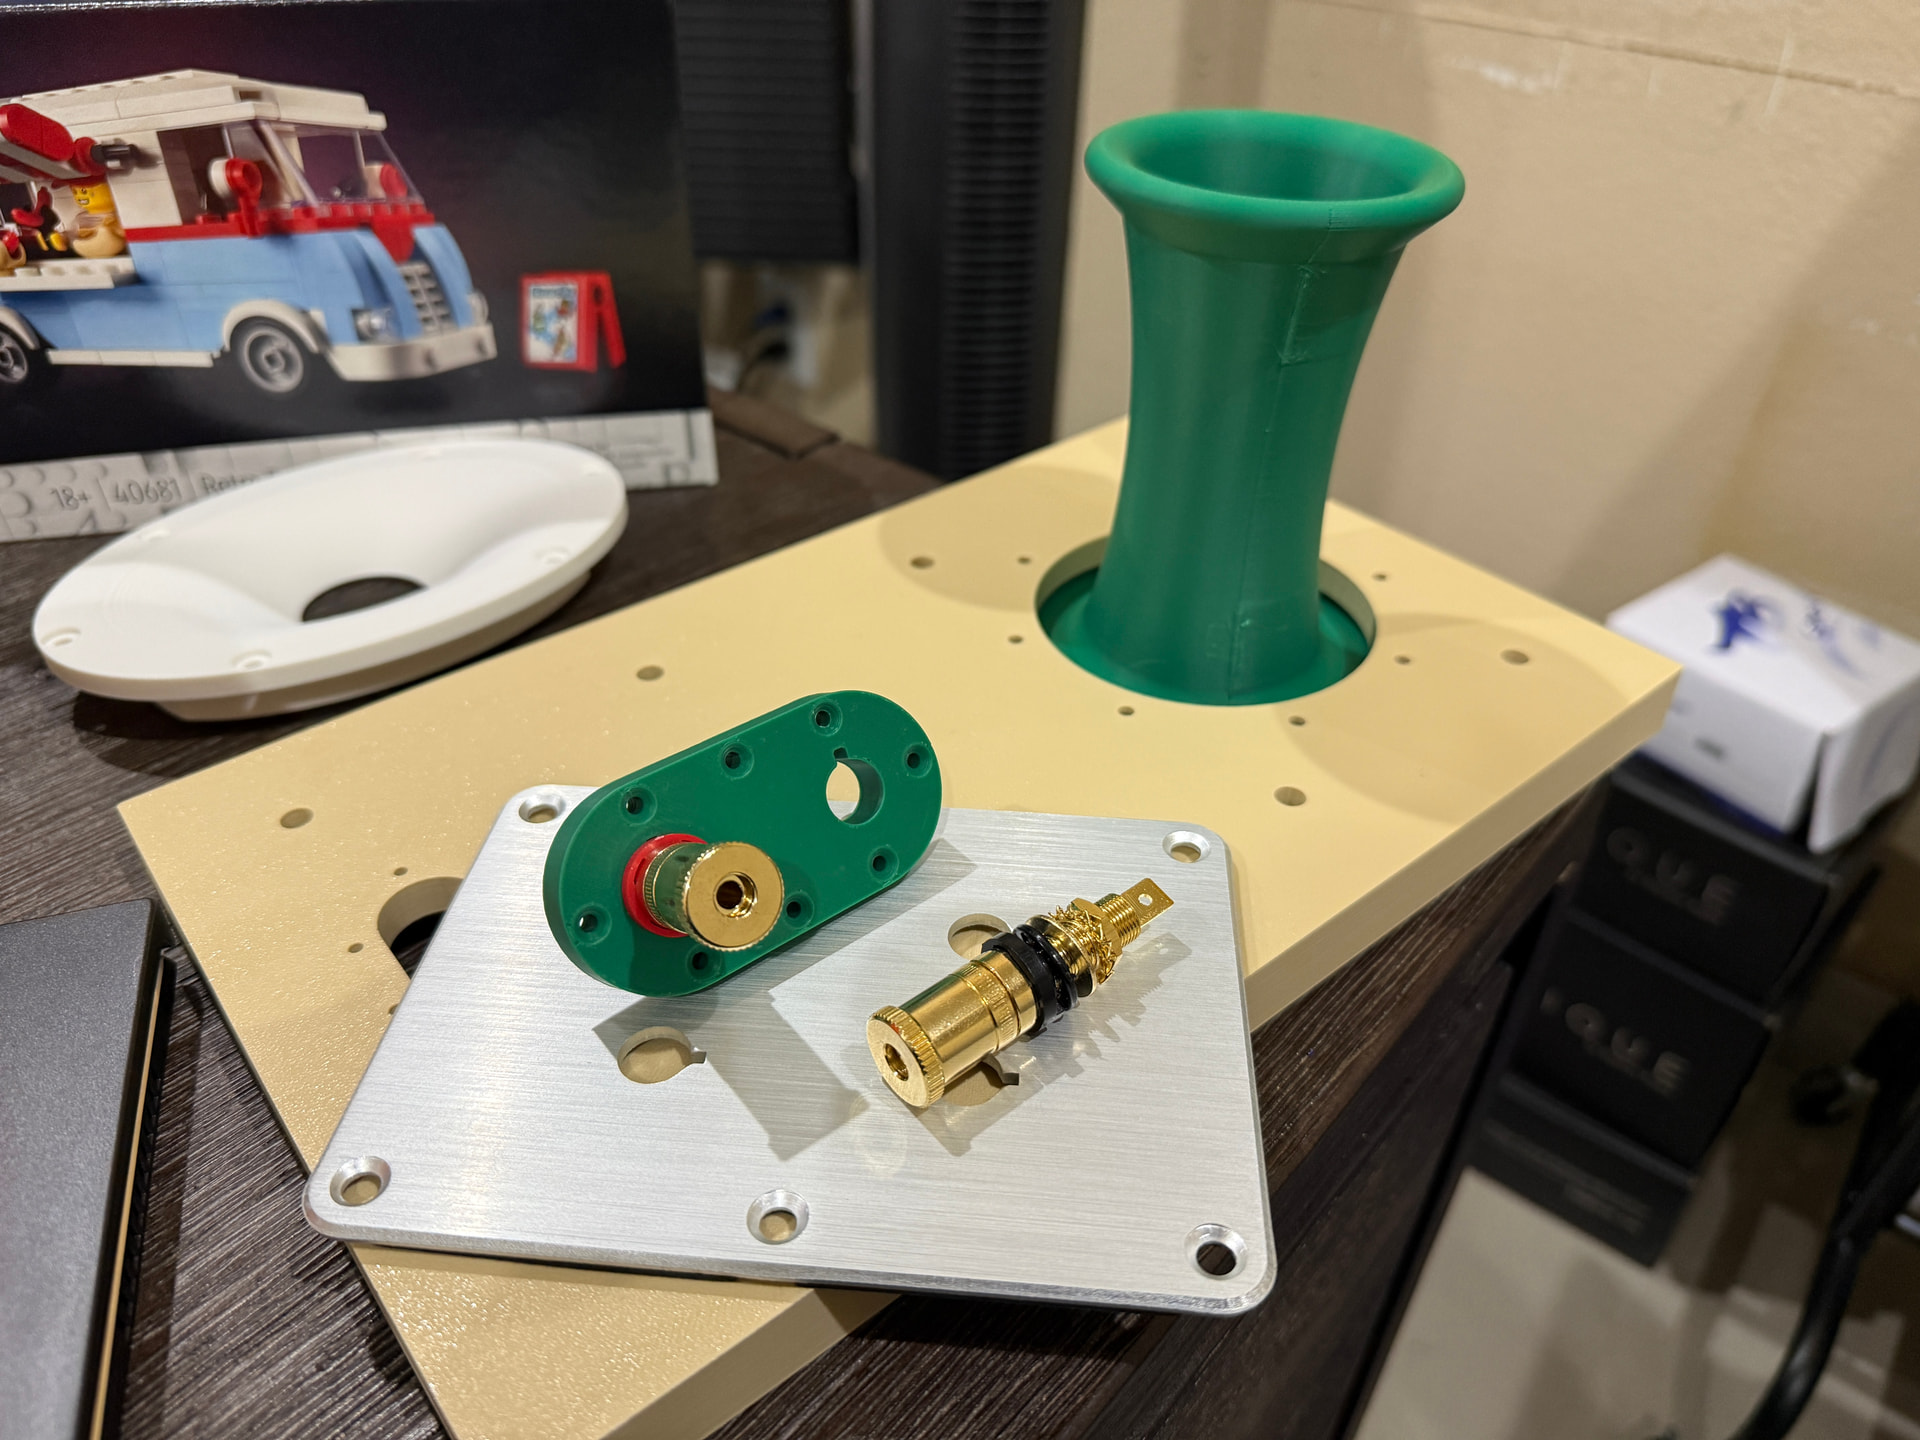
Speaking of bolts, there are several more holding the binding post plate on the cabinet. I was going through my inventory of binding posts and realized most of them had different through diameters. I wanted to keep this box somewhat modular for other DIY efforts (both my own and others) and printing the rear is a timely affair. If I wanted to change the posts after it was made I’d need a whole new one…unless I just made a plate that was removable and could have the holes scaled as necessary. That little design is pending.

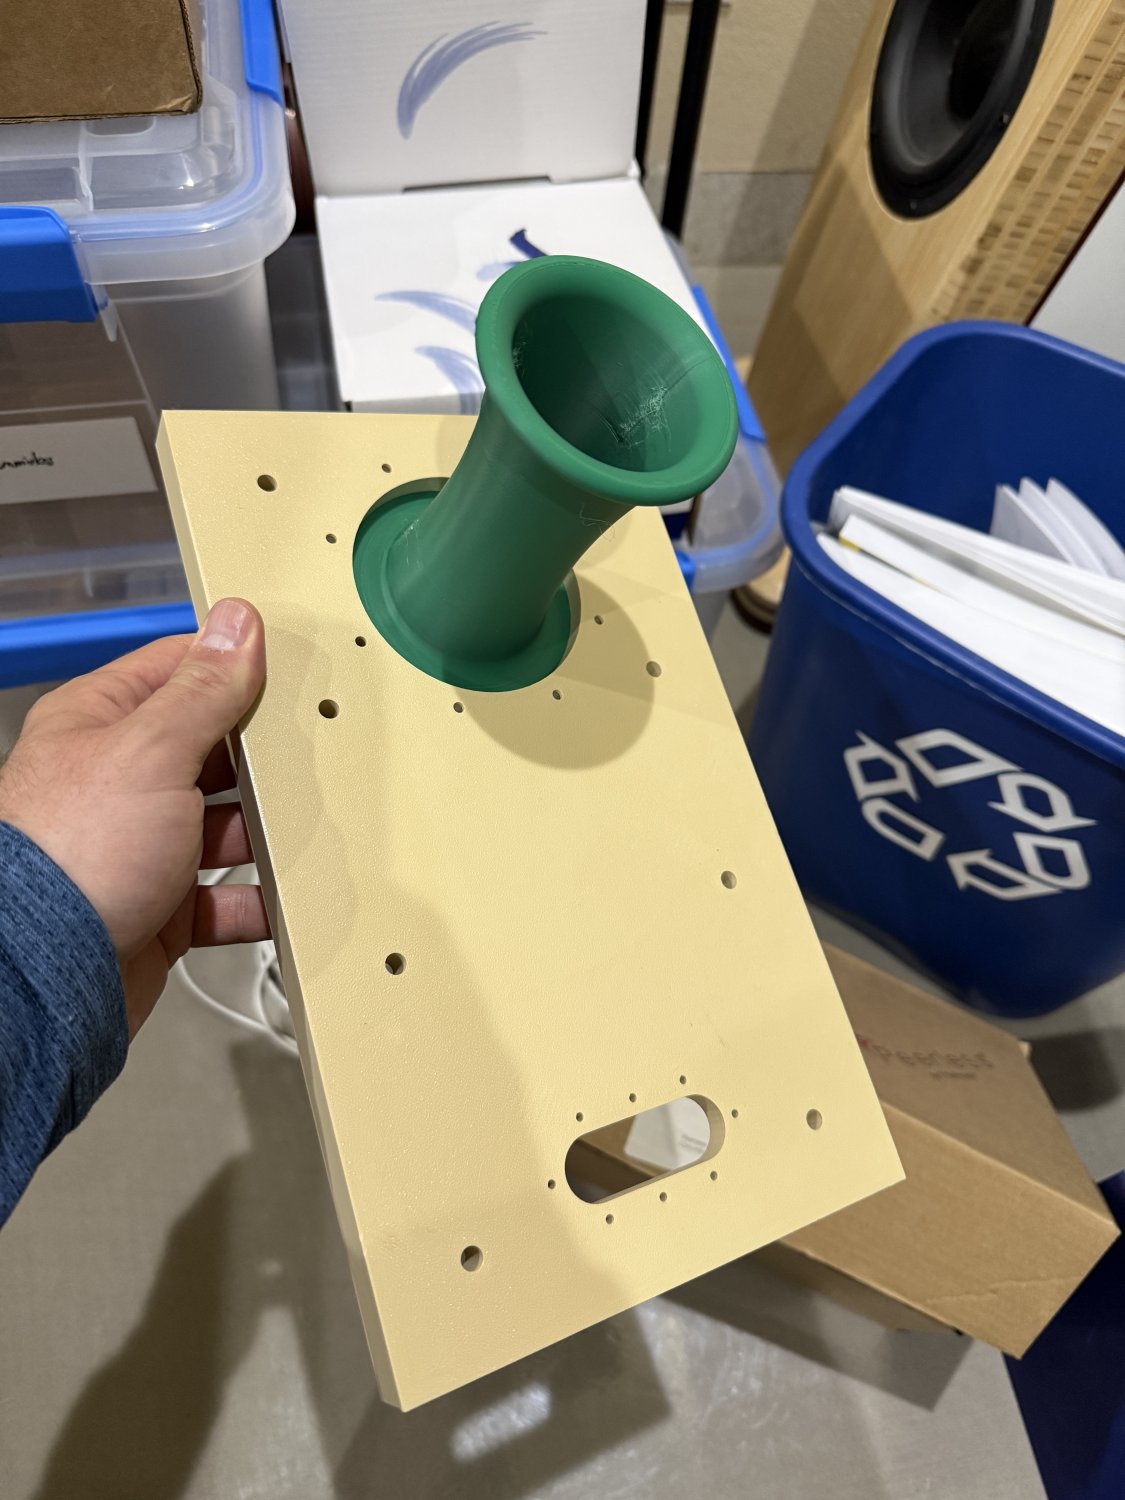
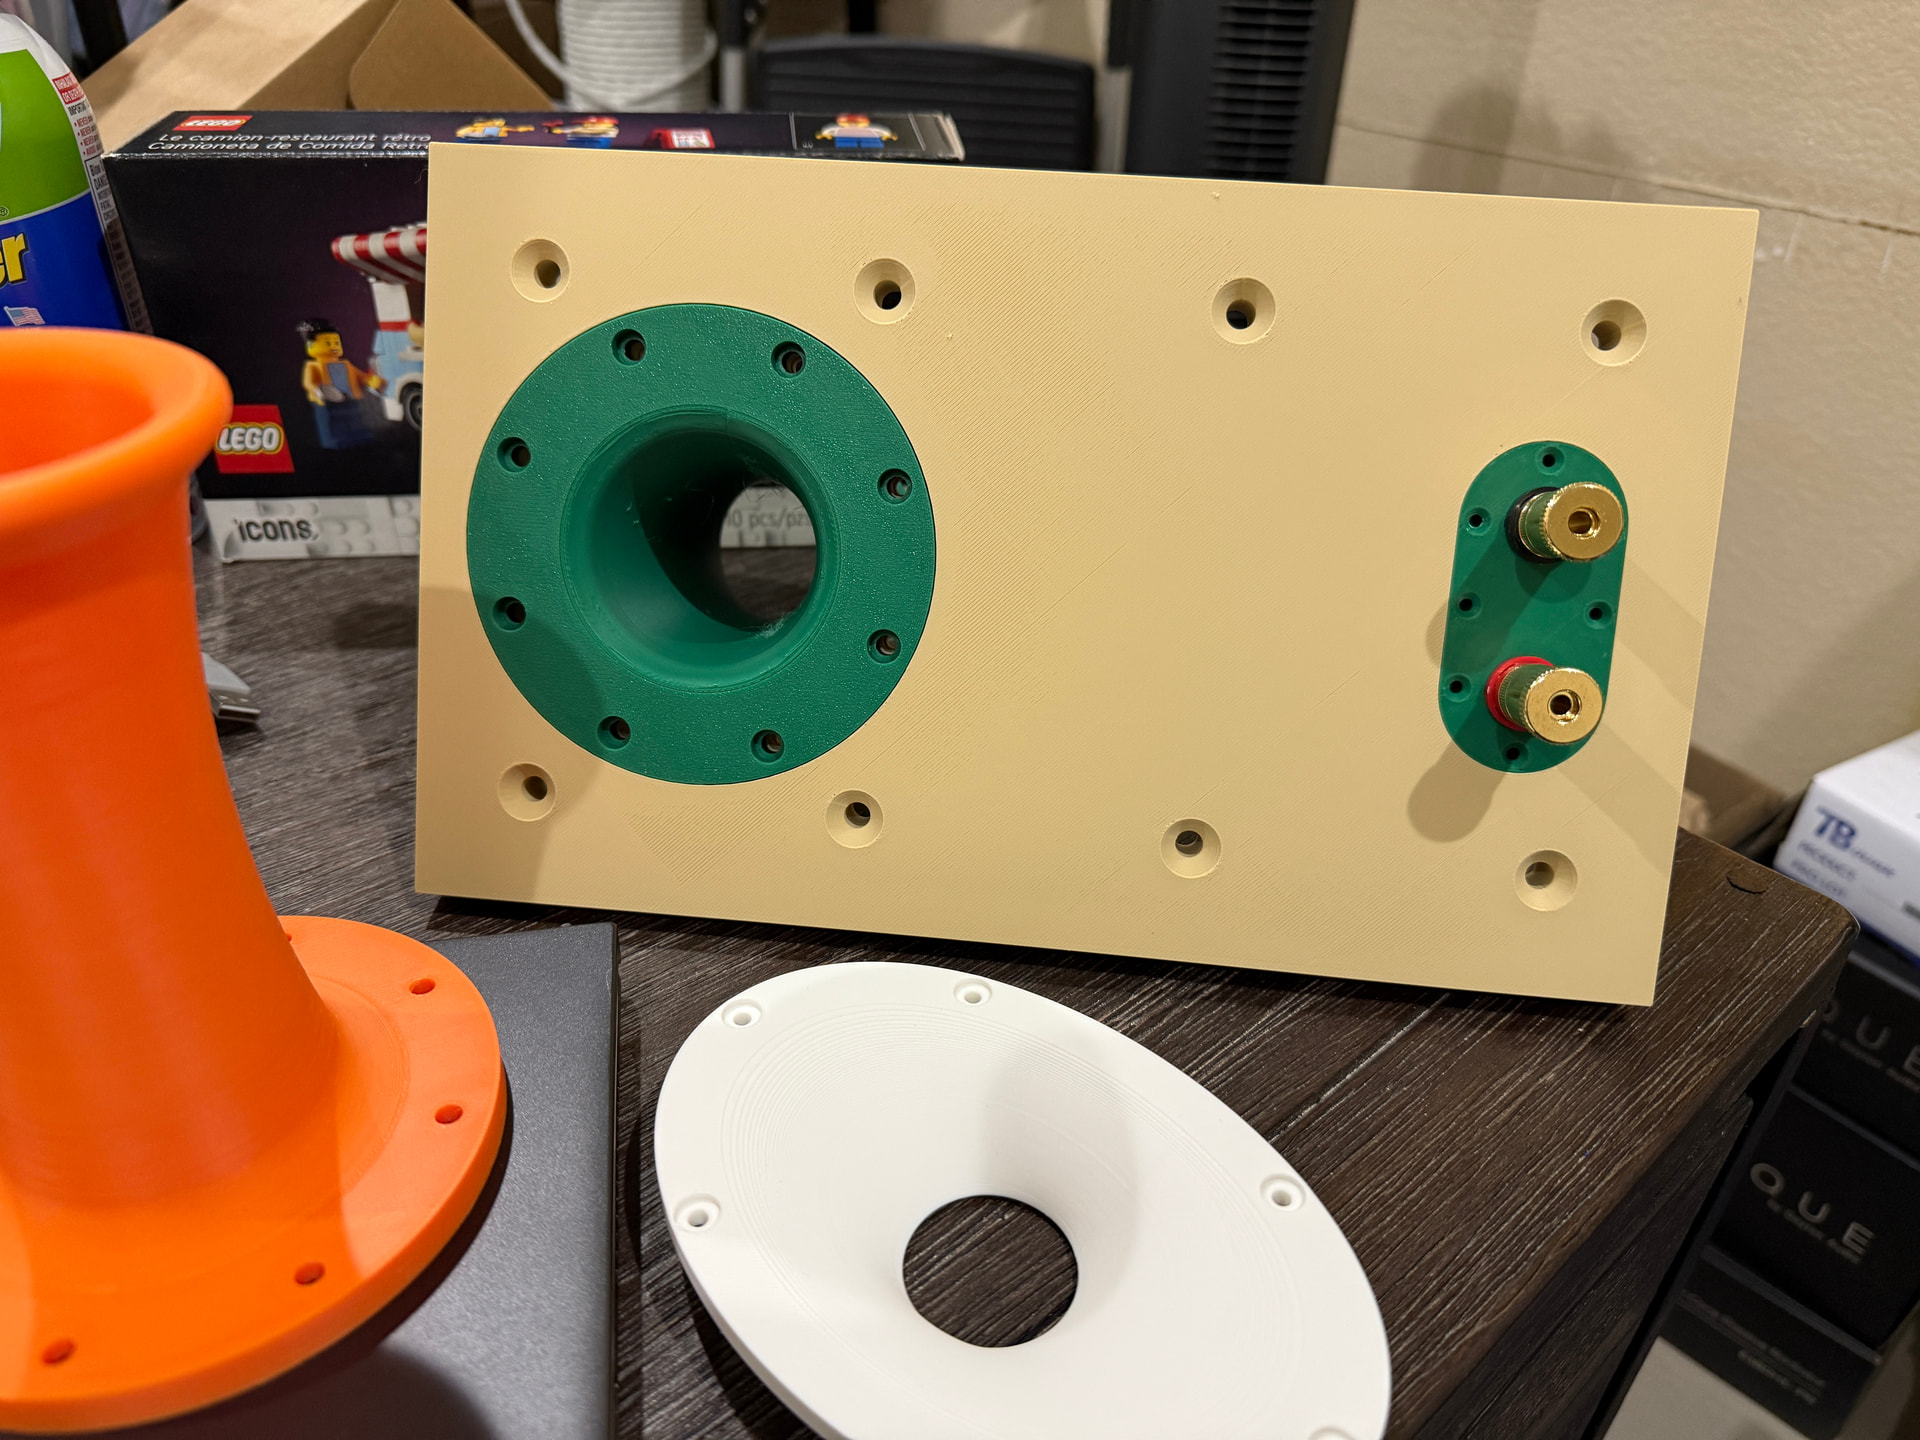
I printed an example of the rear and port. The port is probably the 4th or 5th attempt as I was having trouble with printing it face (outer flange) down. I seem to have mostly resolved this issue, but it could still use a bit of sanding - which I’ve never done before on plastic, so that should be interesting! I neglected to select ‘avoid crossing wall’ on this most recent print, hence some of the extra wispy material shown. The rear printed near flawlessly, I’m not sure I have much more to do there unless I need to tweak the heatsert holes for the binding post plate. I struggled a bit with determining if I should put a chamfer on the edges to match the baffle but elected not to do so on this version.

I will be sharing the files once done, of course, so others can tweak and/or use as they see fit. I’ll probably just put it on Makerworld and link to it here, but we’re a ways away from that right now.

7 Likes

If you are going to have a removable back, look at how Audio First designed their Fidelia kit. With a few alignment pins and just a few bolts from the inside, you can use the bolts for the tweeter and woofer to attach the baffle to a sub-baffle and have no visible bolt heads on the front baffle.

1 Like

I considered doing something along those lines. However, my background is materials engineering and I tend to like showcasing the materials that go into a build. It’s why I often just use clearcoat on the various wood and plywood used in my builds. While it might not be everyone’s cup of tea and I certainly see some appeal in having a clean baffle, for this build I felt having the metal bolts visible would look good.

Of course, once it’s all together there is some concern it’ll look ‘over-bolted’. That determination will inform the design on the ‘Gifties’ series.

4 Likes

A super minor update since this did not take long to print. I have several pairs of these binding posts for some reason. Must have been a sale a while back. I don’t care for them since the gold finish kind of looks bad for the price, but they are the largest post of any that I have (~3/8") so I sort of designed the plate around them. Conveniently, they are also designed for a metal plate that has all the dimensions shown that I needed.

I was set to use M3 screws to hold this on the rear but the holes printed a little on the small side so I need to widen them a hair. On the other hand, the plate itself is very tight to the rear so I think I might loosen that up a bit. It’s only barely removable at this point…unless I put it in backwards, which would then match the finish of the port. Might need to think about that.

Edit: I’m rethinking the lack of chamfer on the back. I think it kind of looks ‘off’ since the bolt holes are spaced so far in. This matches the front though, so adding a chamfer might make that look better. It’d need to be pretty steep though since the port is pretty high.

2 Likes

I really wouldn’t know what to do if all my pieces out-of-the box (table saw…) actually fit together. Ha.

I’m just a bit jealous. Those look really nice.

1 Like

Ha! This is one of the reasons I’m going to this level of effort for these. I can just NOT get wood to be square, and if I did, it wouldn’t STAY square!

1 Like

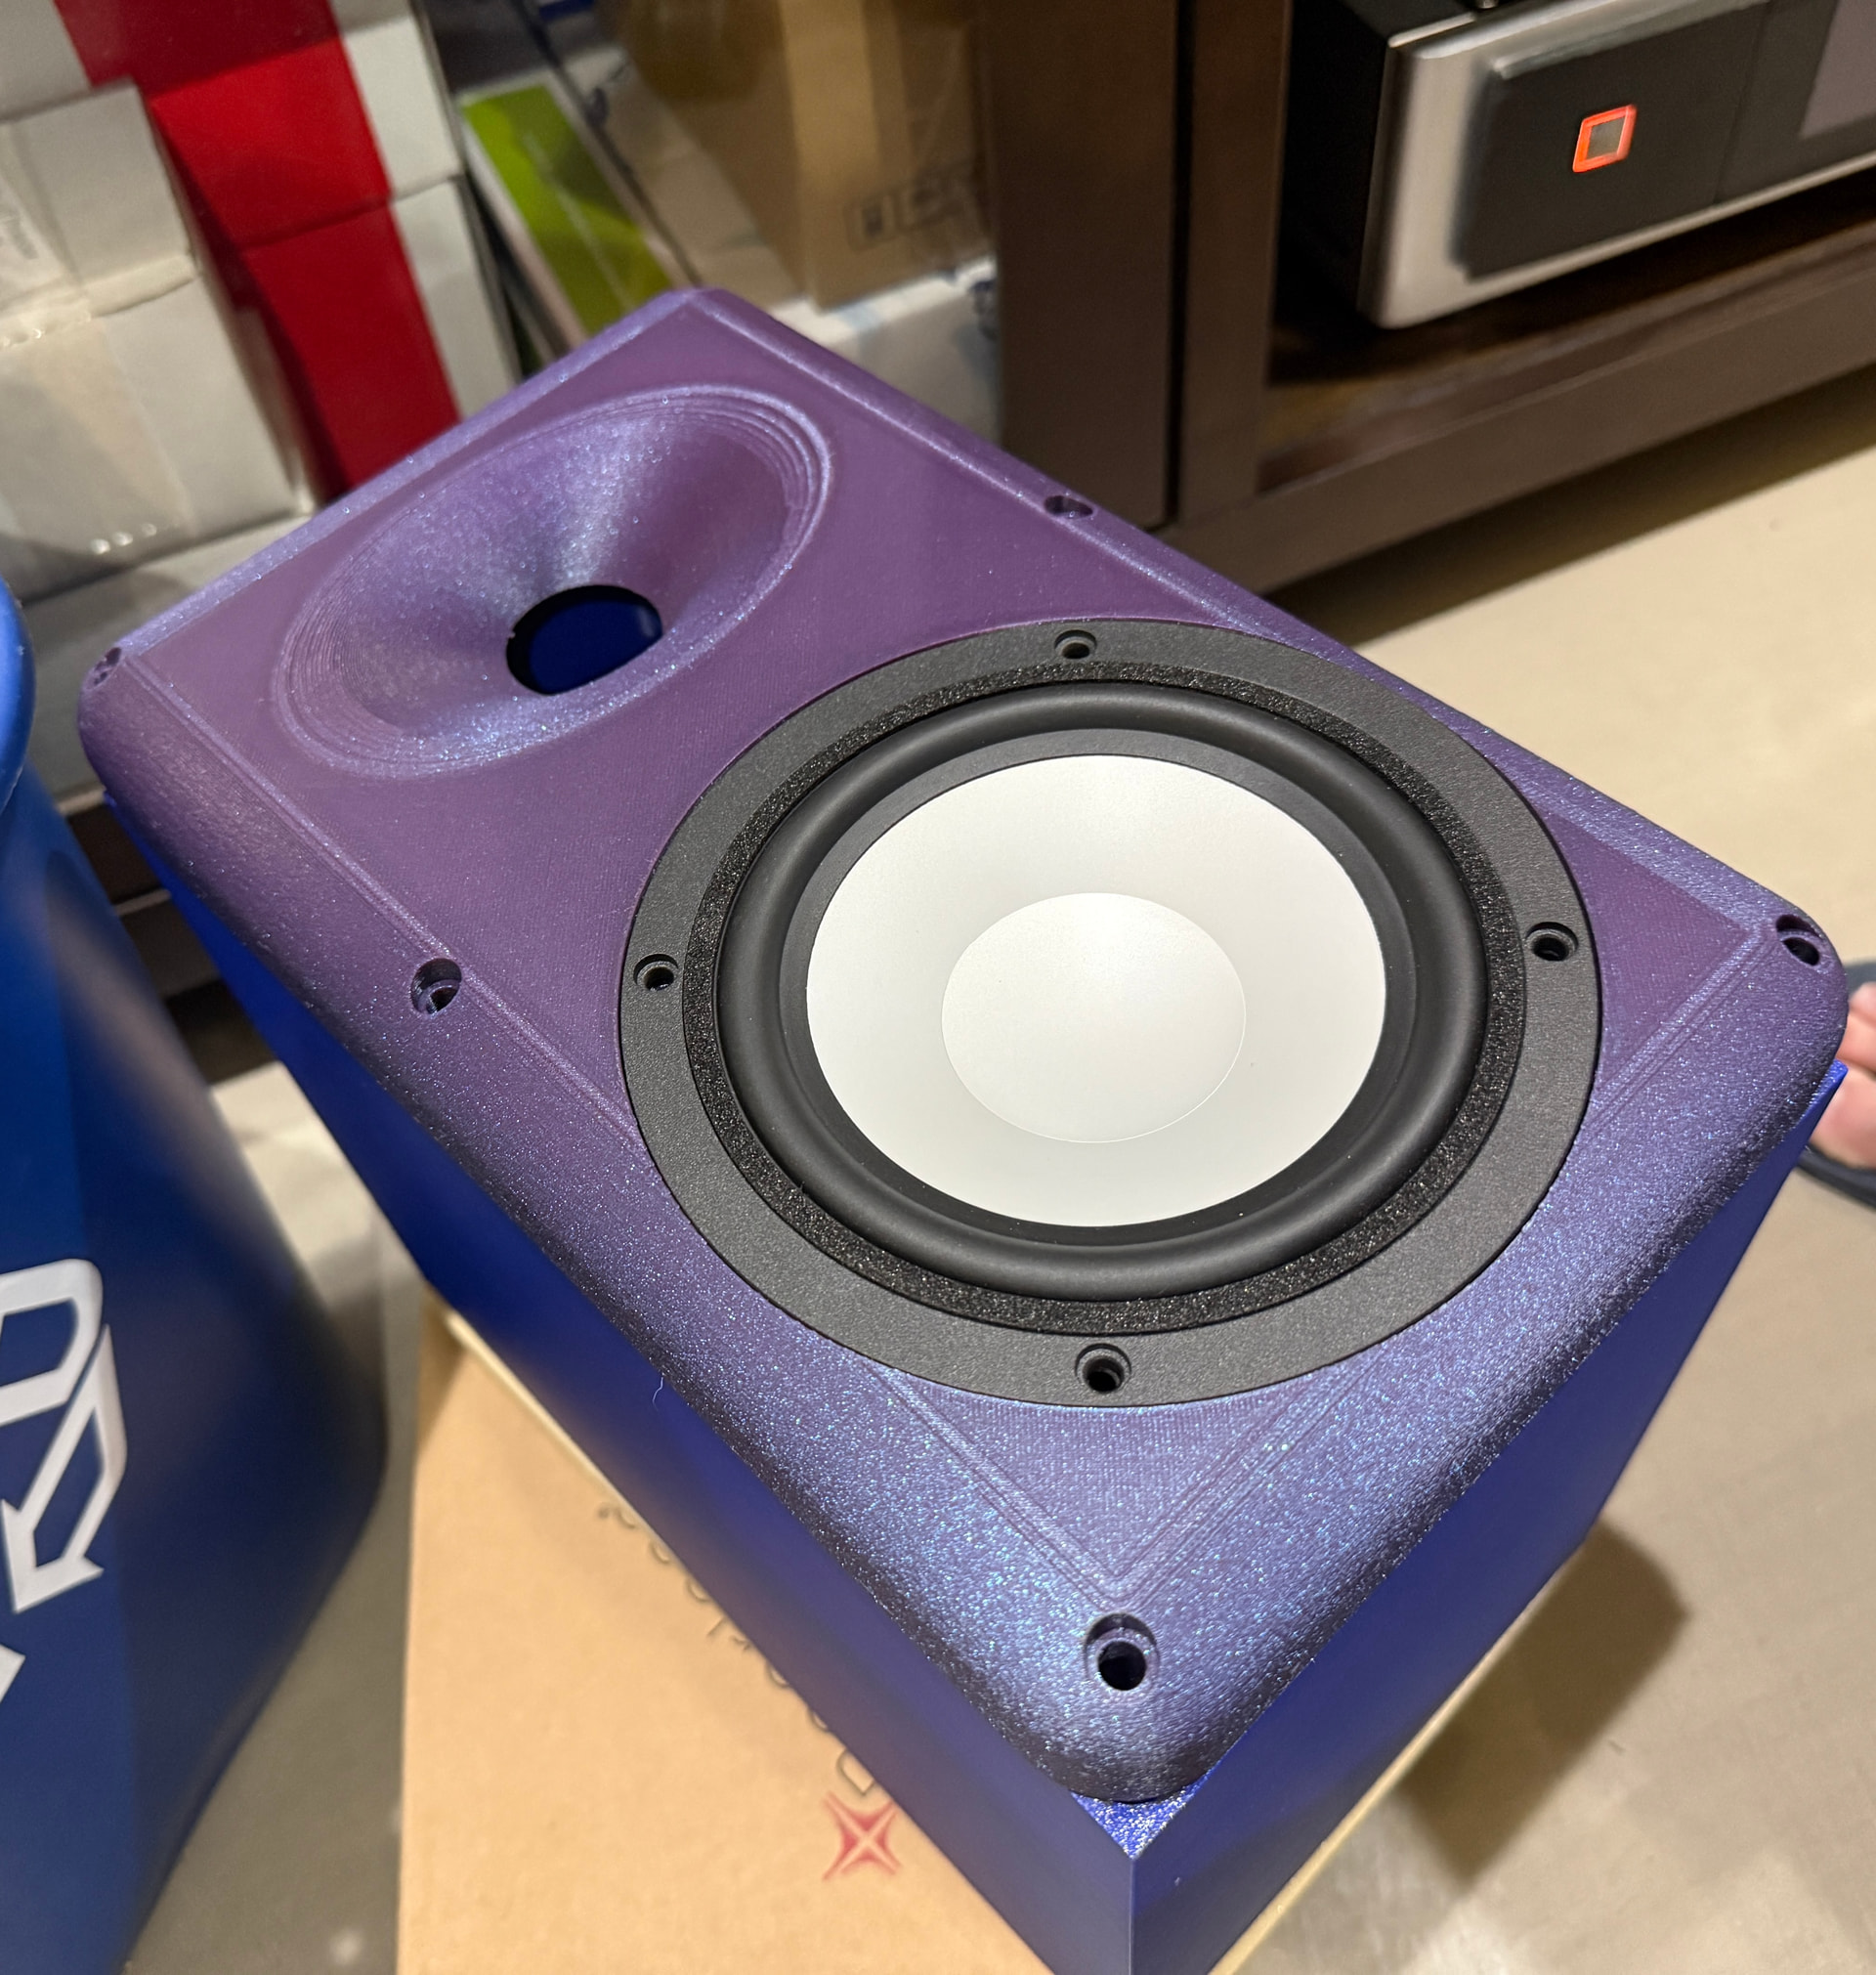
In other news I made a test baffle for the Gifties. No tweeter yet, but I wanted to get something out to test fitment of the MAC-05. This uses an augerpro waveguide I integrated in the baffle as one piece, then rounded all edges off too. Unsure I care for the shape as it’s a bit TOO rounded for me, but I do like the sparkle purple.

3 Likes