I’ve been thinking of making a set of gift speakers for a while now, something I could give to friends and family that wouldn’t break the bank and was reasonably simple to manufacture quickly. In lieu of designing something for myself I think I have settled on the Mechano23, designed by Xmachinik. His website is linked below, as is the thread at ASR where it is well documented and discussed (and where I first discovered the design) and Amir’s review of the design using his fancy gear.
Xmachinik Website
AudioScienceReview Post
AudioScienceReview Review by Amir
This speaker uses the affordably priced Scan Speak H2606/920000 tweeter ($47.80 at the time of this writing) and the even more affordably priced SB Acoustics SB13PFCR25-04 midwoofer ($36.80) in a roughly 8 liter box. Just under $170 USD (plus tax and such) is pretty darn solid for drivers these days, and with all the positive reviews from the various websites and users it was hard for me to ignore. I had originally pushed this project off with a reminder to look at it closer toward Christmas, but I came across a project on Makerworld that reminded me of it a bit sooner than expected.
This project was posted by user_1168315211 (no other identifier that I could find, but I wanted to be sure to call out their work) and appears to be intended for experienced builders and those new to DIY. The model is split into several parts: the woofer portion, tweeter portion, crossover boards, and port (which could be modified for various tuning). This was also seemingly intended for a variety of 3D printers with the woofer and tweeter portions split as they were. There was some effort to stiffen up the sides of the cabinet by adding some vertical ribs as well, though this is also a function of the infill density and wall loops, among other things that can be adjusted within the slicer software. I went ahead and printed one cabinet to see how it looked.


I noticed a few things about the build that I felt required a little attention, the most obvious one (to me) being the portions that would be adhered to each other could have a means of holding everything aligned during that process, but there were a few other small details I felt I could help with. I reached out to the original CAD / Slicer model but didn’t receive a response, so I decided to recreate it myself. I’m not sure I’ll share the files on Makerworld, but we’ll see. I’m also not sure I’ll ‘only’ make the Mechano23 with a printer but I figured I’d give it a go.
I had a few goals with this design.
-
First, the largest dimension is only 290mm, meaning it’ll fit on my printer - I won’t need to do a split cabinet design. However, there will still be a few separate pieces by necessity. The seams should be more natural though.
-
I want to minimize to the maximum extent possible the number of supports that need to be printed. I’m just not a fan of them and they can often be engineered out in designs such as this.
-
Glue should not be necessary.
-
Baffle and rear will be printed separately and bolted on.
-
The outer cabinet (sides and top) will be printed in one piece. The major downside here is the print time could be several days and use two or more rolls of filament per side. That’s a long time for something to go wrong. Hard to avoid this.
-
Threaded heatset inserts will be used extensively.
-
Gaskets will also be printed from TPU (or, perhaps, cut from neoprene using the printer)
-
Braces will be integral to the design (and also printed).
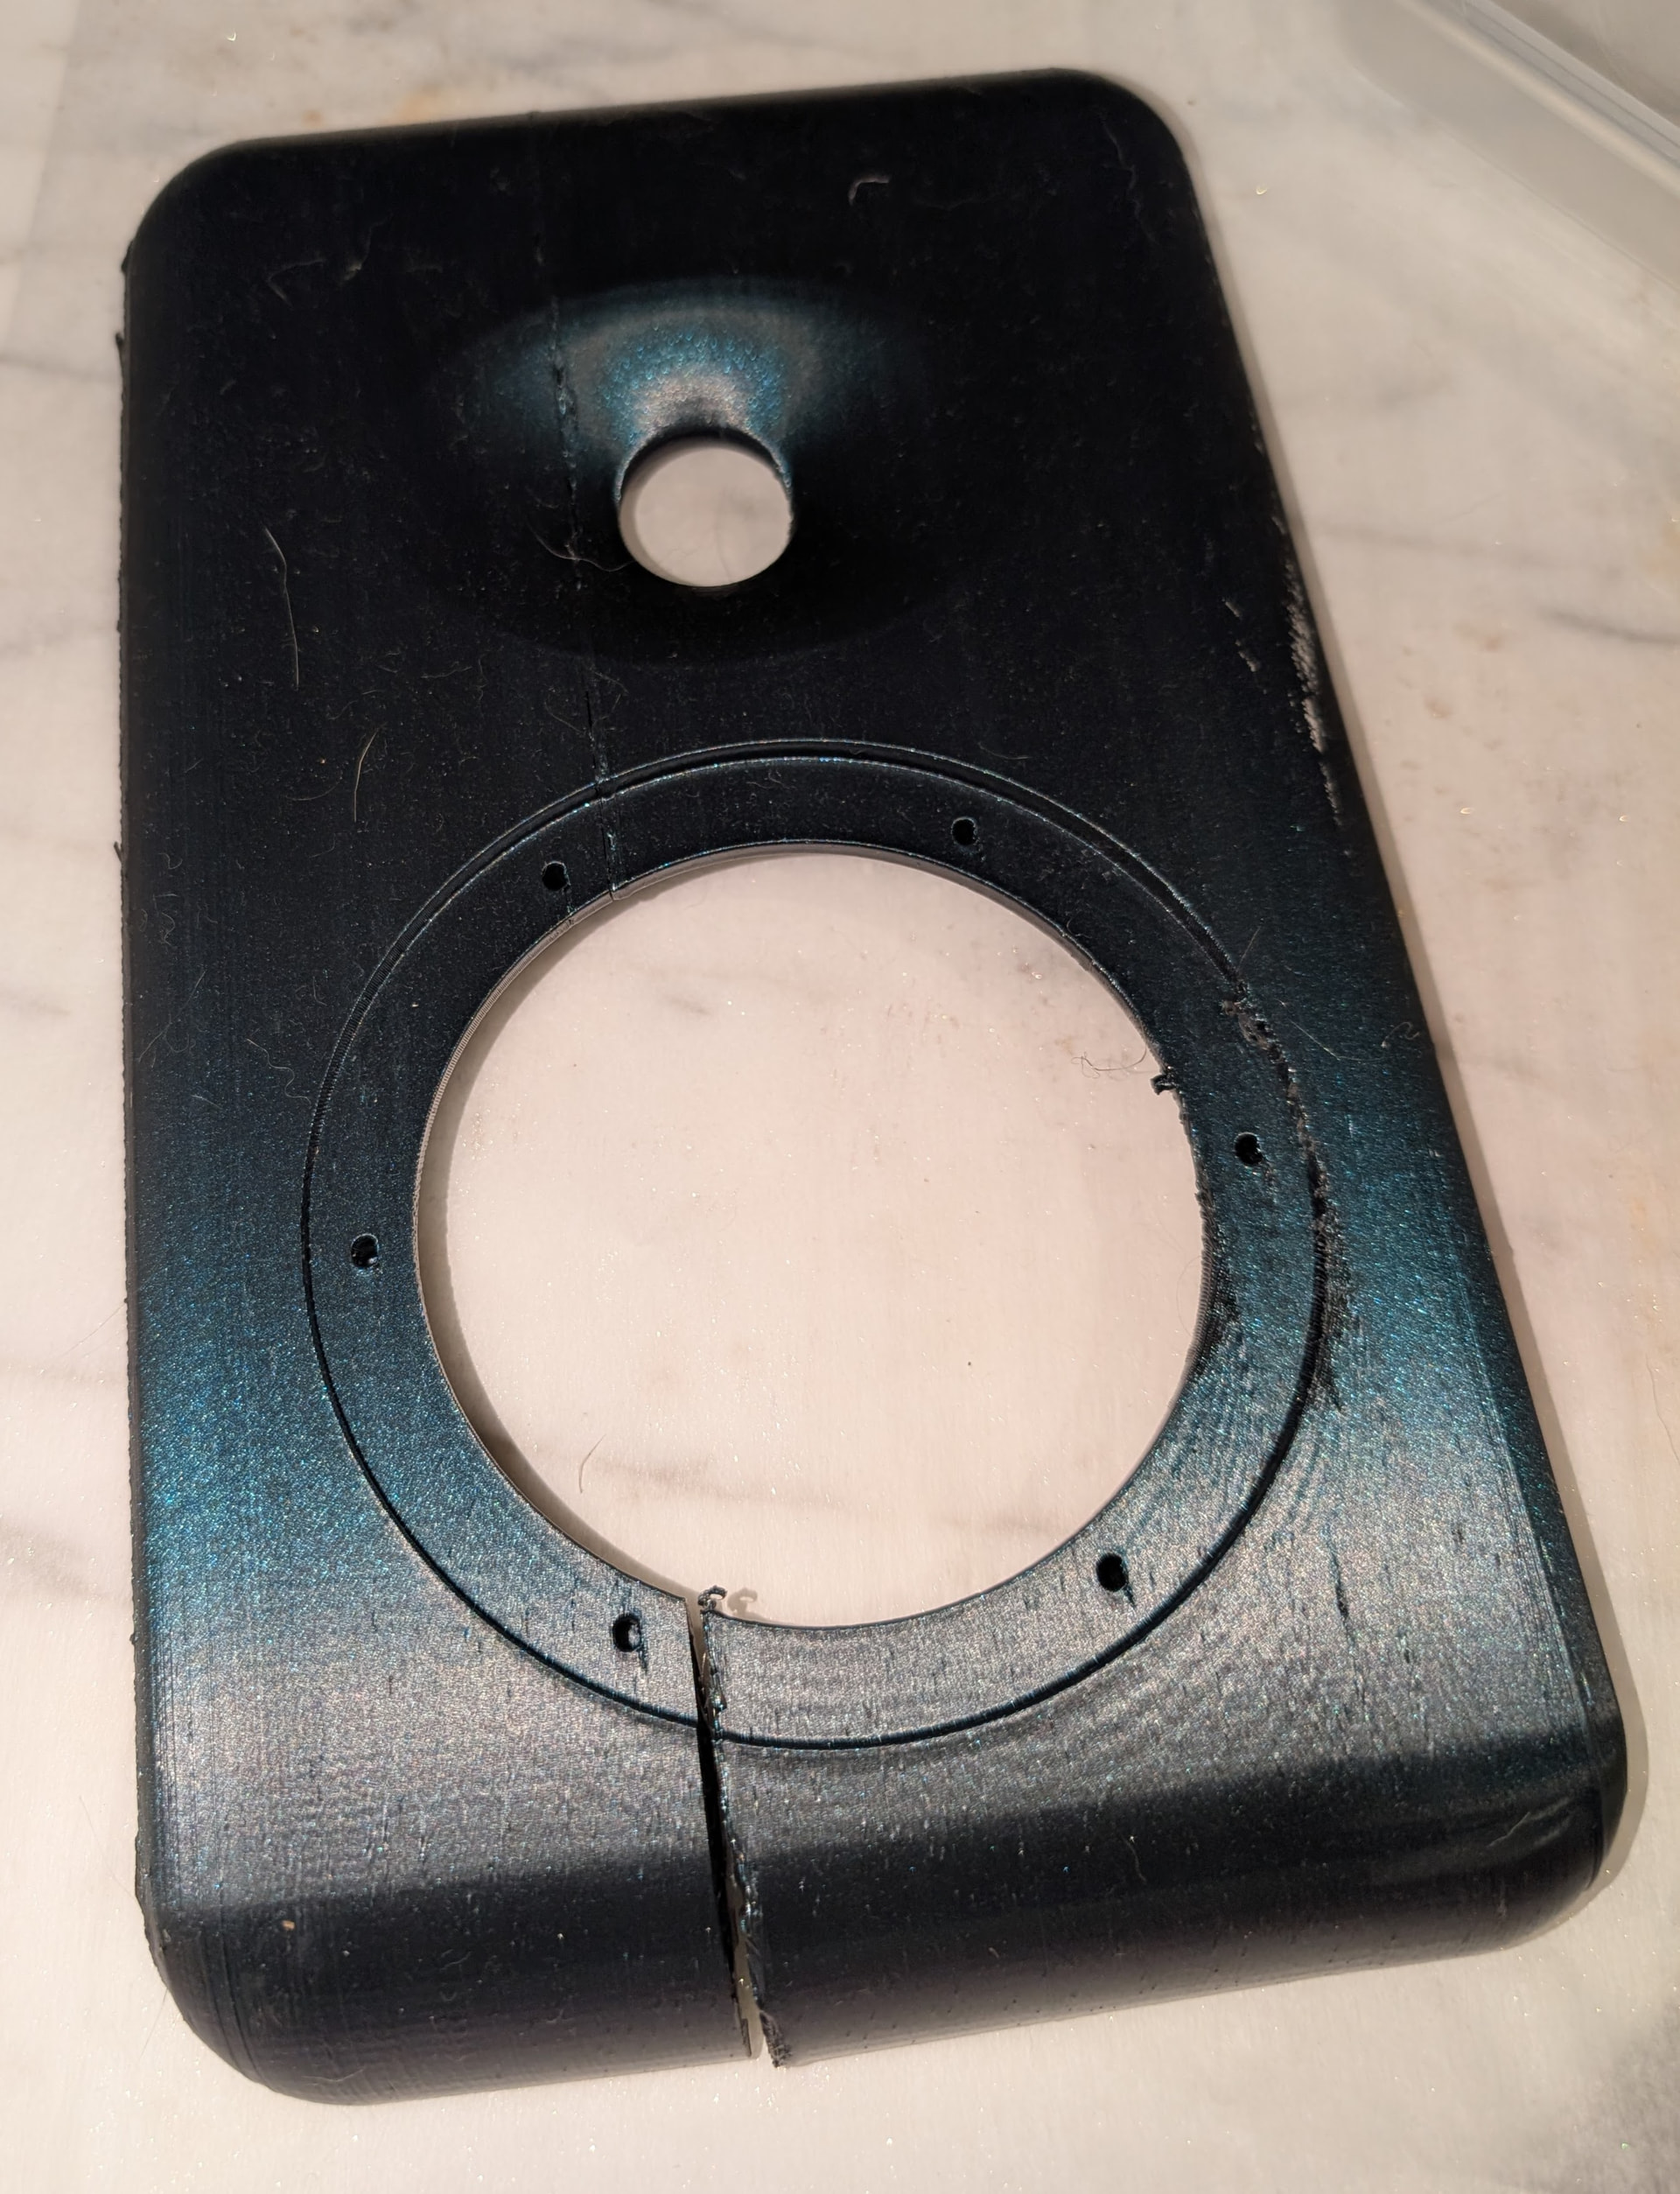
My first intent is to create some ‘shells’ to prototype the models. This one I printed at 25% infill (i.e. not just a shell, which might just be 5%) with PETG-CF (carbon fiber) so it’s really quite solid. I think in an ideal world I’d use CF for all parts but the available colors aren’t going to work for every situation. I want to test this with regular PETG to see how much difference that might make. A couple key notes about the below baffle compared to the speaker design by Xmechanik and the original model on Makerworld:
-
The original baffle (in addition to all other sides) called for 18mm of Baltic birch. Obviously this is a great starting point for a small speaker! However, I’m working with plastic here and the material will probably be ~75% air in the finished model. I felt I needed to go thicker to shore up the strength a bit, so I elected to go with 36mm. This will also increase the interior volume a little, which I’ll need later due to additional bracing.
-
I couldn’t tell if the original design called for carving out the back of the baffle around the woofer. The 3D printed version did not. I have included this in my redesign.
-
The original design has no chamfer or roundover on the edges of the baffle. Given how well it measures and the reception it has received I guess this works just fine. However, that seems kinda boring to me, and it must have to the 3D printed modeler as well since they included a pretty good roundover on the vertical edges. Normally I would do that same, but a 3D printed roundover in which the baffle is constructed from back to front ends up looking a little rough. I think it looks really quite nice with a relatively steep chamfer instead, which I placed on all four edges.
-
This baffle is held on by eight 1/4-20 bolts. Six would have been fine, but I decided having 4x arranged around both the tweeter and the woofer would look nice. The current print uses the low profile 316 stainless hex top bolts I have set aside for another project, thinking they would be nice here too. These are expensive, something like $10+ apiece. There will also be eight on the back, so that would be $160+ per side, or in other words, WAY too much for ~$170 worth of drivers total, especially if I’m making multiples. Making the change to 82 degree countersunk hex bolts (still 316 stainless) runs about $1 each for the same size. Still pricey for what amounts to a pretty (but nice) bolt, but FAR more palatable to the wallet. I’ll see if I can find a way to buy some in bulk.
-
The drivers will be attached with M3 bolts (for the tweeter) and M4 bolts (for the midwoofer). I haven’t priced these yet, but I’m obviously hoping they’ll be cheaper still.

The other side of the baffle is currently flat. I have thought about including guide pins, or a groove for the gasket, or even a groove that might fit a corresponding protrusion of sorts on the cabinet itself. I do not think these are necessary - the bolts will essentially be pins that will aid in alignment. I learned from the AliExpress ‘sub’ box that having a groove on both the cabinet and the baffle is kind of a pain to align and keep in place while clamping down, and I have a groove located on the cabinet already. The current baffle also does not require any supports when printed back to front.