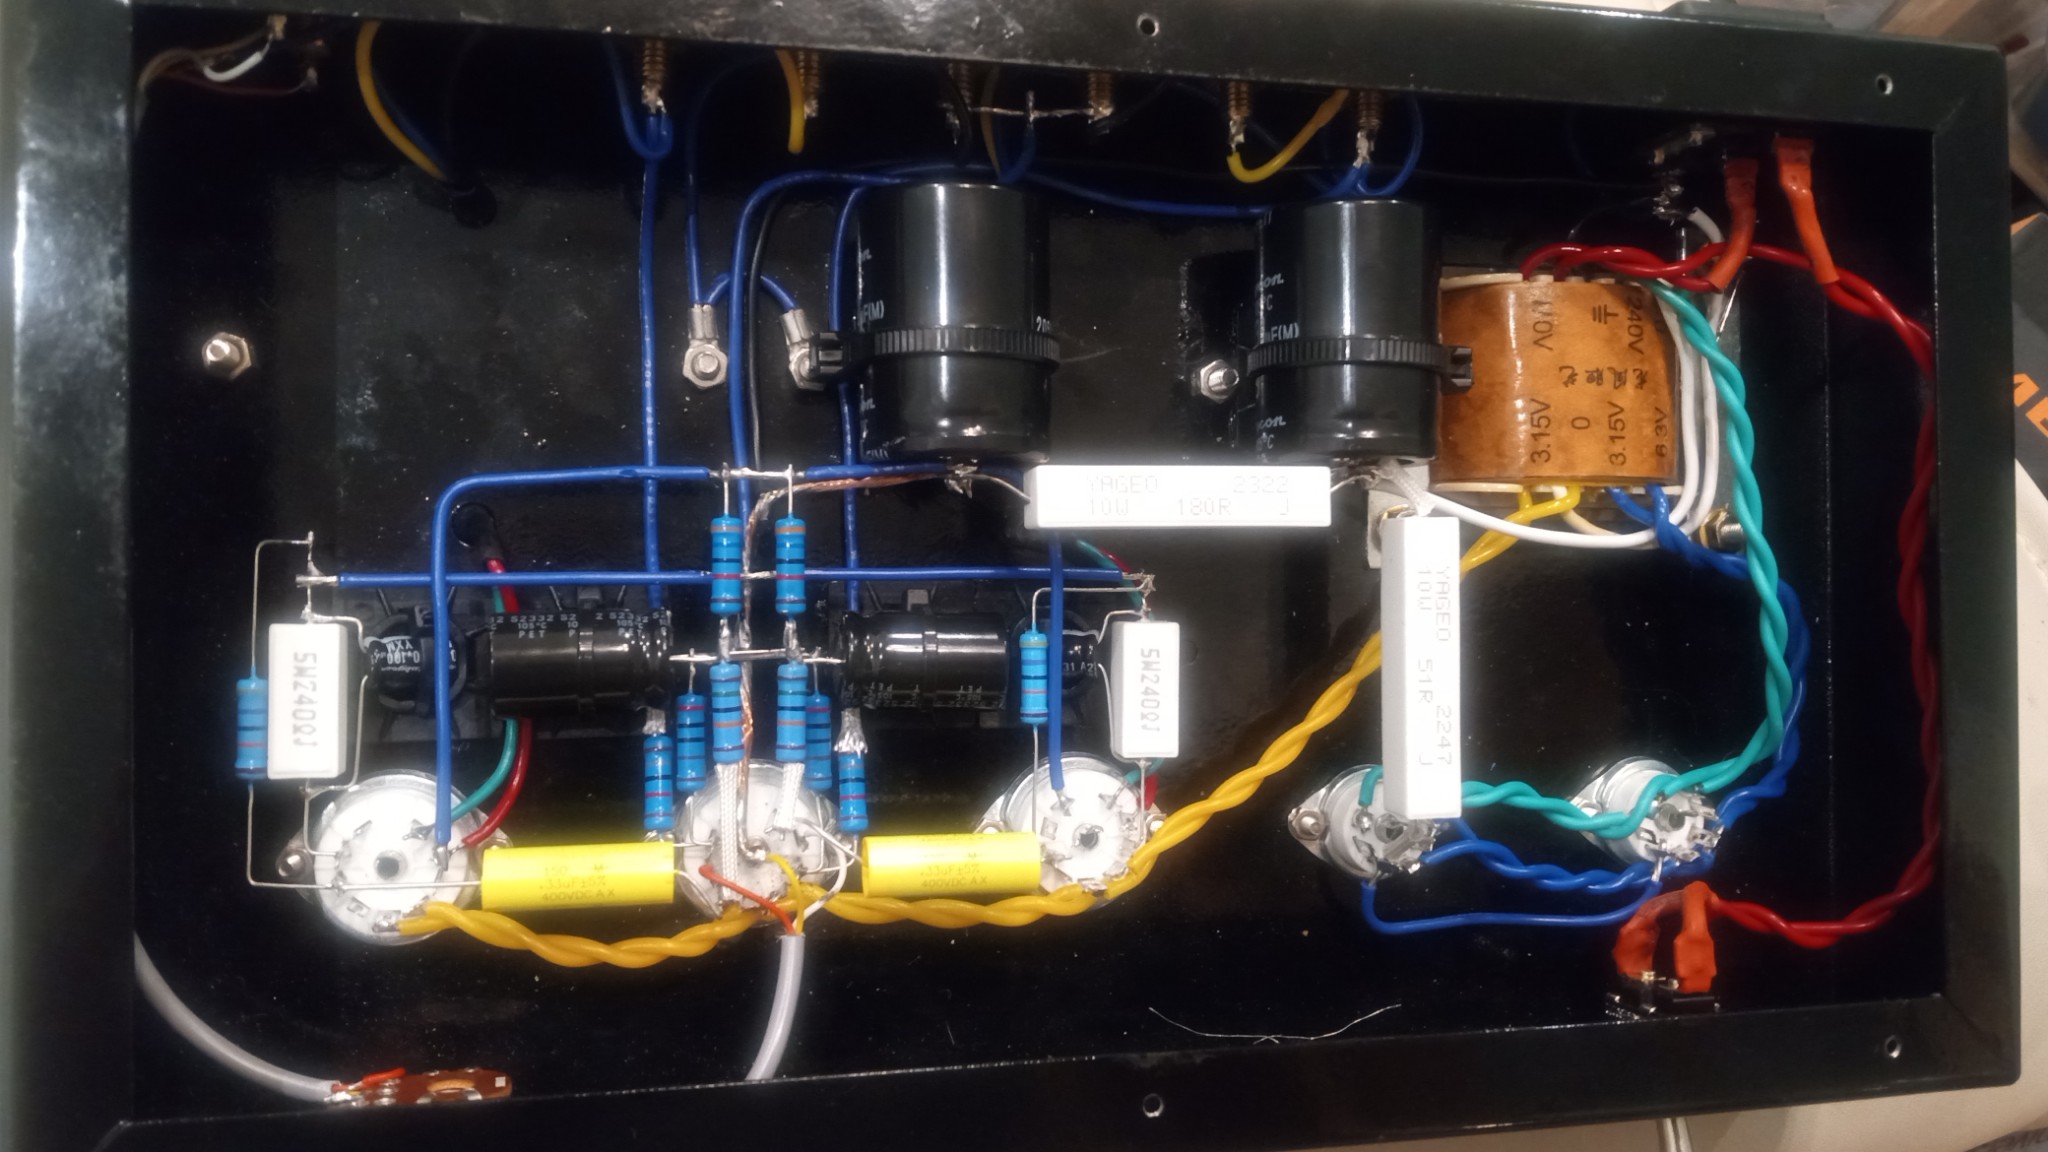
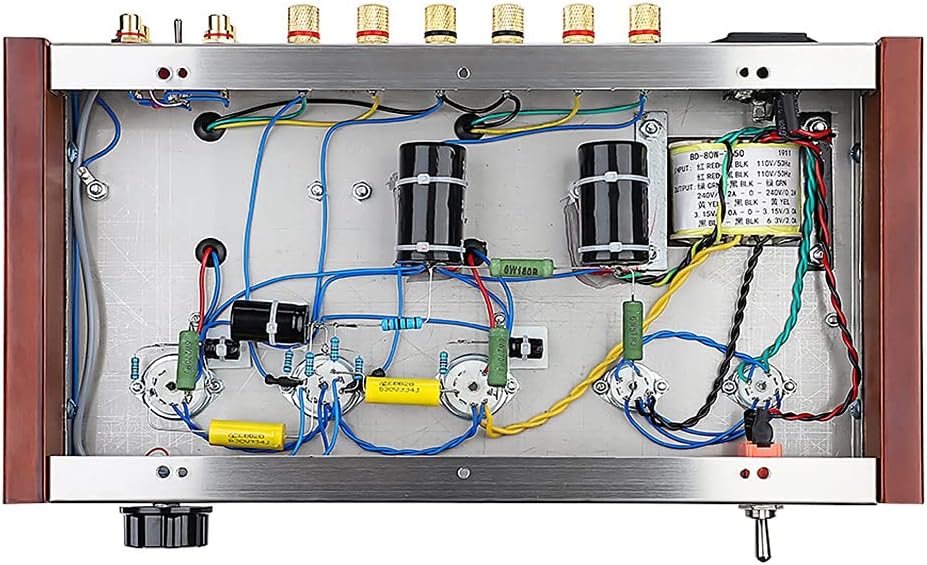
Originally I got a bit of analysis paralysis researching best practices, so I shelved the project for a while. I recently decided to just try it and see what happens. I swapped in Rubycons for whatever electrolytics it came with. The isolation caps were upgraded too (whatever I threw on the Mouser order.. don’t remember). I read the big filtering caps were no bueno to be direct wired to the tube rectifiers. So I adopted the filtering circuit from another schematic I found for the near identical kit. It added a resistor between the rectifiers and first cap, as well as slightly larger capacity.
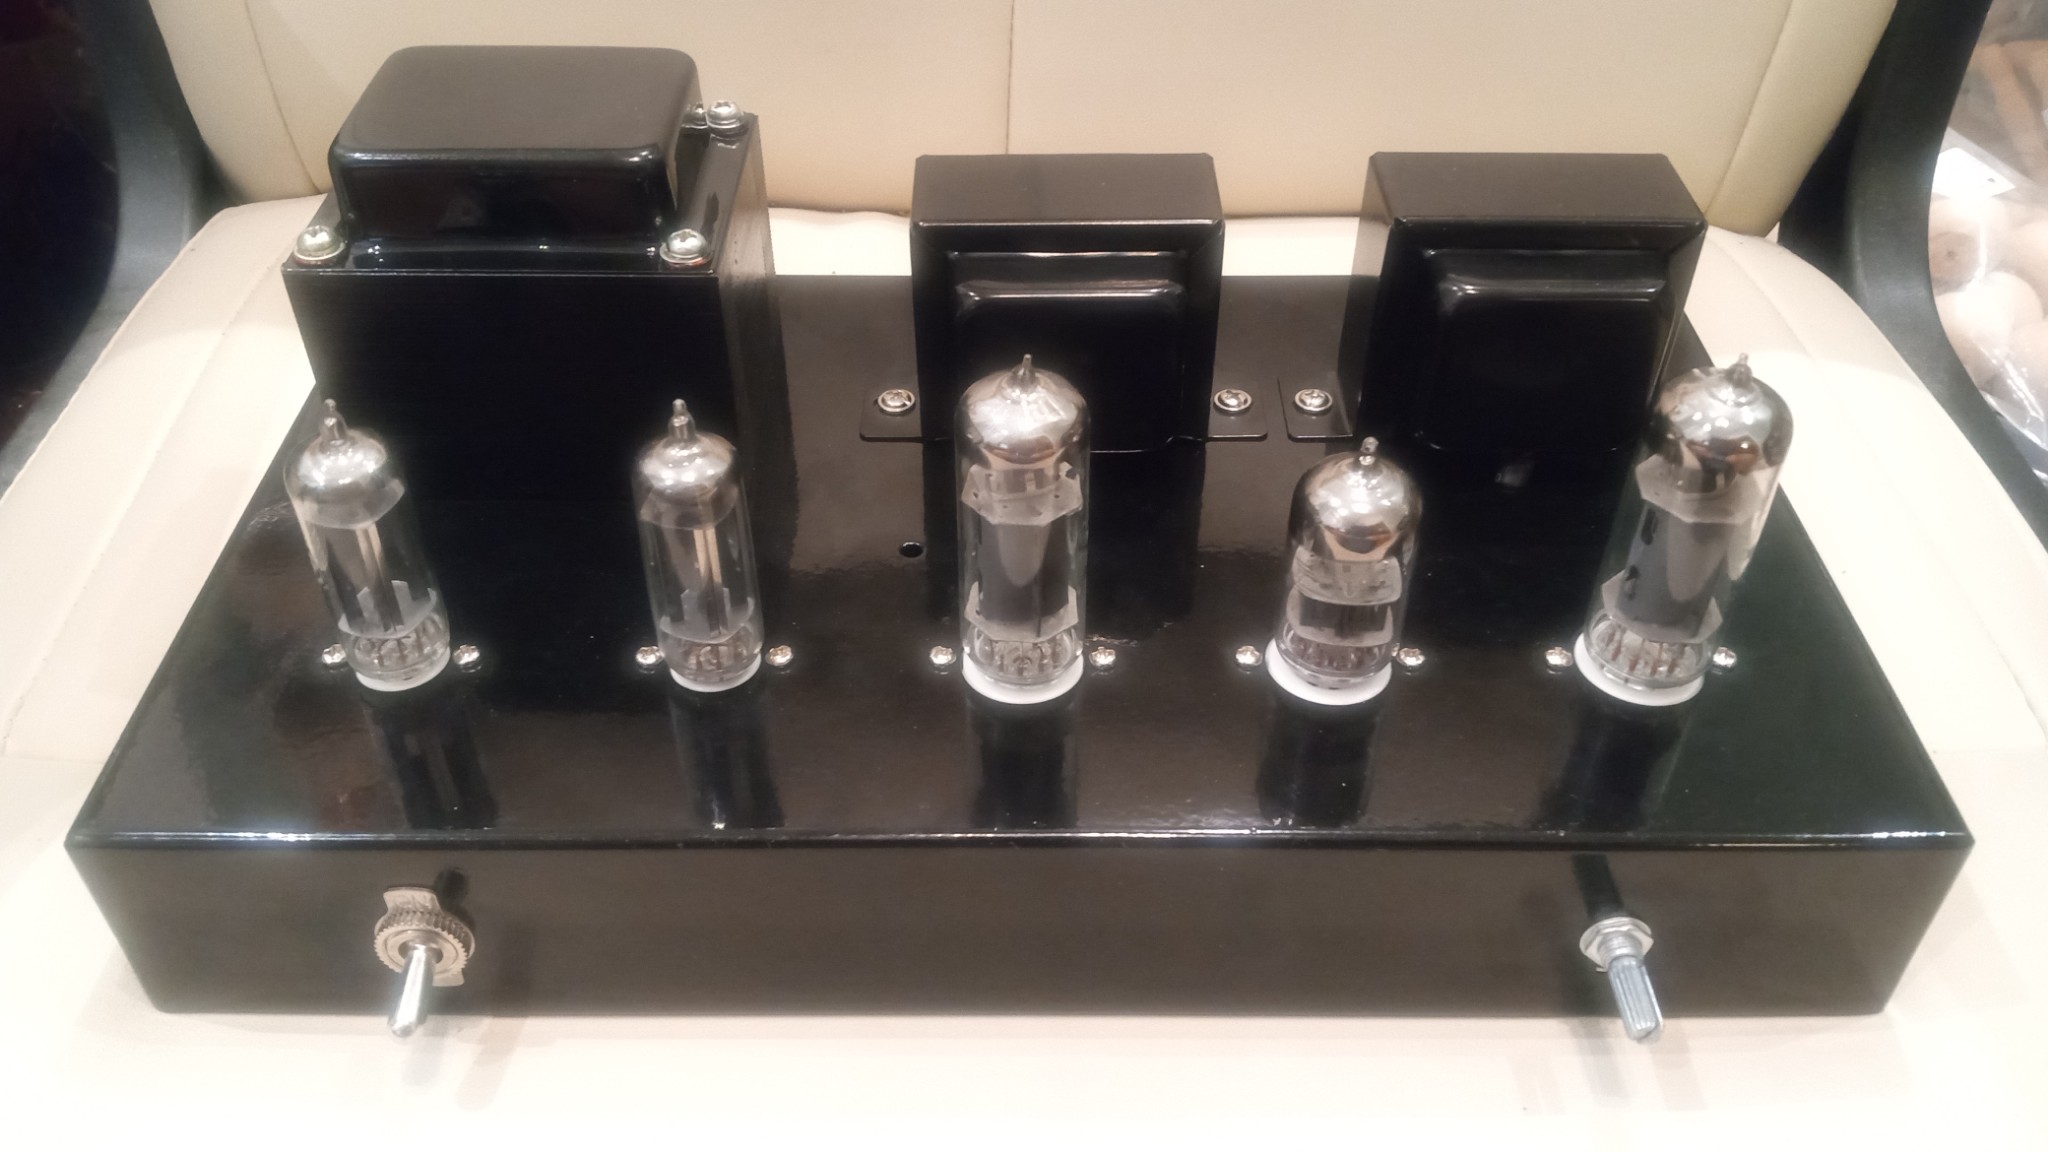
I just now completed it tonight. Needs one more look over, pop the tubes in and smoke test. At least I also got better tubes to swap out
Dim bulb tester hooked up, mother on speed dial, safety squints engaged. Recite the magic words: Clatu… Verata… crap what was the last one? Oah well, flip the switch.
The dim bulb shone bright. No pops or smoke. The dim bulb.. well dimmed, and I was greeted with the dull tube glow. Fortunately no glowing under the chassis.
Next, hook up some speakers. Play something. I hear sound. WOO!
Much louder in one speaker than the other. So I shut it off, swapped the power tubes L/R, confirmed the tubes are the issue. I anticipated that so planned on the china ones being testers. I’ve got some better ones somewhere.
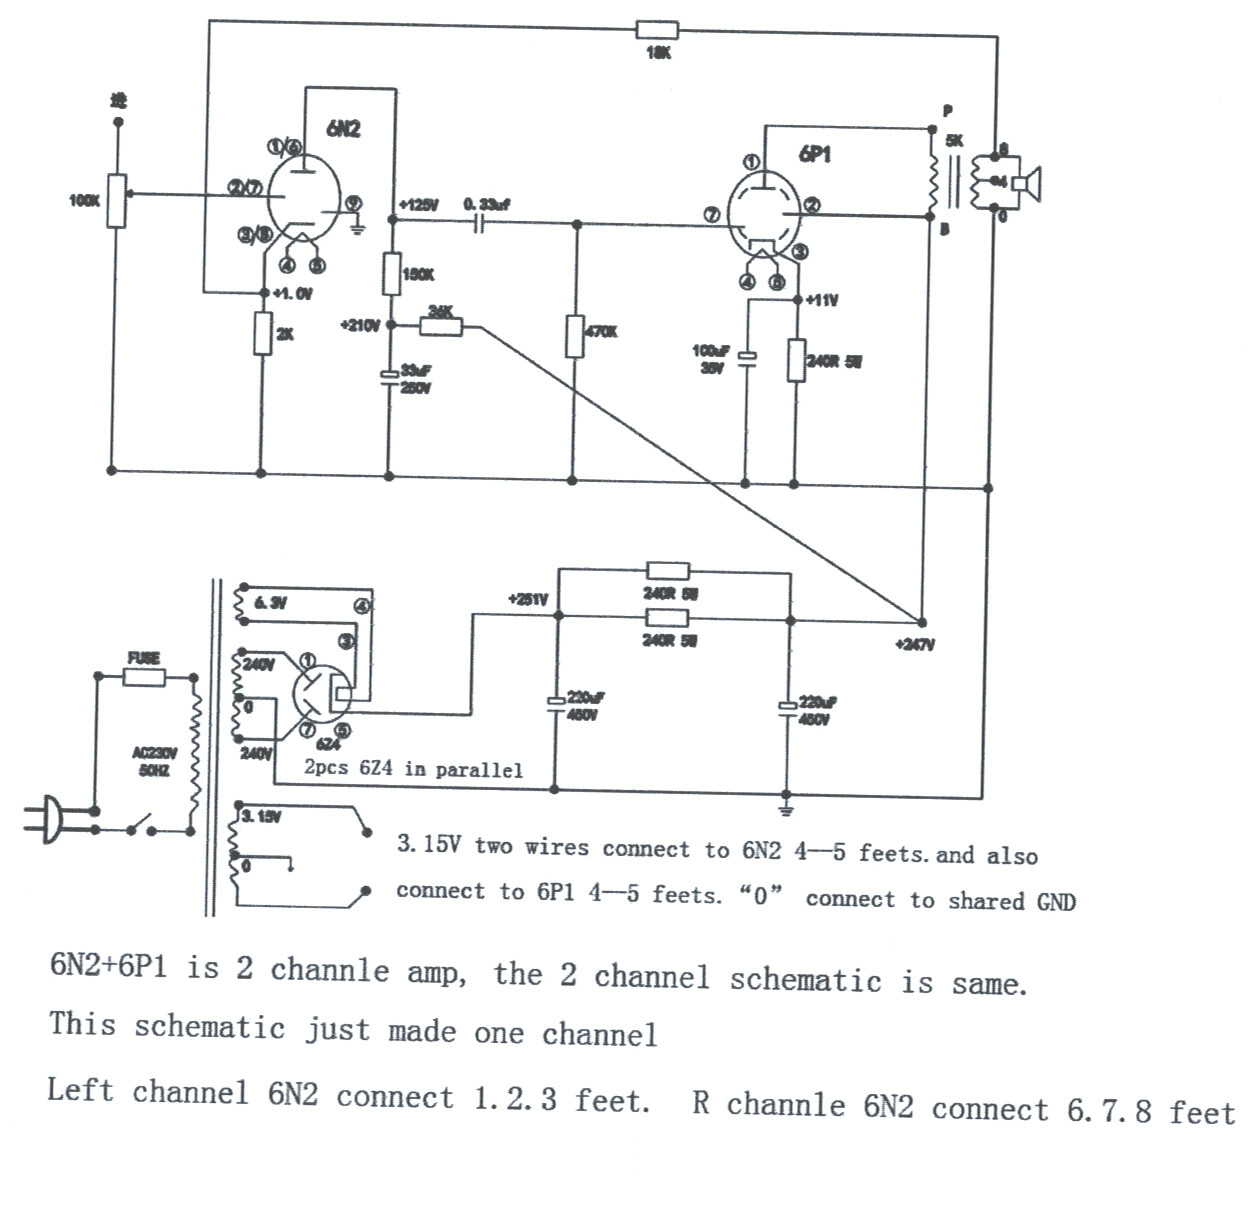
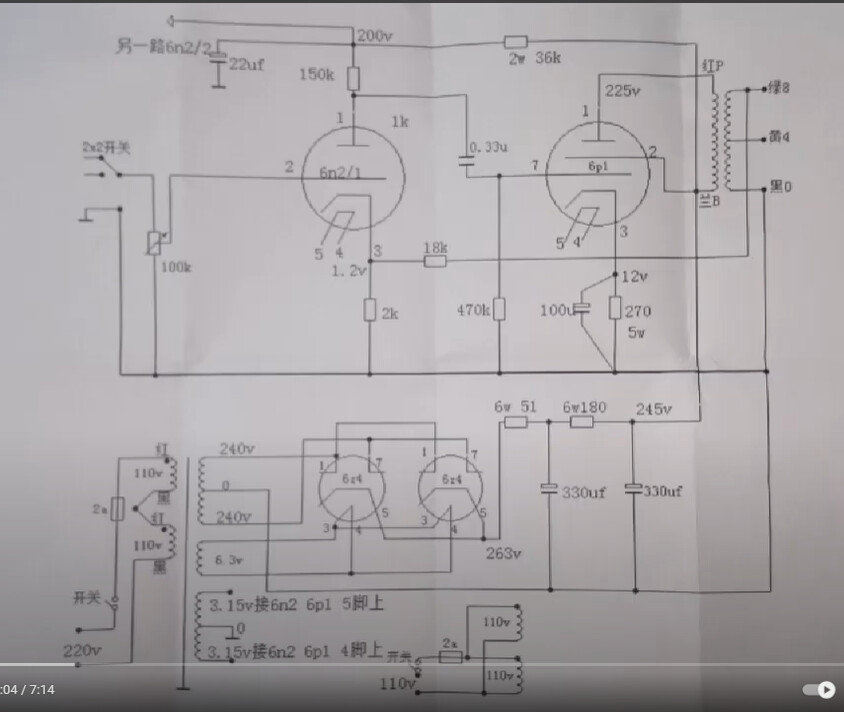
I usually add a resistor on each of the high voltage outputs between the transformer and the rectifier’s plates. It really helps extend the life of the rectifier tube. 150-300 ohms, 5 watt has worked well.
@Ani Stranded wire, but the insulation is pretty stiff so it kinda holds it’s shape OK.
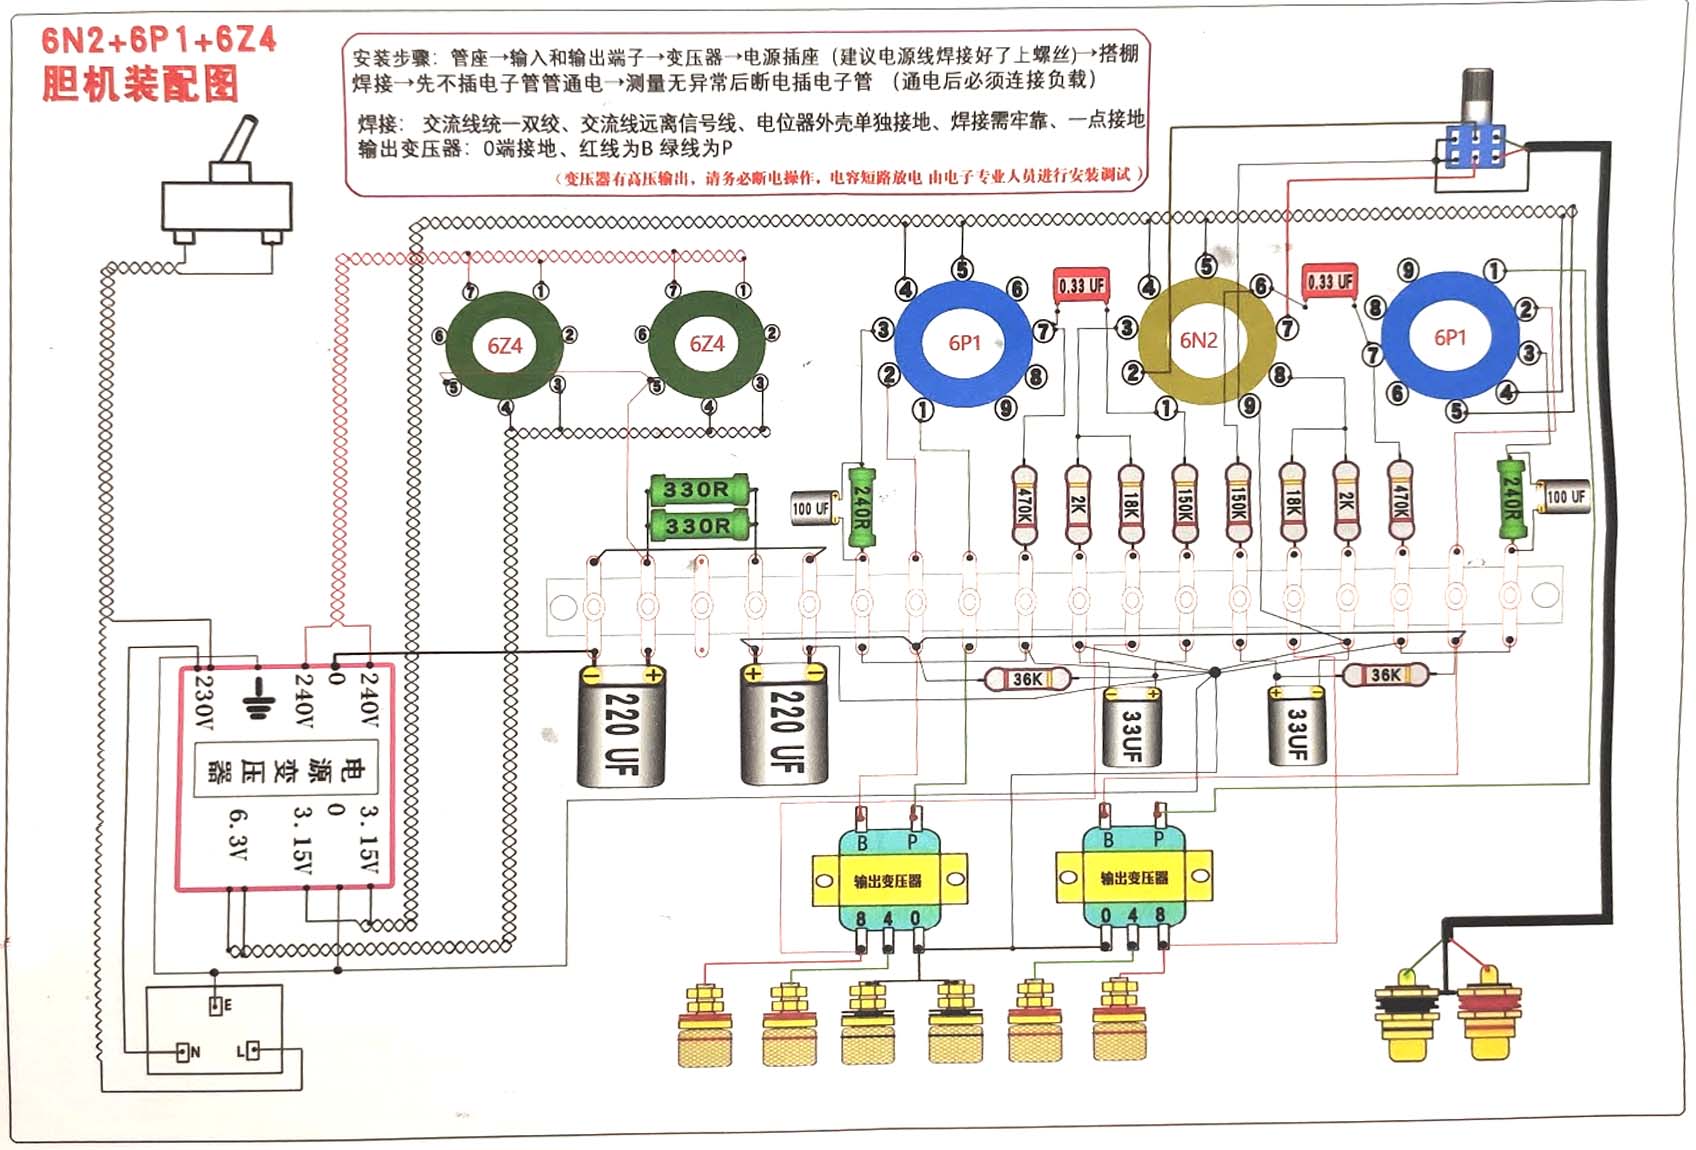
@Tom_S if I remember correctly: 6n2 and 6p1, 6z4 rectifiers (I hear the china version is totally different than other 6z4). I’ll post up the schematic when I get home.
@PWRRYD Yeah run parallel. I welcome suggestions on keeping them running as I’ve read those take the brunt of the abuse.
I figured this would end up as one of those projects that would never be quite right. Something to fire up for the novelty of listening to it for a few minutes every once in a while.
But. I’m happy to say the NOS tubes very much prove that wrong. It is deceptively quiet at idle. I expected at least some light hum. I set it to “quarter throttle” and didn’t hear anything, so I figured it was a reasonably low starting point. Nope, jumped out of my skin when it started playing. It is plenty of amp for the Faux Pas. Plays pretty clean to me. Maybe a light seasoning of extra soundstage, certainly didn’t seem slathered in the sauce (tubiness). Bass started out tight, but relaxed to let out a little swagger as it warmed up further. I made the mistake of sending a pic to my father who immediately called me for an hour long conversation. I got probably less than 15min of listening time. Then the wife wanted the living room back. Dang. To be continued.
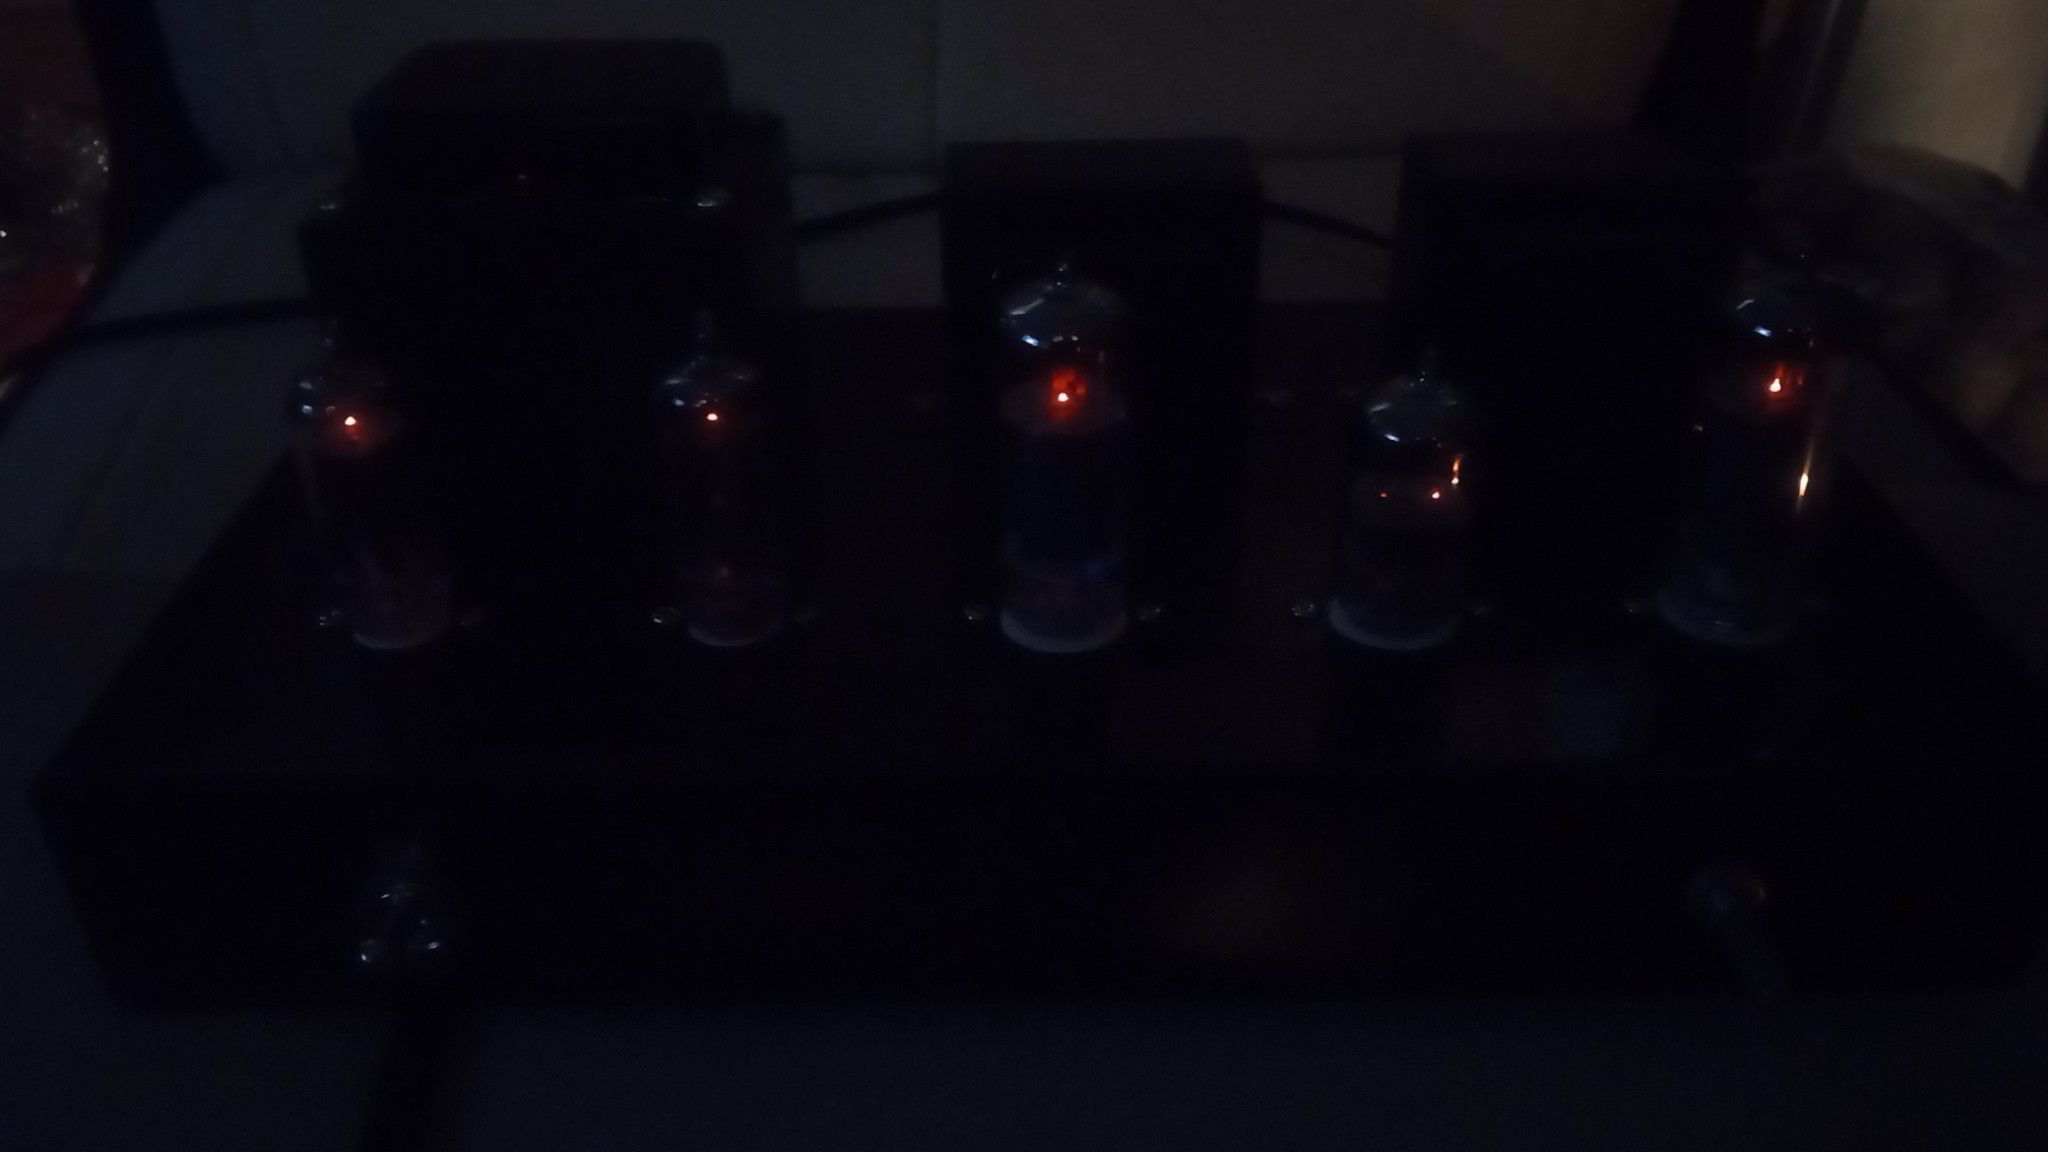
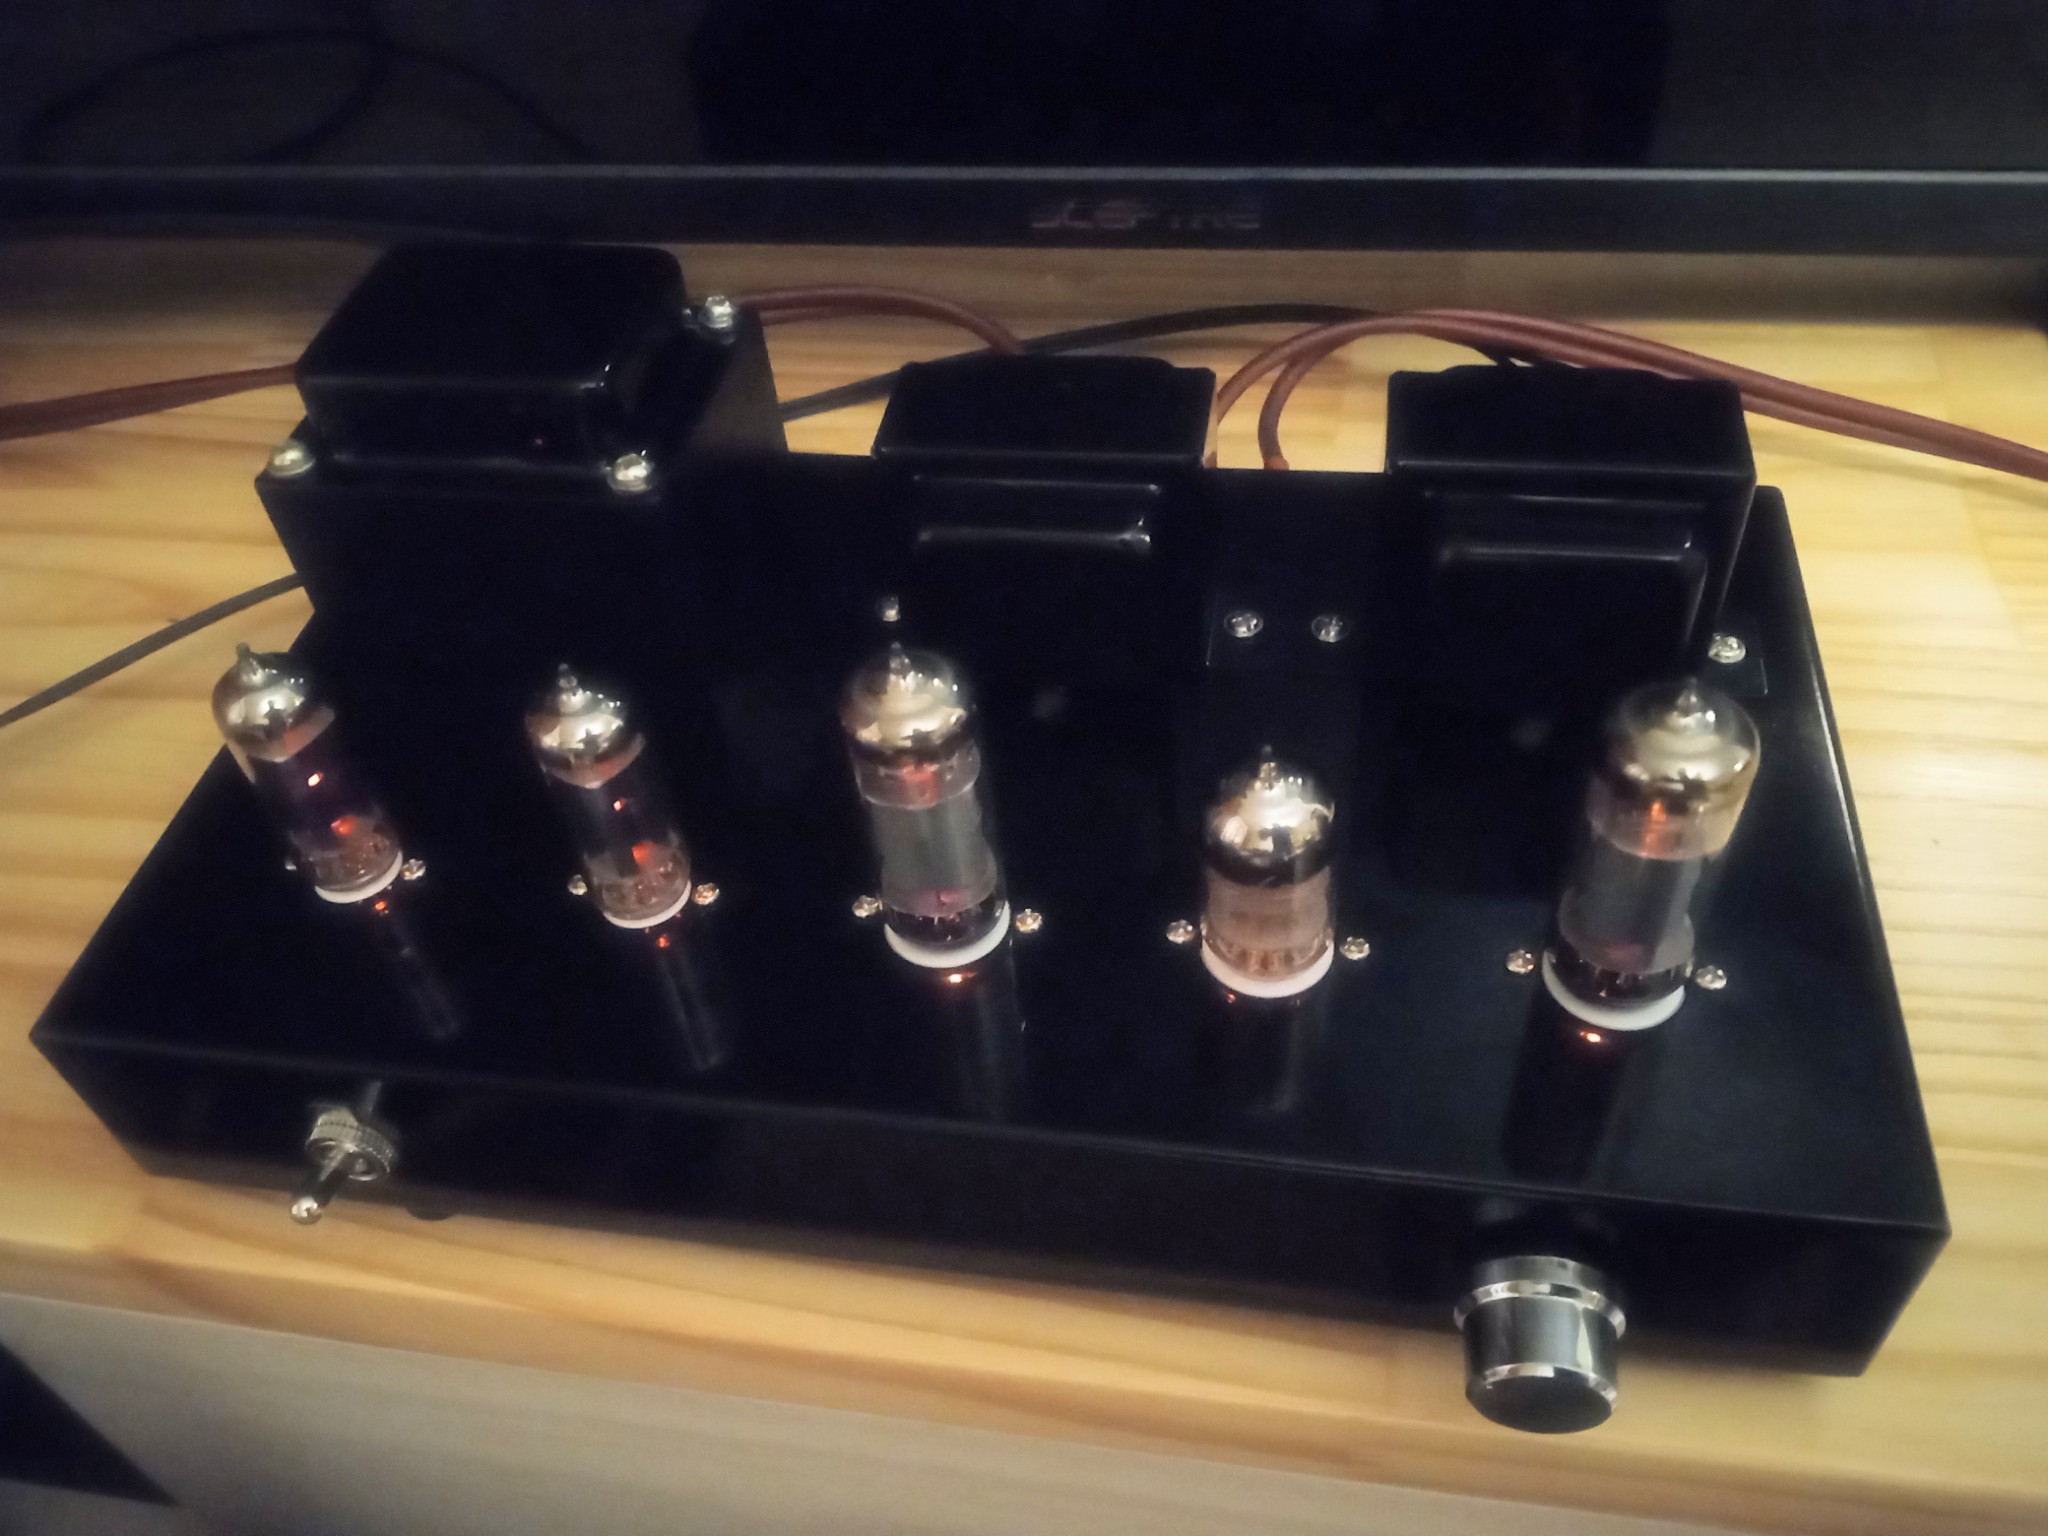
Shot taken in low light then brightened. (Makes the tubes look brighter than they are)
I realy need to get or make more speaker cables for messing with other amps. And I have this faint memory that I should check filament voltages.. Due to transformer being wound for 110v instead of 120v.
The matched pair 6P1P-EVs did come with little tags that showed the plate current (Ia) and an “S” value of each. This pair Ia=48, S=4.5. Not that it means anything to me except that they measured the same.
So what do you figure? About 3 watts per channel? @JohnH gave me an old stereo console “pull out” (InDIYana 2021) that I re-built a few years ago. It was a vintage Claritone Model S-301 Countess dating back to 1961. Each channel uses 1/2 of a 12AX7 driving into a 6BQ5 power output tube which is hooked up SET fashion into a small transformer. Circuit looks very similar to the 6N2/6P1 topology shown above. I’m guessing that it was about 3 watts per channel. I’ll have to pull it out and test it.
In case anyone is interested. I found a few sellers who look to have gotten them in the states before the tariffs went in place. Any others coming from china are applying $100 shipping.
Diode tube version like mine (prebuilt, not a kit):
Silicon bridge rectifier version kit:
Obviously none are the black version like mine. I never found anyone stocking the black ones in the states. I had to get it direct off aliexpress, and it was even a bit hard to find there.
The silicon rectifier is probably more long term reliable. But ya know, less cool I guess. I also noticed it has cooling draft holes around the tubes, something I wish mine had. I may need to drill some more holes than the two open screw holes it currently has.
Kit + NOS tubes + Rubycon caps (and other elec parts) I’ve probably got about $300 in it. Though it probably isn’t necessary to go as far as I did. Some of the kit caps may work fine. Silicon rectifier throws the rect tubes out of the equation, etc.
I also “upgraded” the power switch with a much lower internal profile one from Menards (here). I liked the on/off bezel washer and nicer looking serrated nut. It also has a nicer, softer mechanical-feeling action than the jarring snap of the original. Swapped out the chromed plastic volume knob for an aluminum one… as one does. Haptics and tactile feel I think are important too.

 (Ep. 174 )")