Some of the parts are bought but nothing is starterd or finalized yet.
Here is the parts bought so far.
The goal is to have a set of speakers that will serve as the mains in my main TV room and be mobile enough to move outdoors for parties and bon fires (this has been hapening a lot lately and I love it). Considering powered to make them easier to set up havent goten that far yet.
I would love some Insperation from you guys on what you would build both looks and design.
I might suggest plywood if these will see any outdoor use. Even if it should never see rain. Stuff happens. Such as condensation from temp swing as the sun goes down.
If there was a good option to go active without breaking the bank I would consider it. I have a nice TPA3255 board collecting dust that might be a good option for an amplifier without DSP. One concern I have is that I have heard a few people say that noisy boards sound worse with high efficency speakers. The Dayton KABD dont inspire confidence in me.
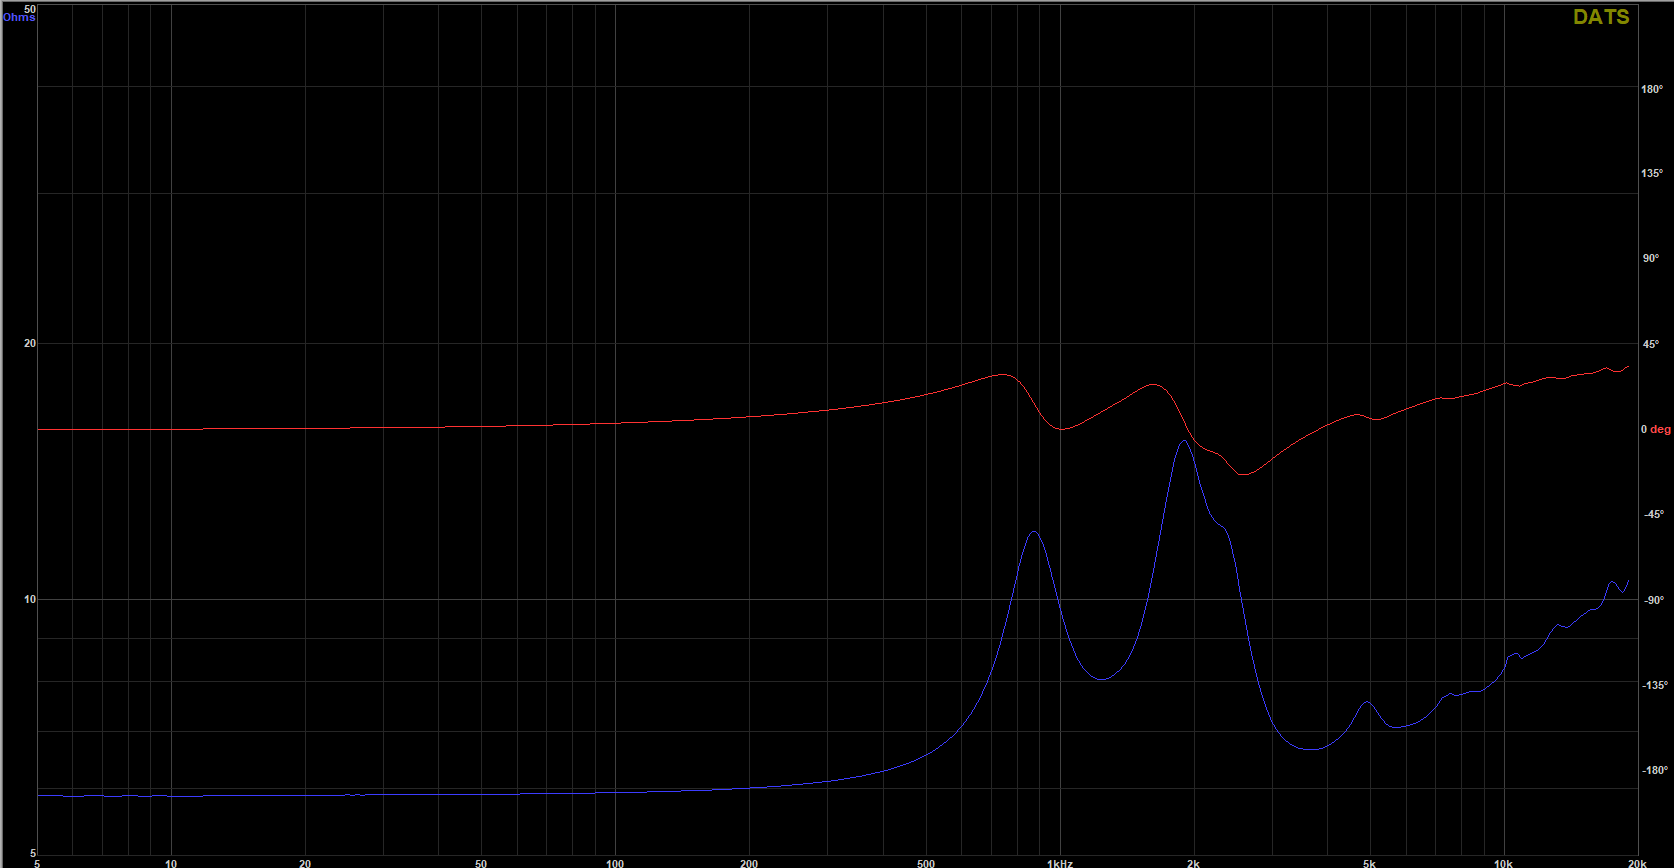
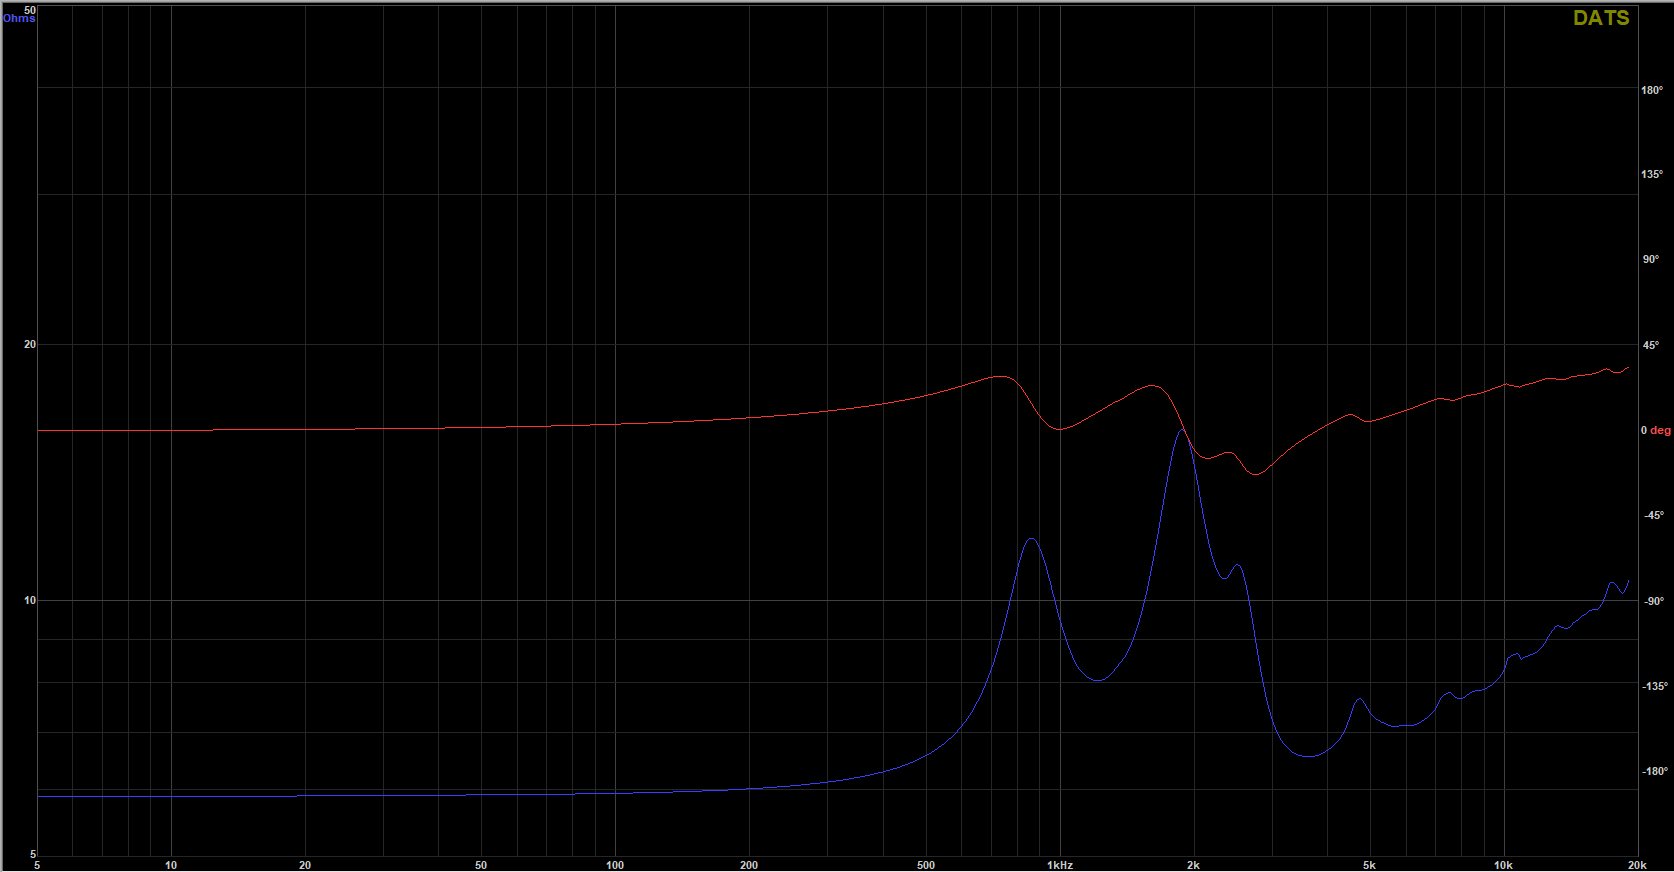
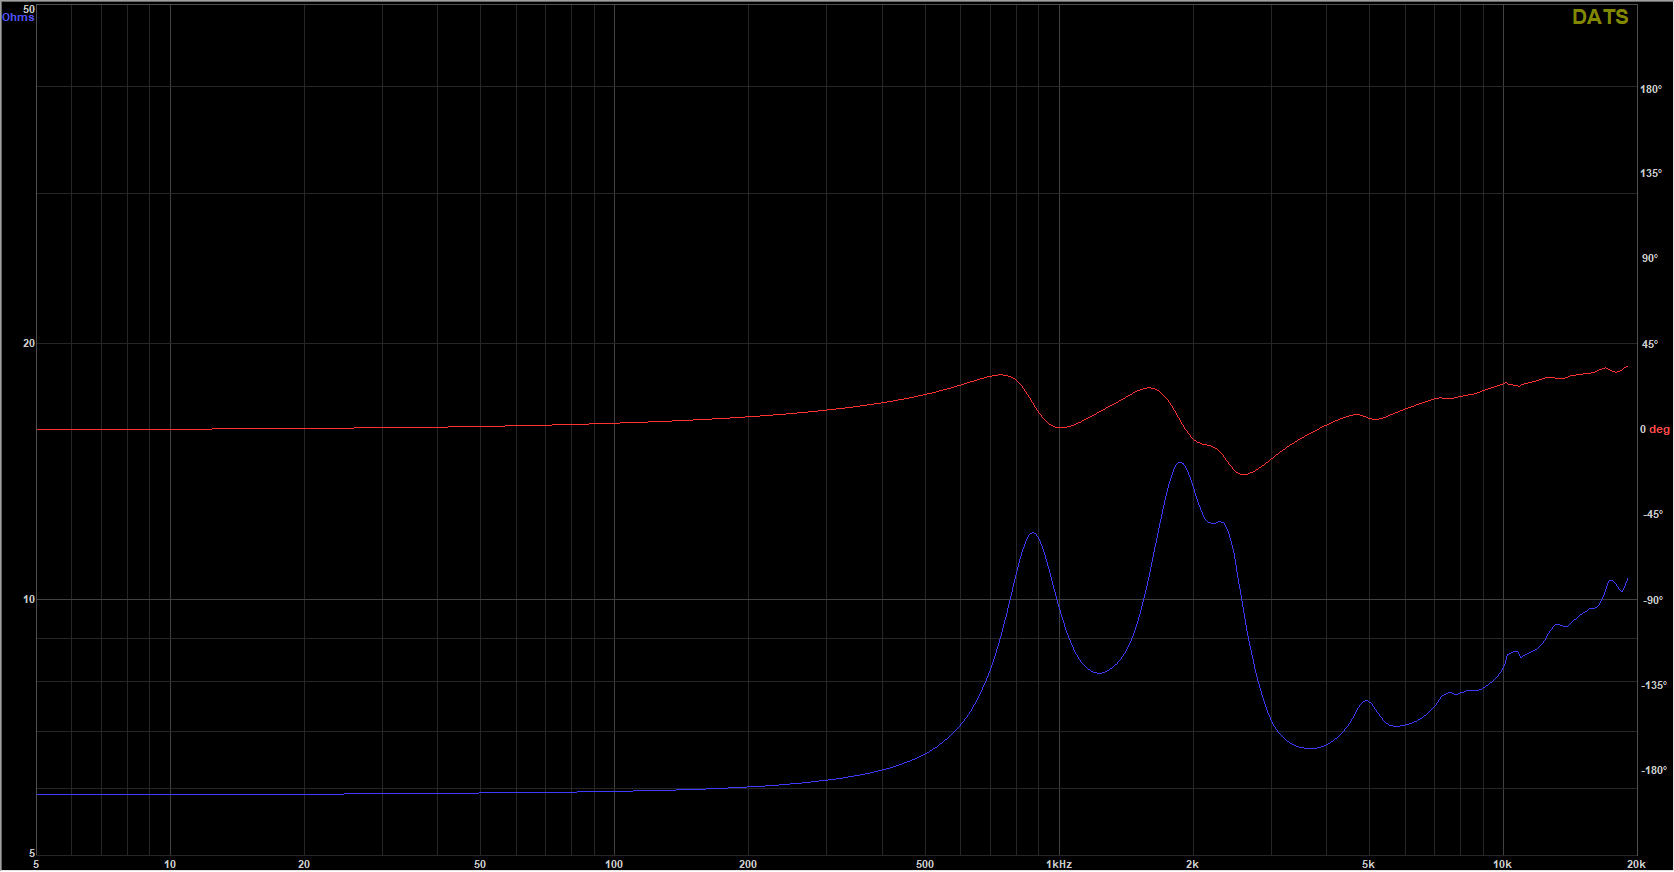
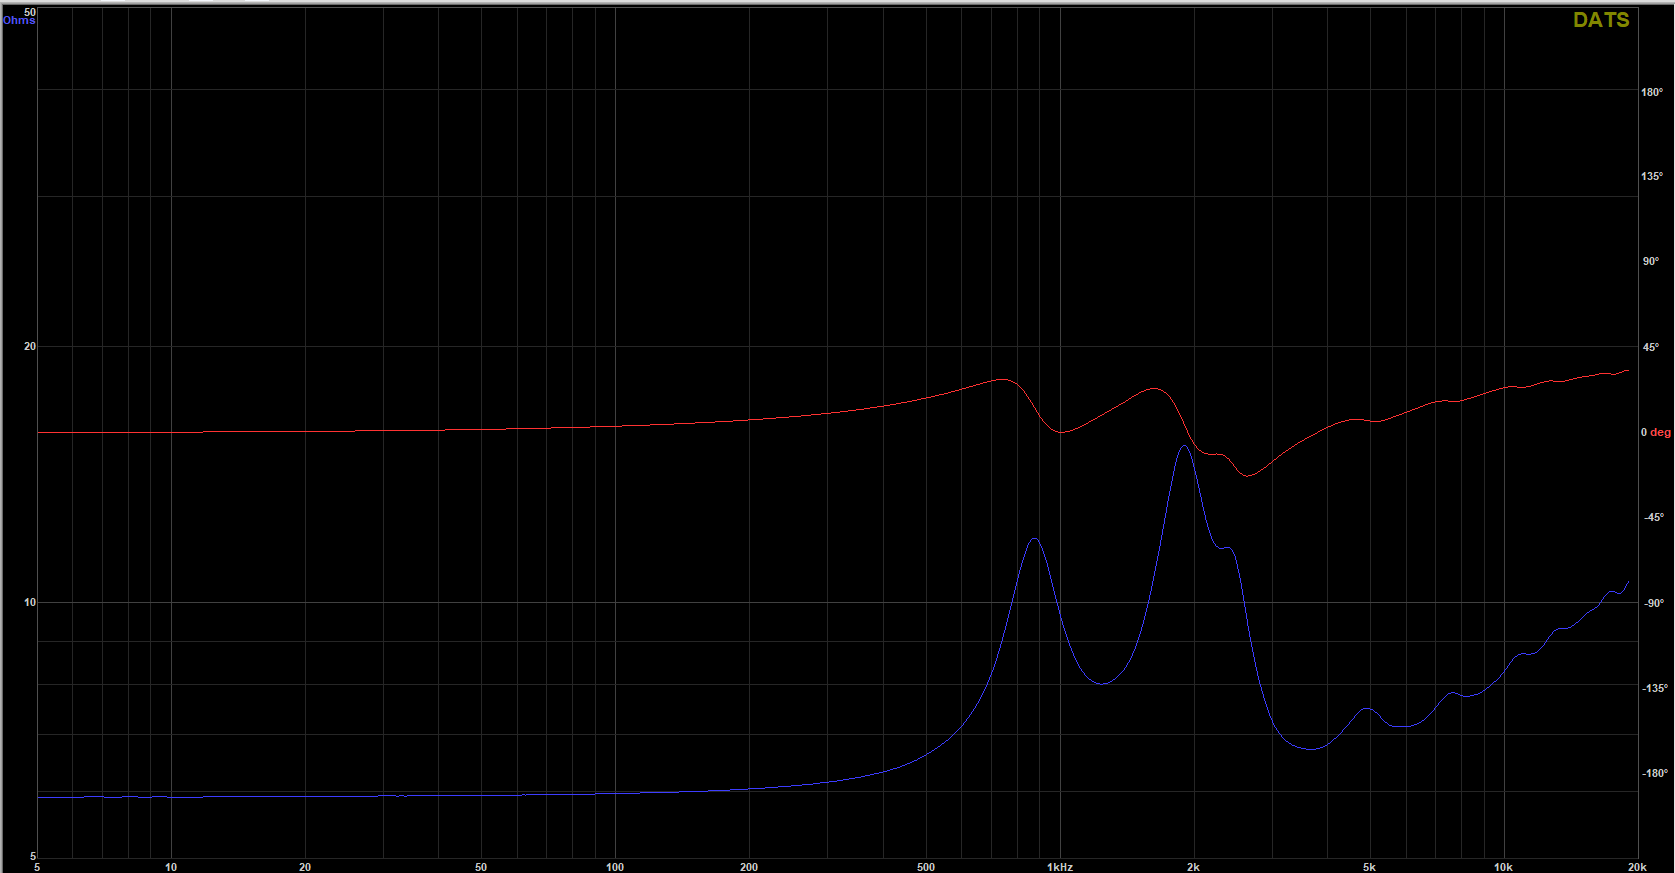
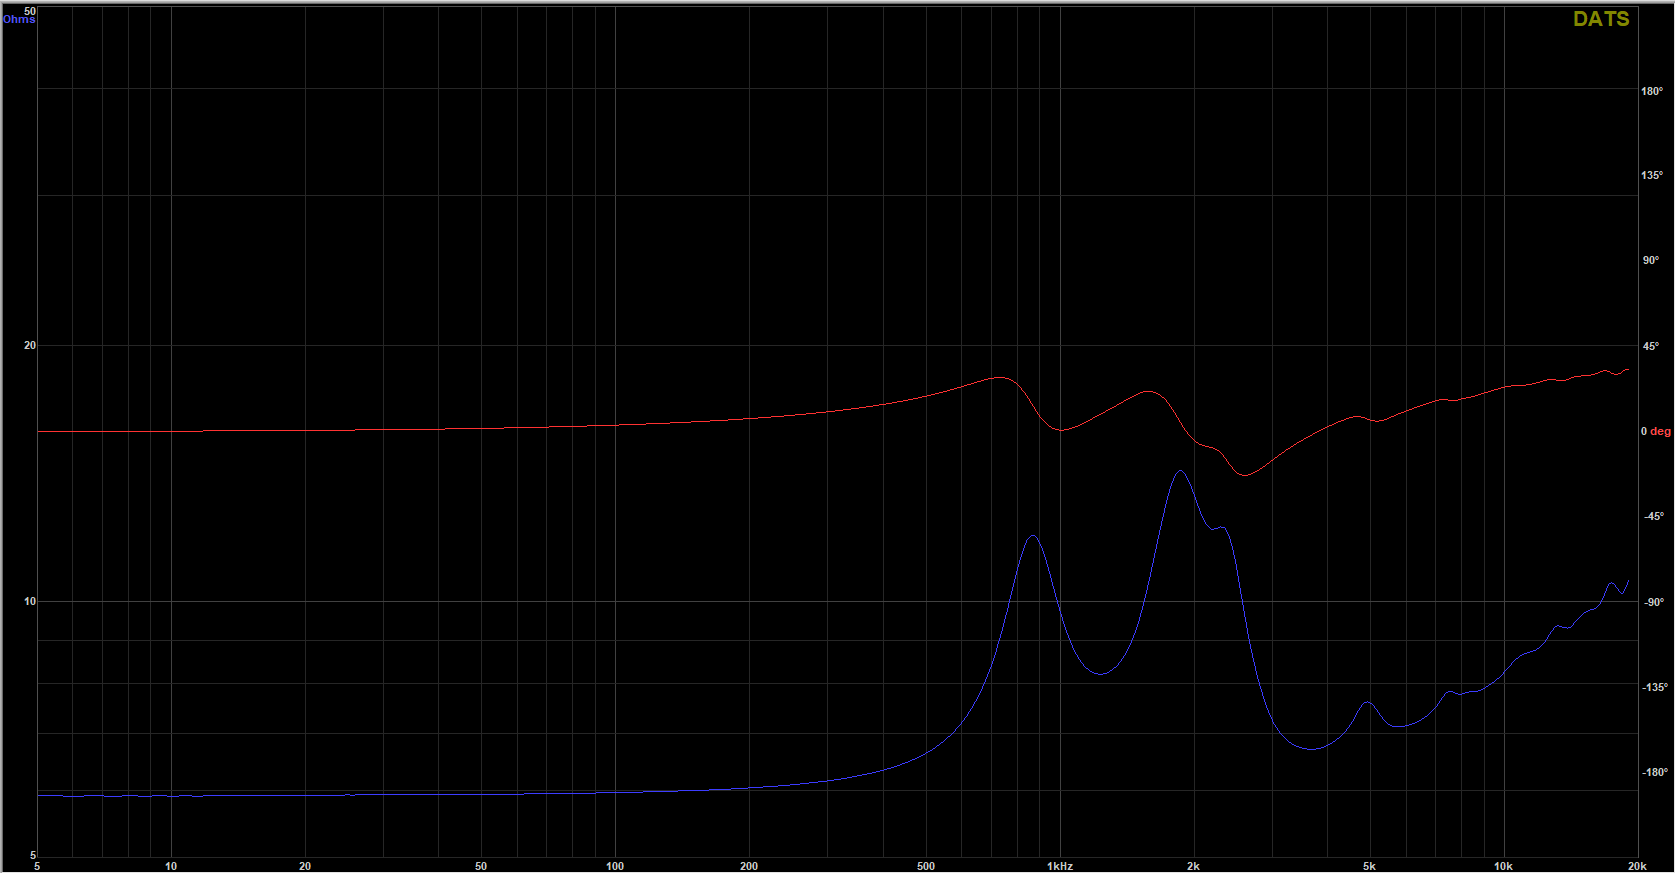
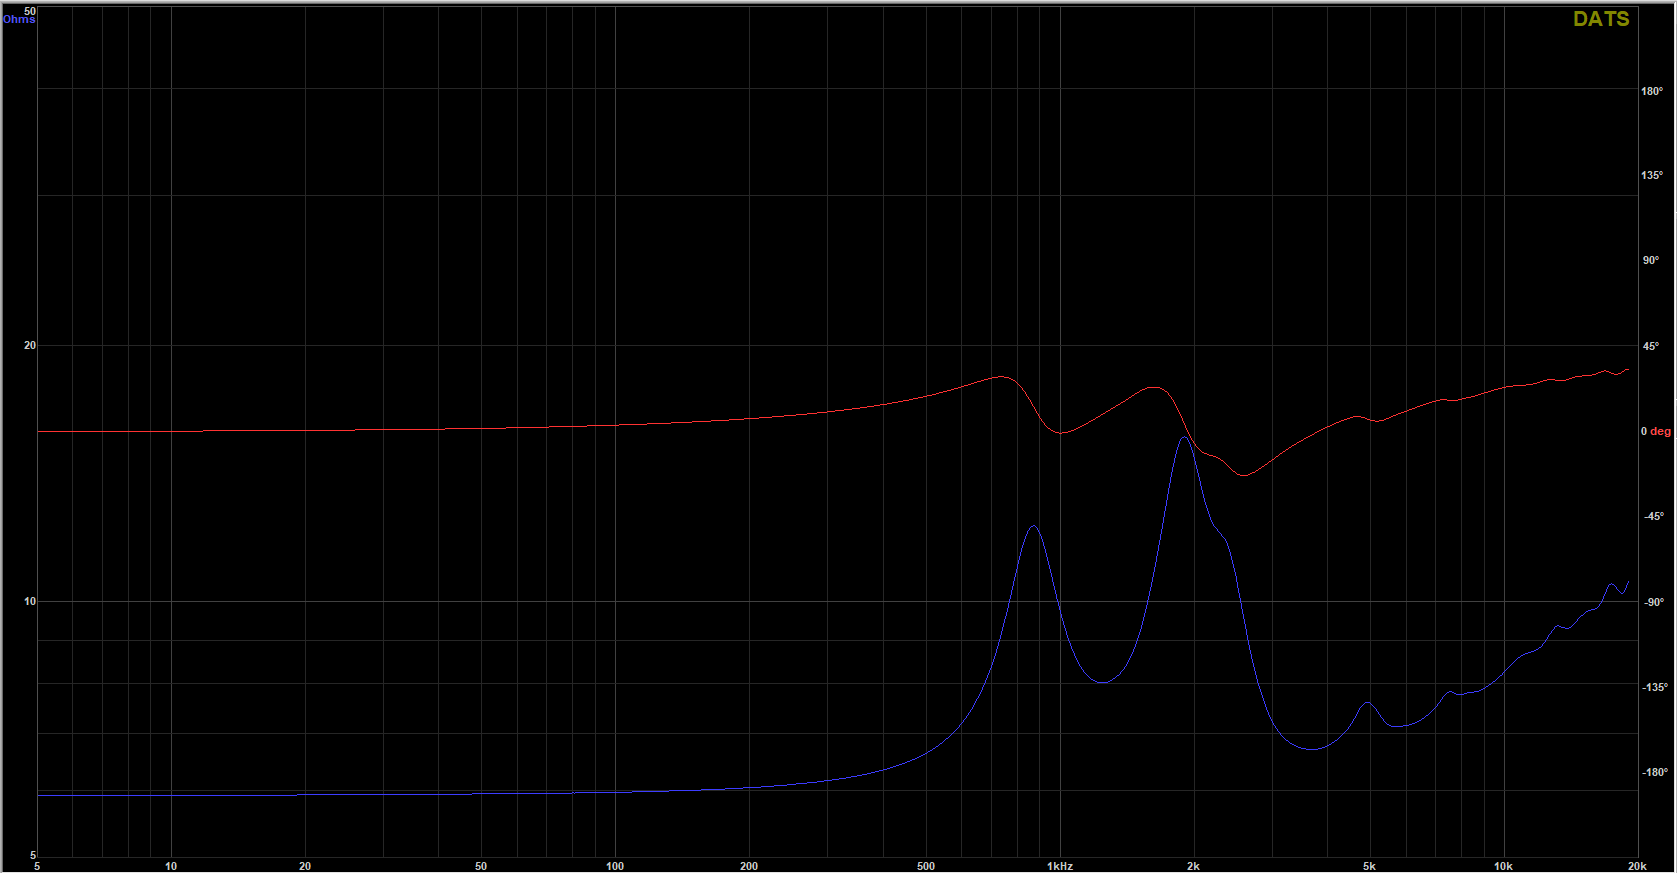
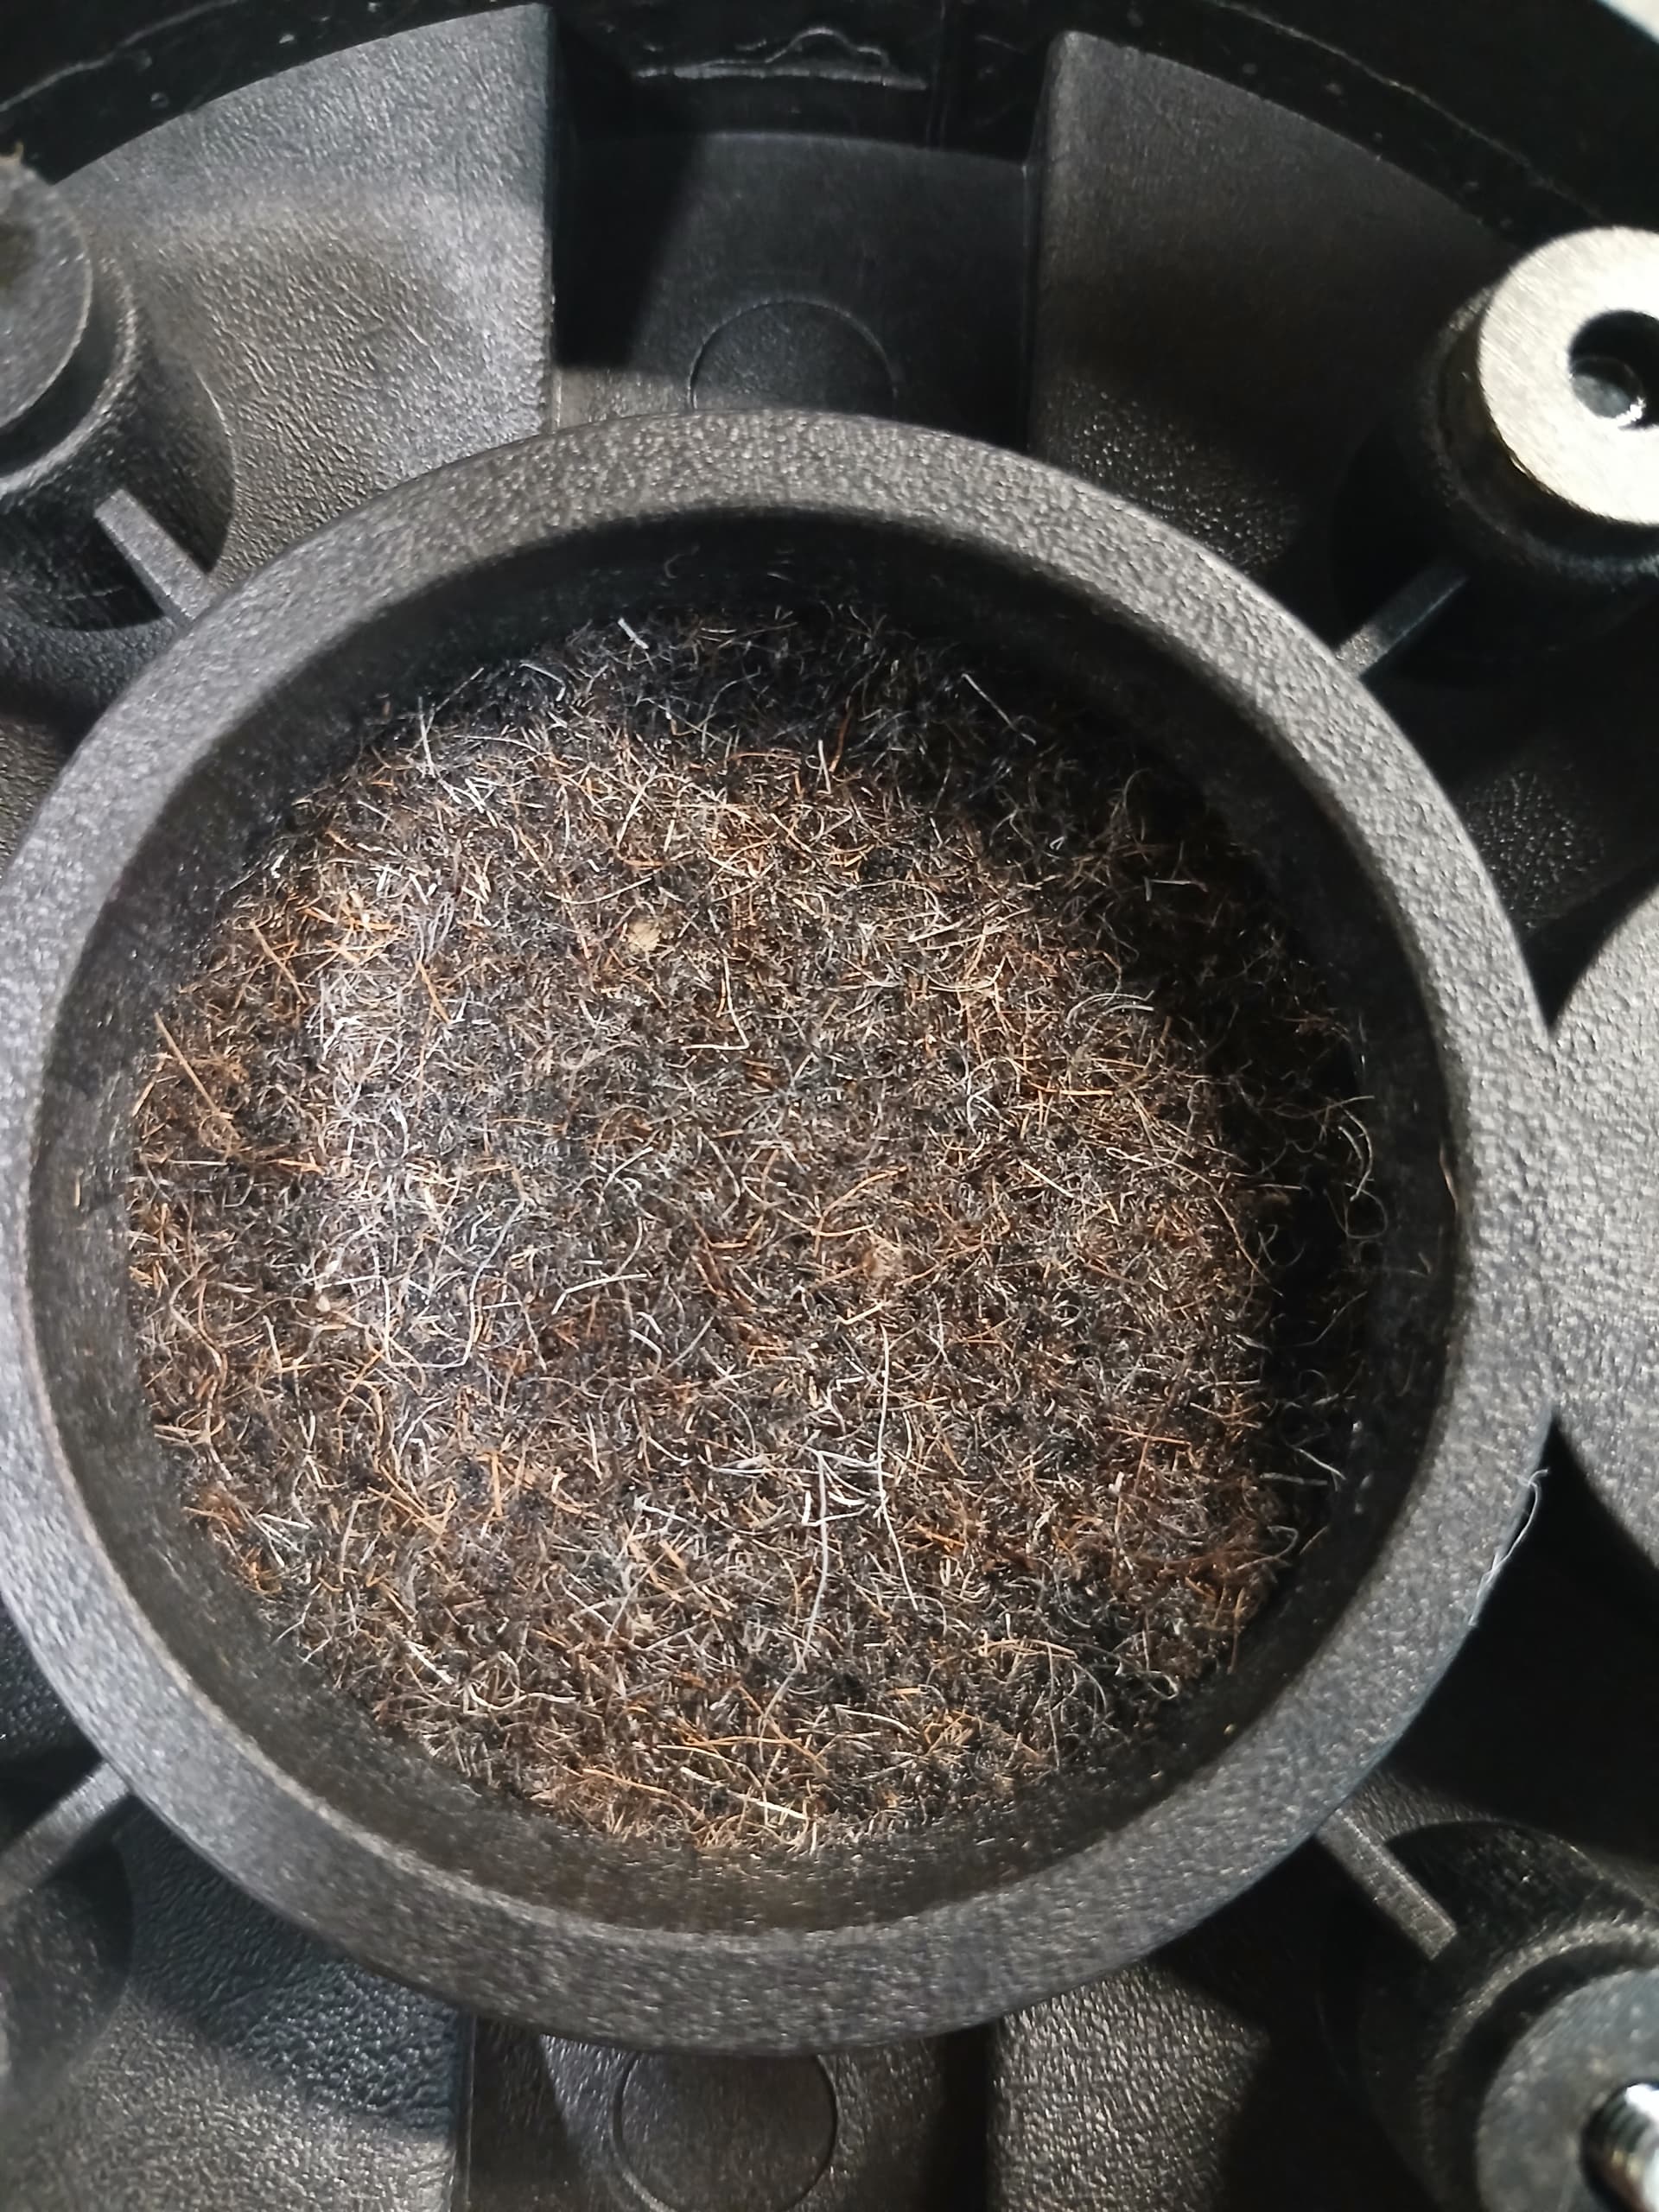
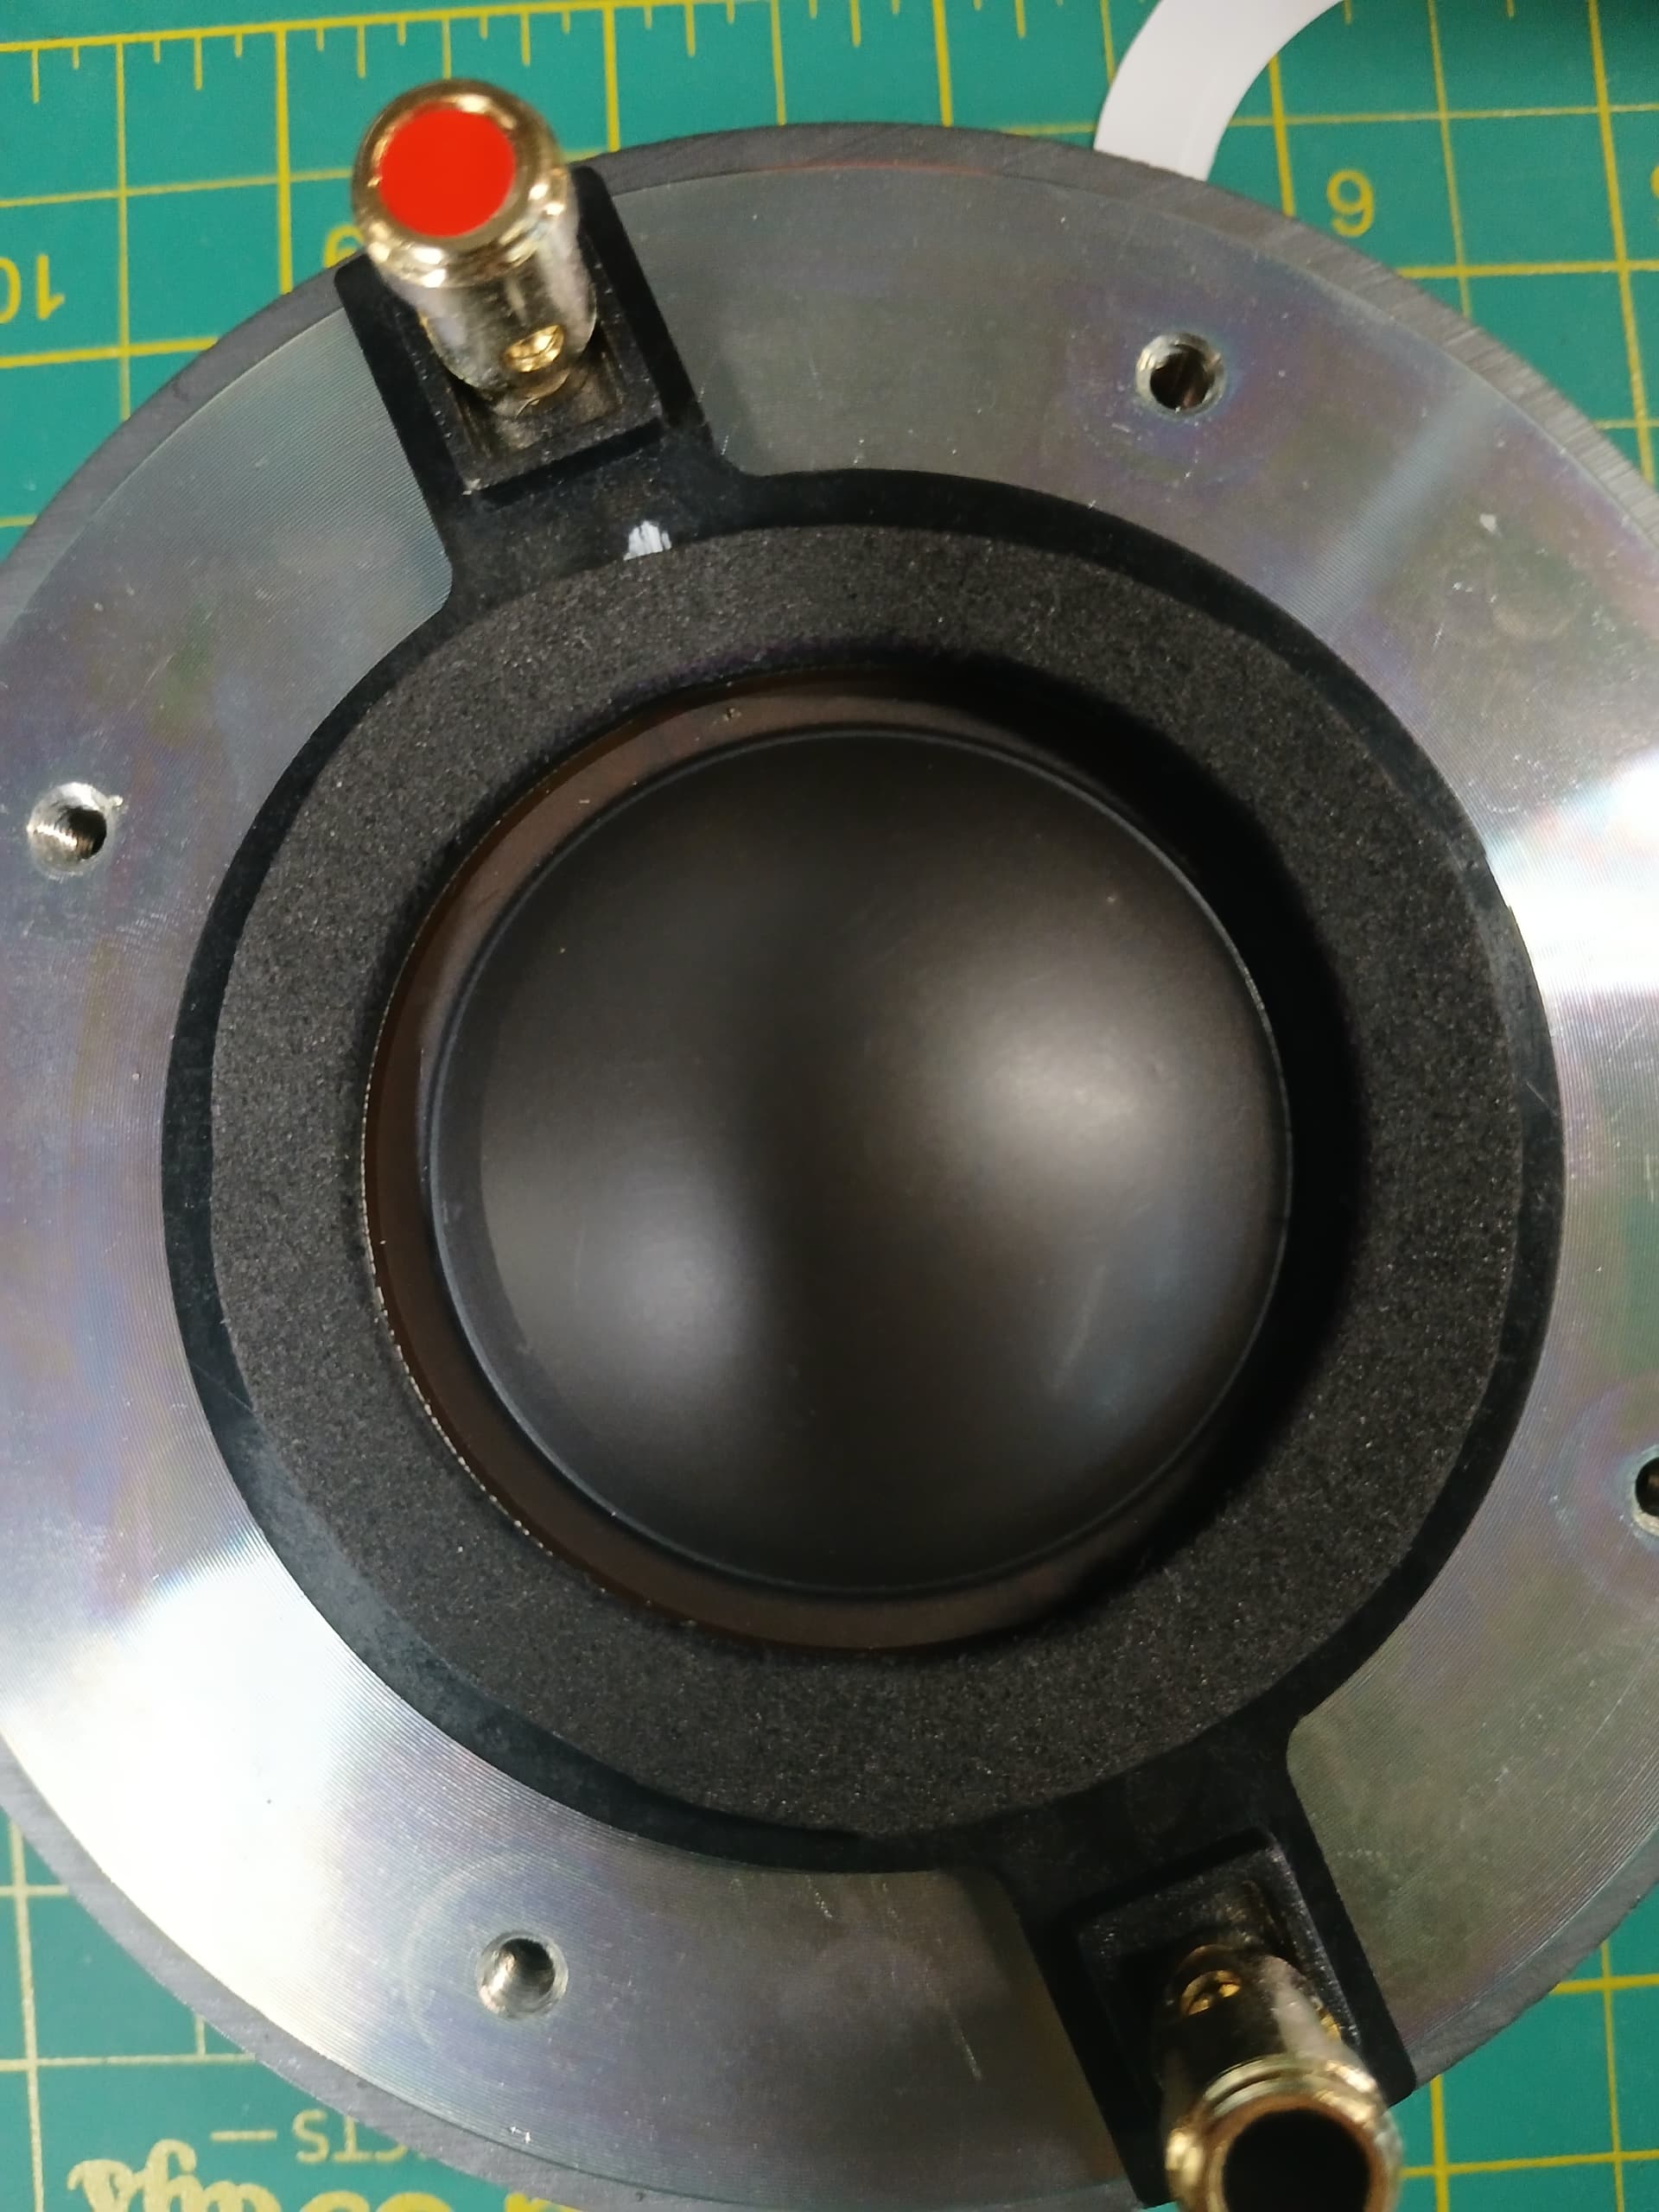
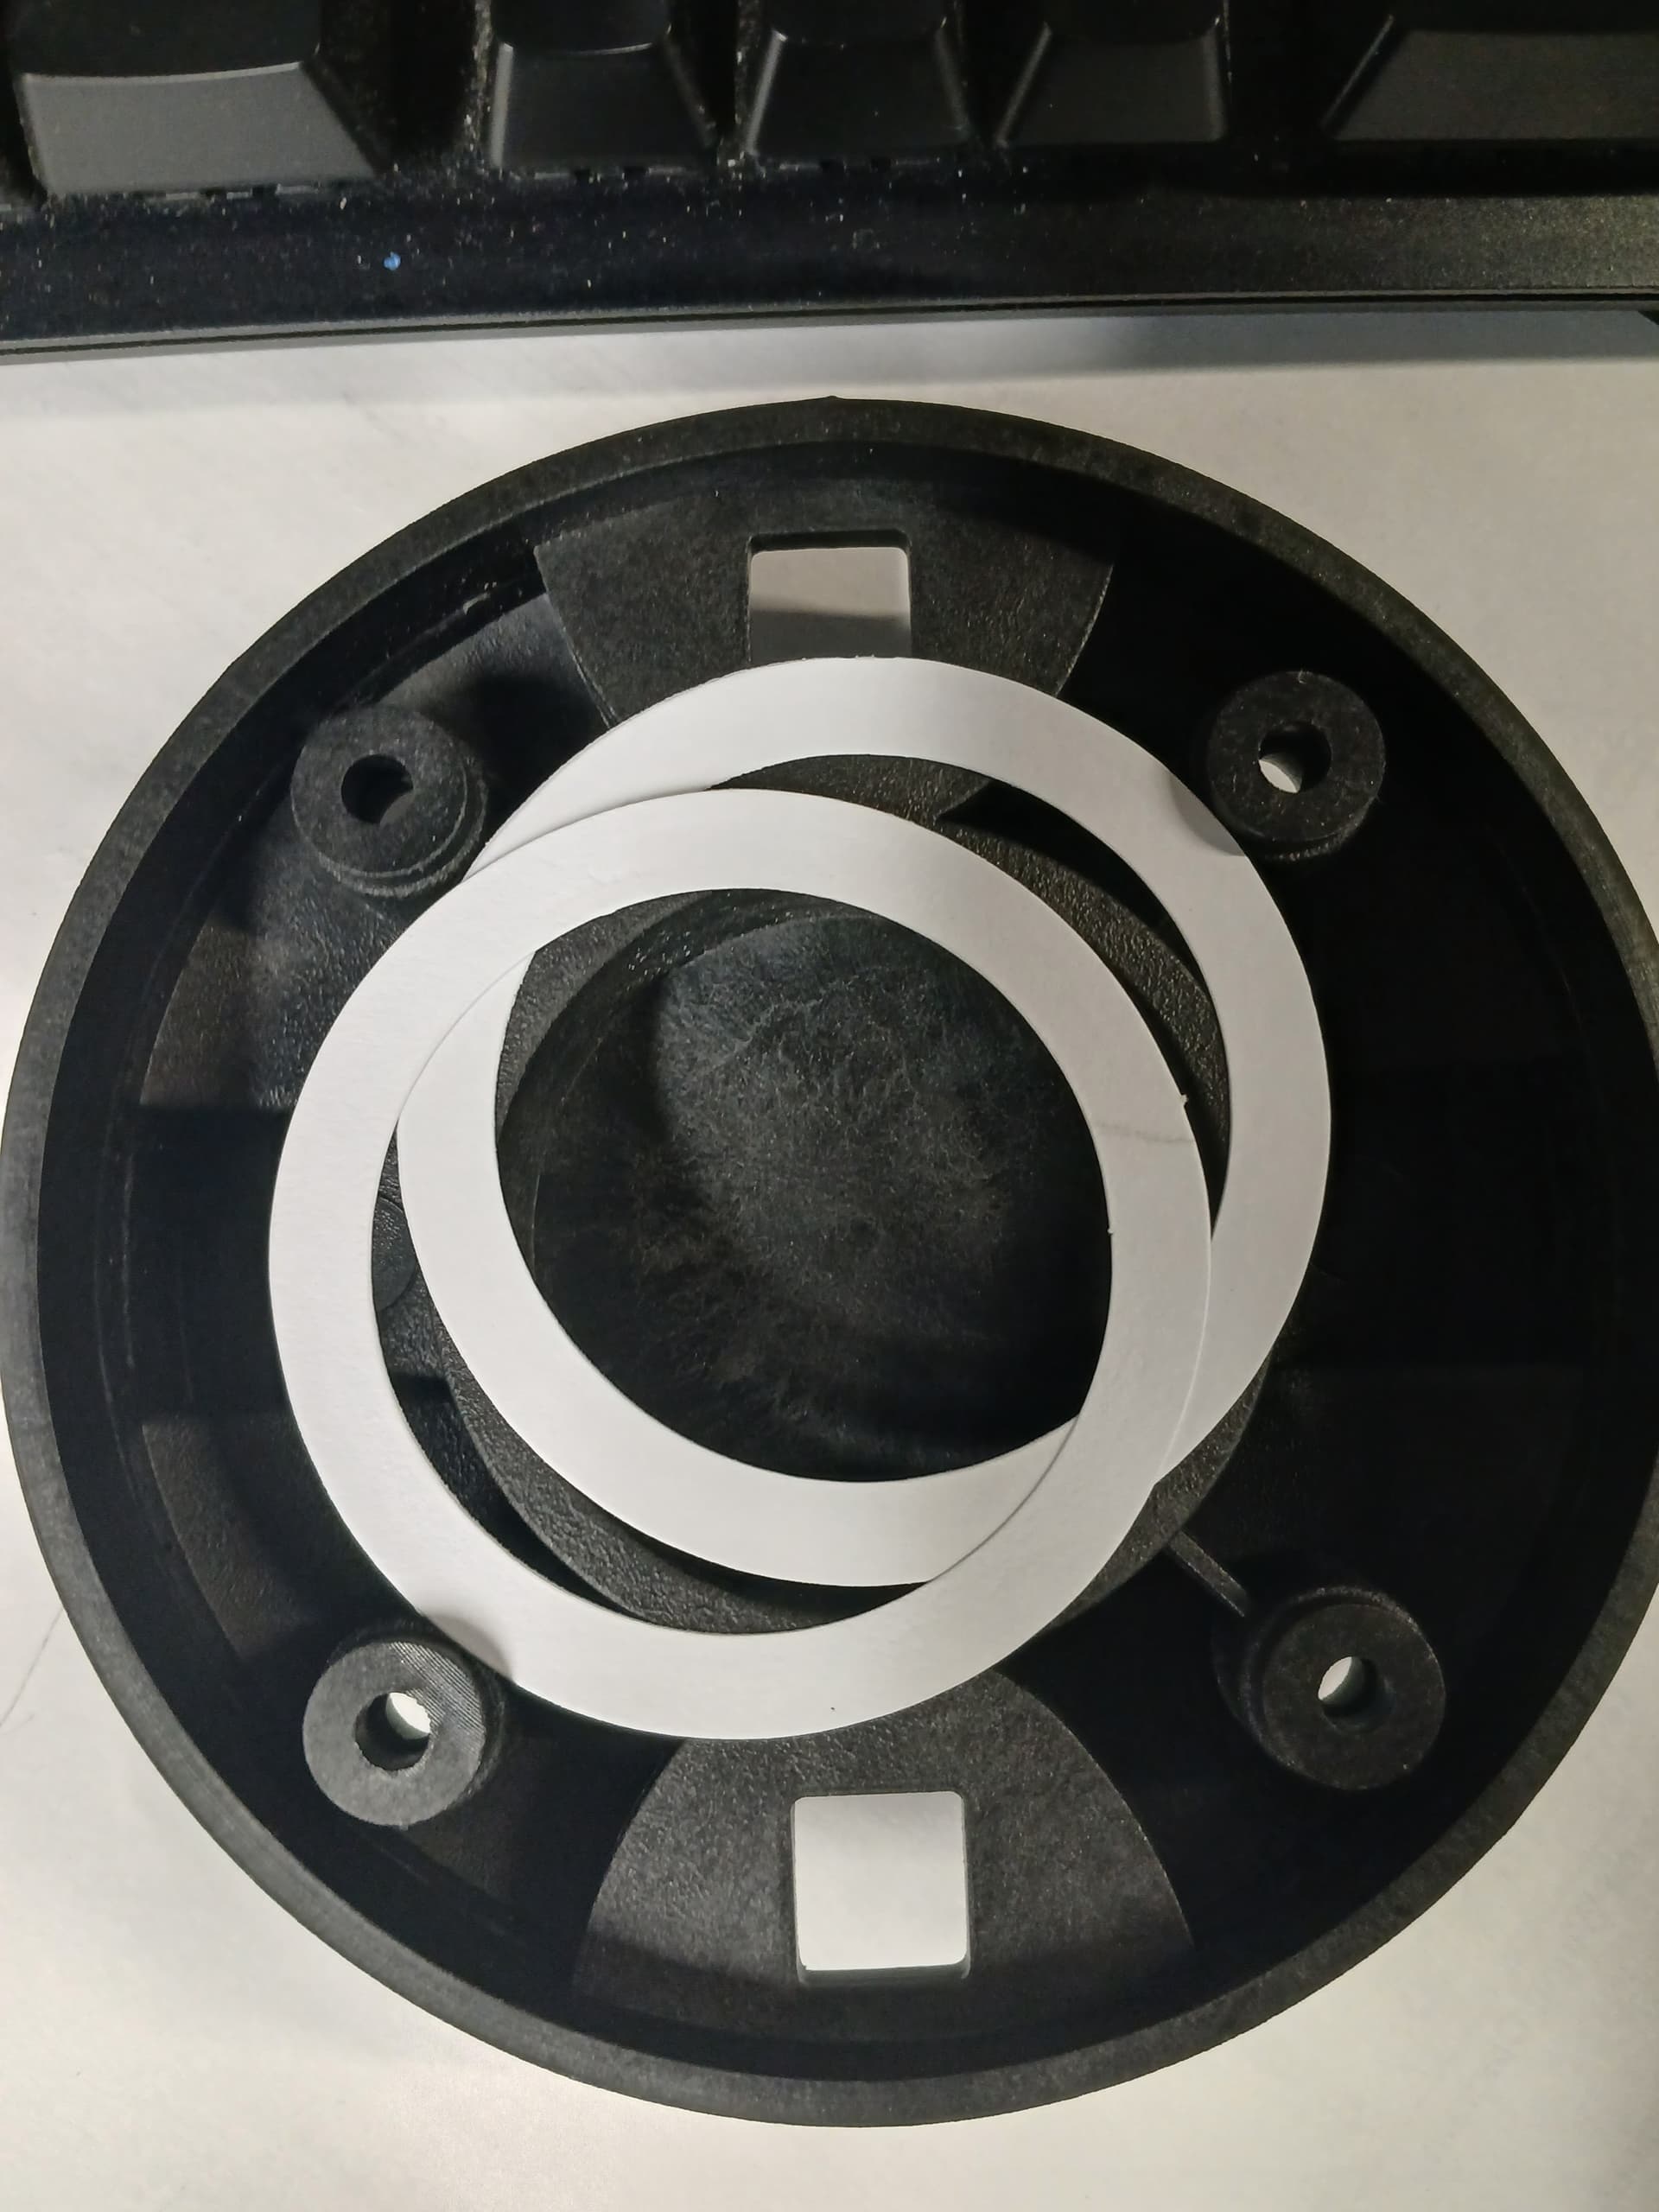
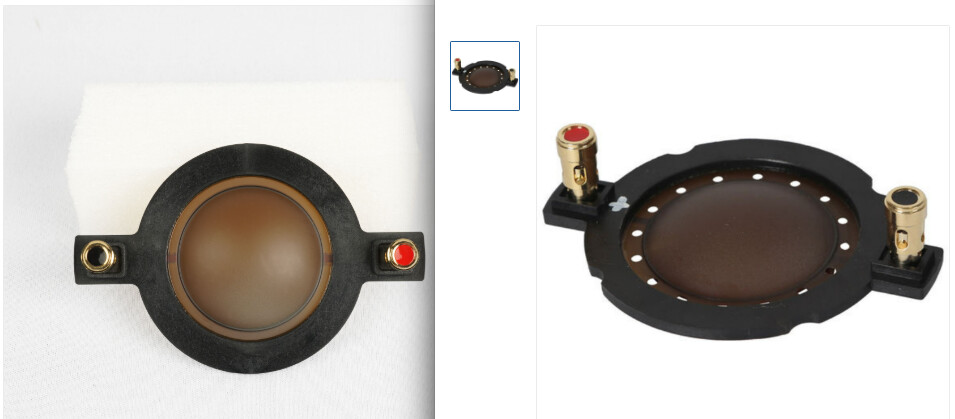
Let’s DIY! Opened the back to see that the back chamber is sealed by two peices of paper, we can do better. I got some craft foam and made a new gasket:
Spitballing: Drill and tap some holes so a small plastic disk can be screwed against the back, to later sandwich felt or foam in between. Then drill small holes through the disk and back cover. This creates an aperiodic vent when sandwiching the previously mentioned material. Finally glue a PVC end cap over it all for a secondary back chamber.
Look’s like the thick audio felt did the best job of smoothing the impedance, it is still far from what I would like to see.
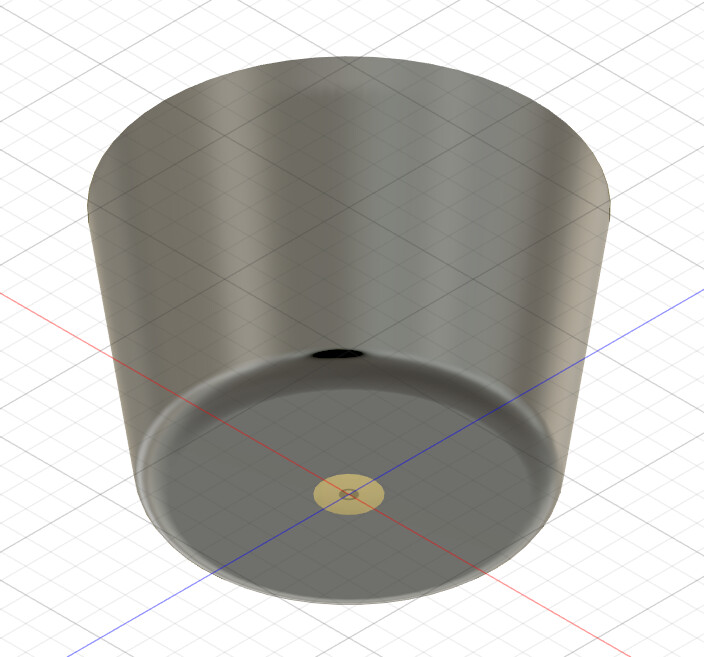
I might have to redesign a better housing and 3d print a few test subjects.
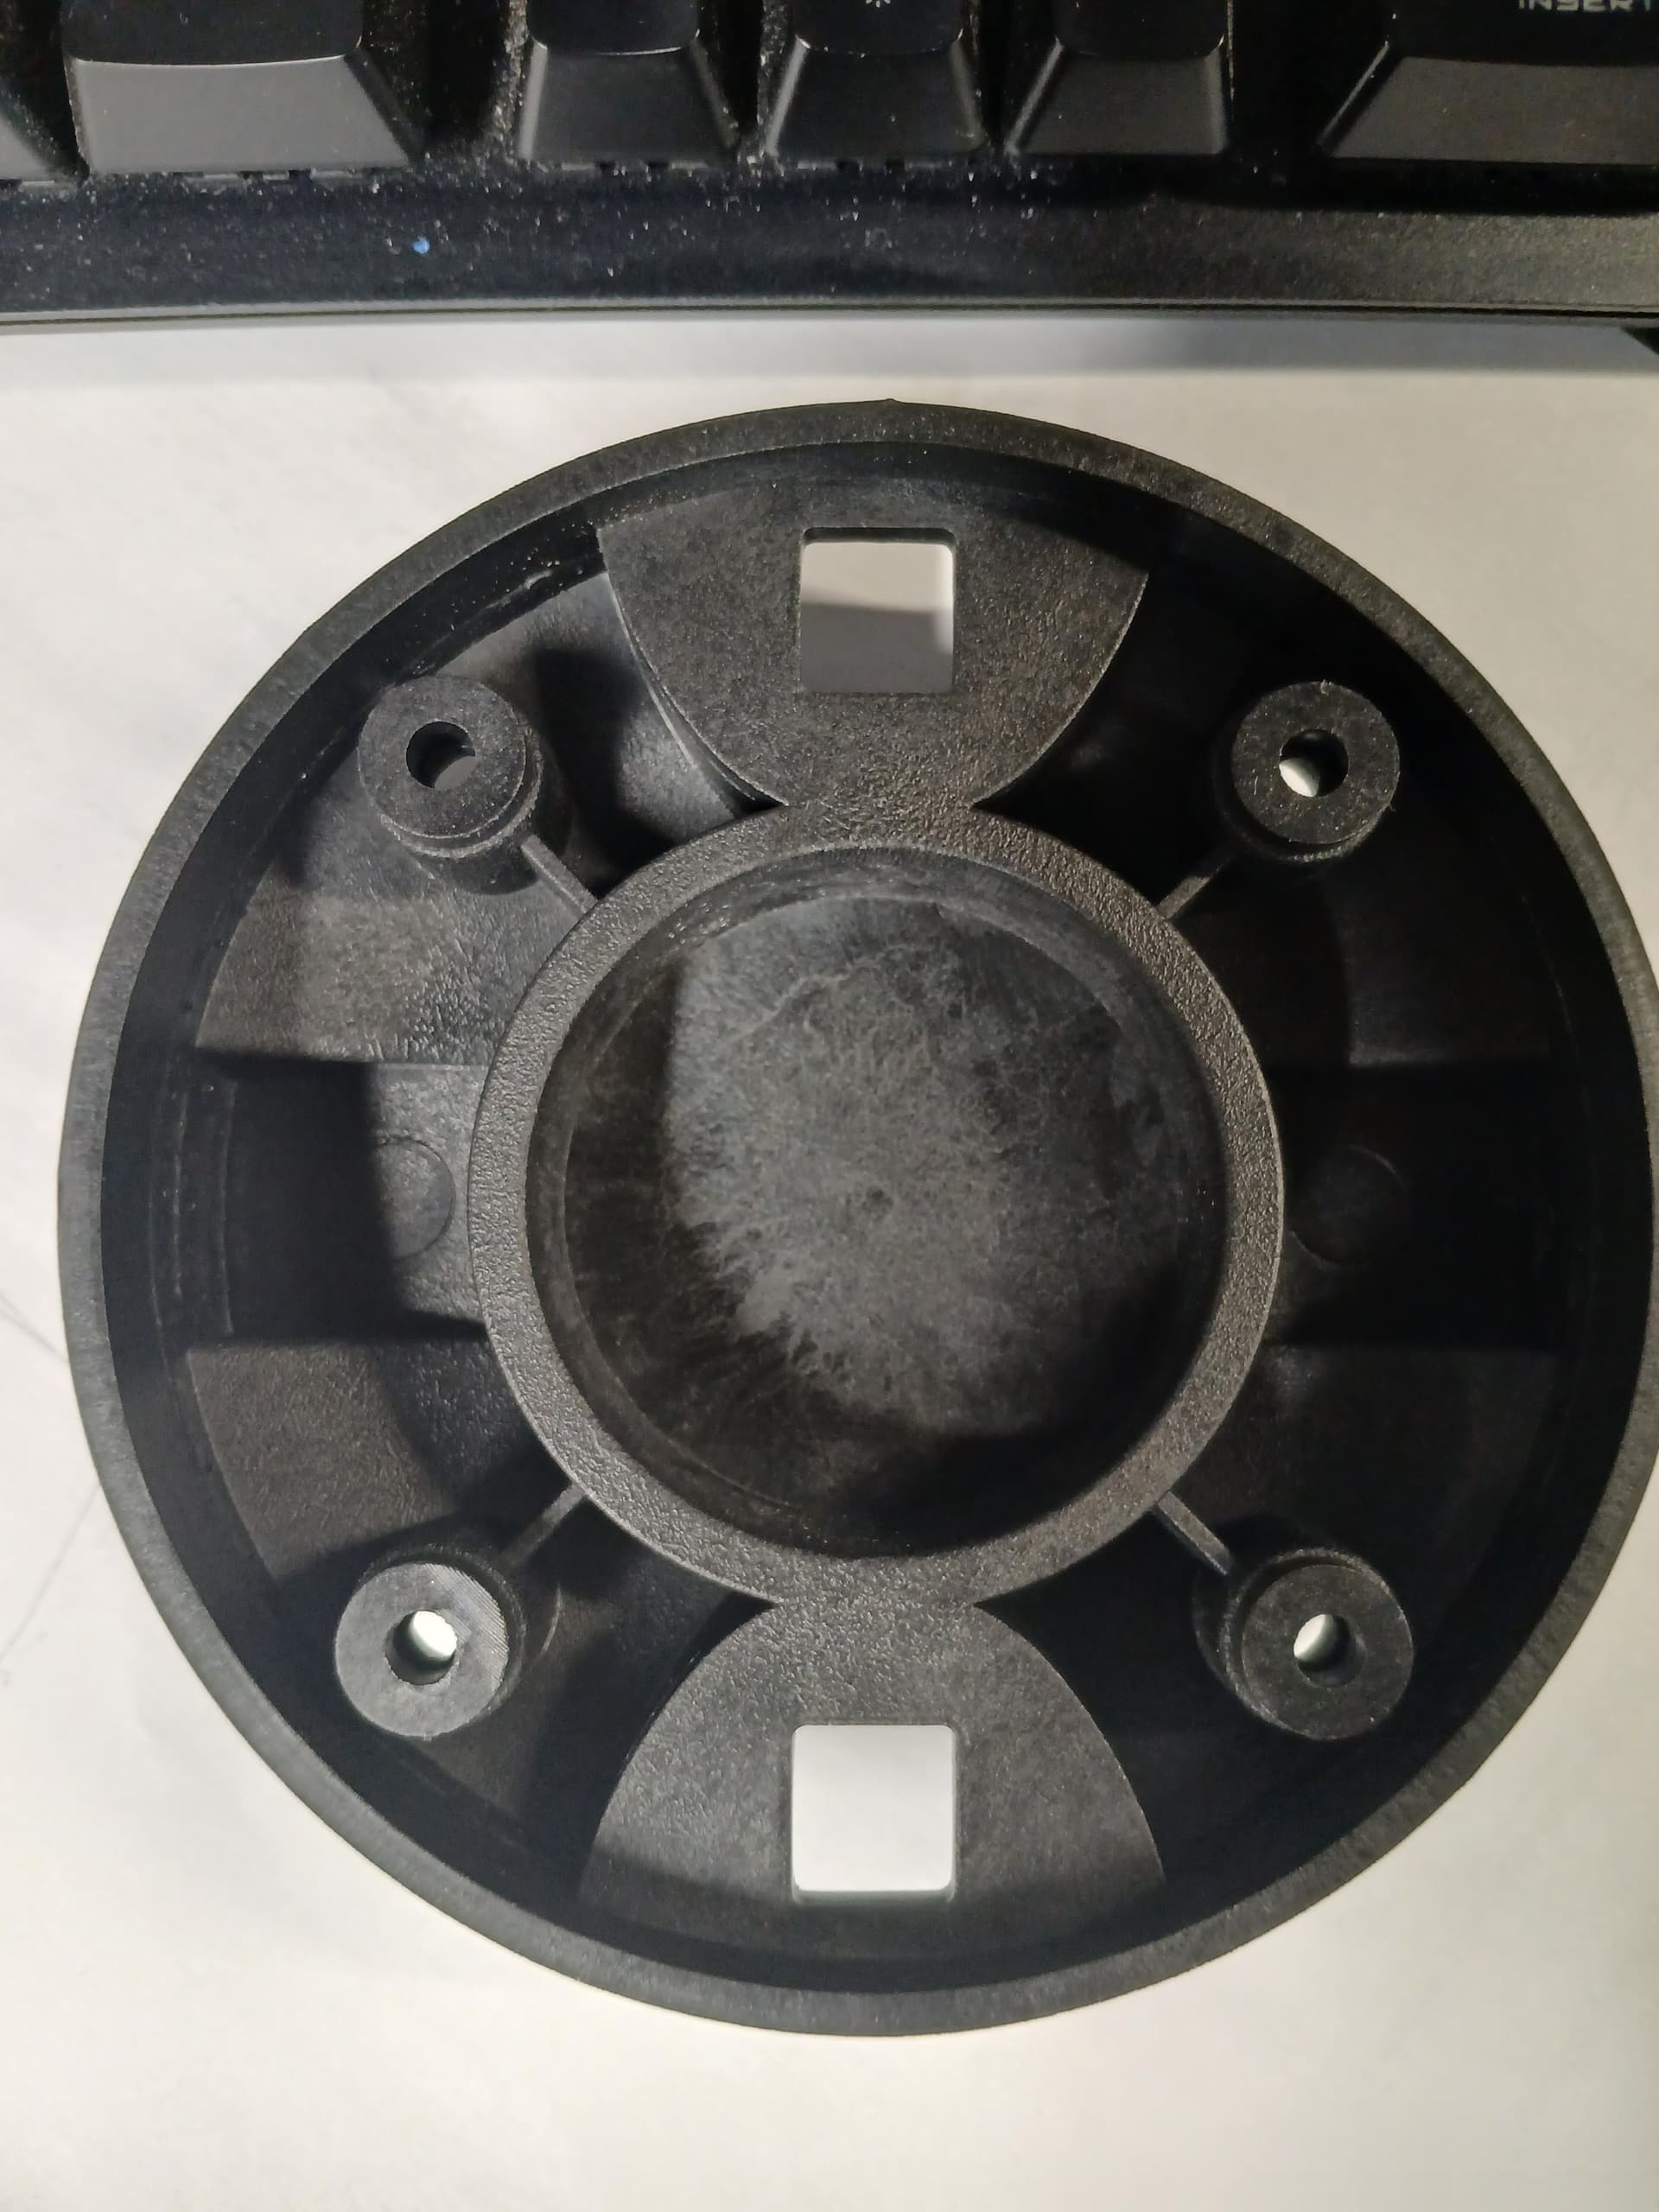
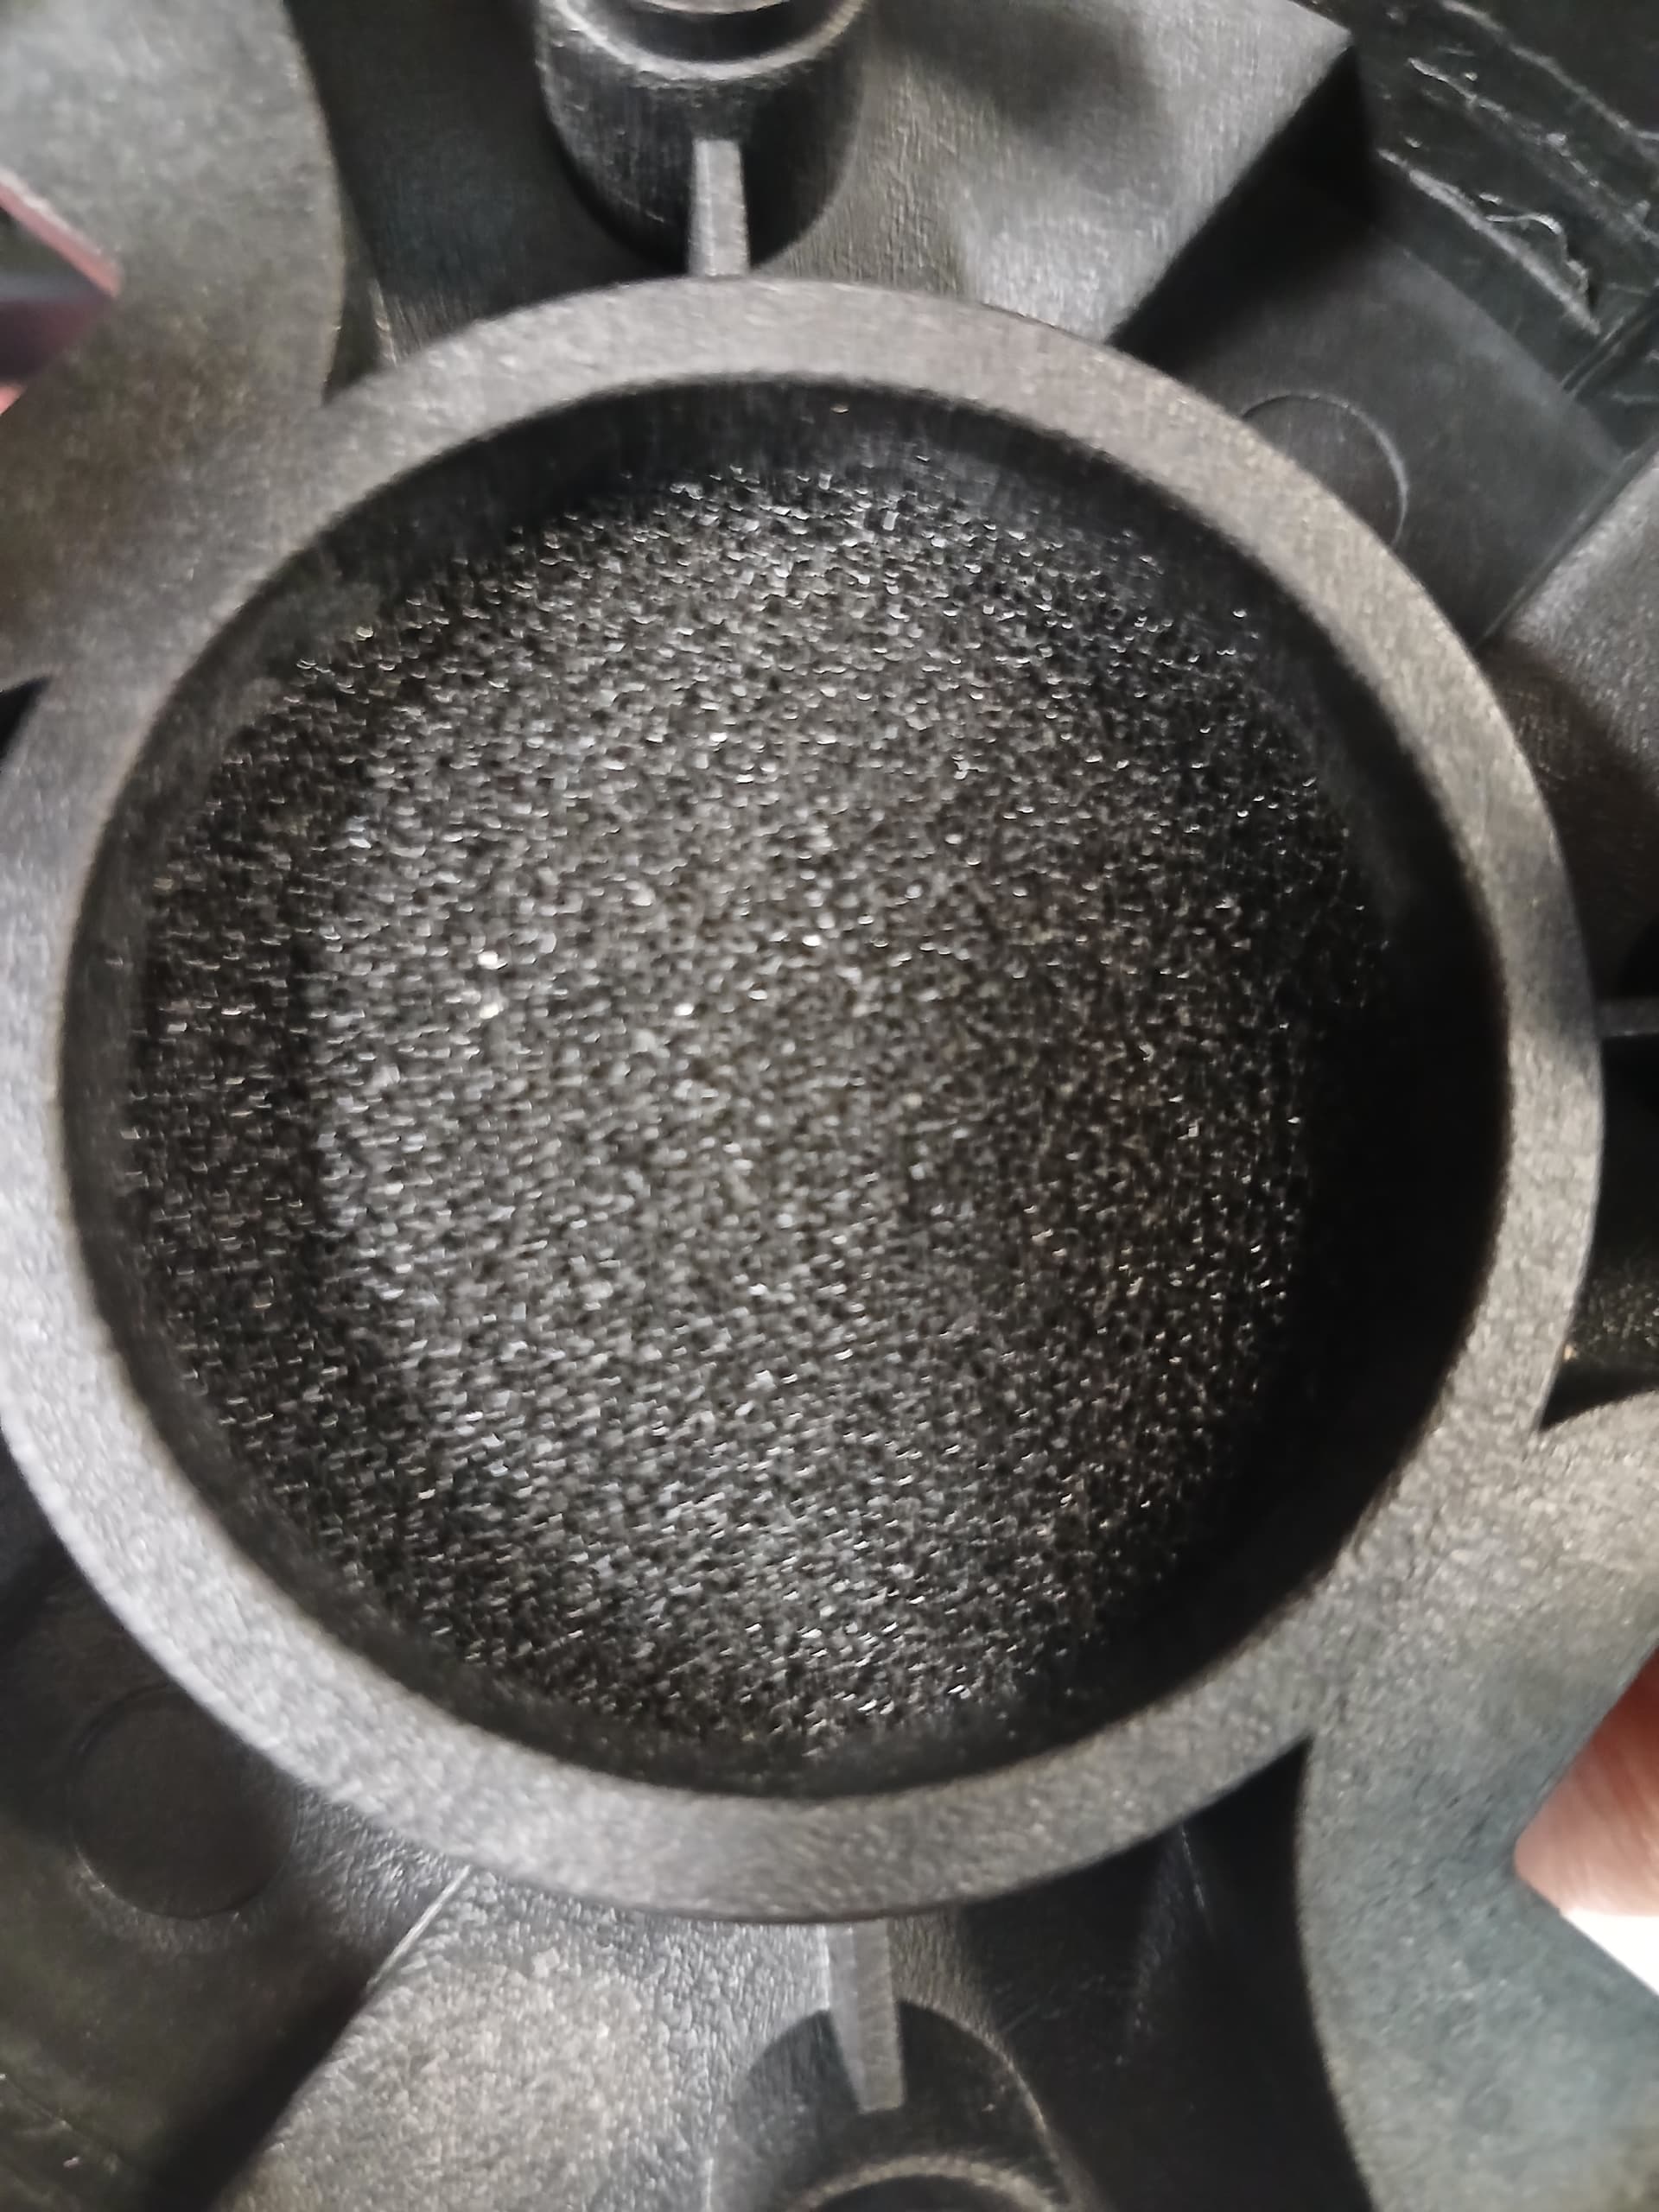
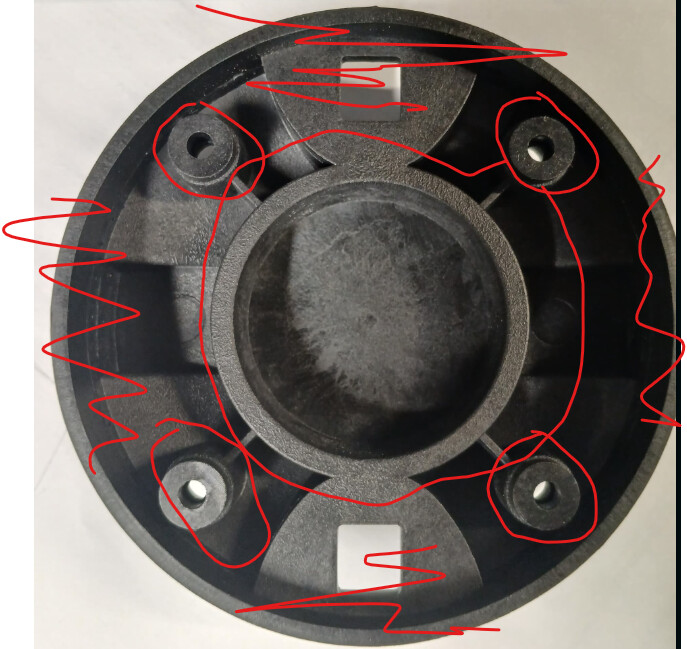
A lot of the back shell is wasted space. The center is the only chamber and the bolt holes are all that is really needed to hold it in place. I’ll probably start by just making a much larger chamber with thicker walls. The oem housing is fiberglass filled nylon, and it rings like a bell.
You mentioned the OEM housing material being less than ideal as far as resonance is concerned. I recently upgraded my 3d printer to an advanced materials unit, and Im getting information overload on all the different materials. Have you had good experience with any particular materials for their acoustic properties?
These back cups are glass reinforced and would ring with a tap of the finger. I used a small piece of magic eraser on the inside of the cup and a few pieces of dampening material on the outside.
TPU makes a great speaker spike/damper, PETG is a good allround filament. I have not found that any of the glass or carbon filled filiments are worth the extra work. I have used PETG rapid and pro versions and didnt feel they were better than any other good PETG.
Plan on any printed part needing some kind of dampening material.
Hey Ken, how good is TPU for load bearing? Having a slightly elastic spike would be great, but can 4 spikes of say 2” diameter hold up 100 pounds or so for a sub or large floor stander? I haven’t printed with TPU, though Ron had printed some speaker gasket.
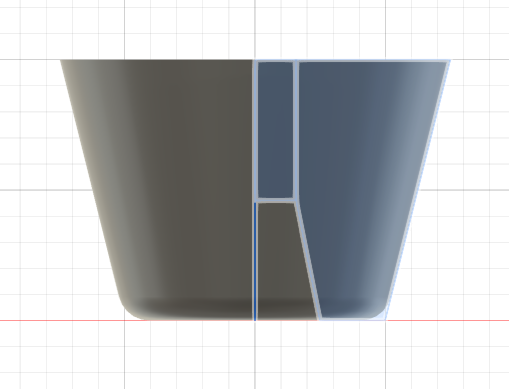
Re-drew the part so that it could be printed hollow. The light blue section shows a bit of the cut away. This should make it moure bouncy if you wanted. This is drawn for the heat insert.