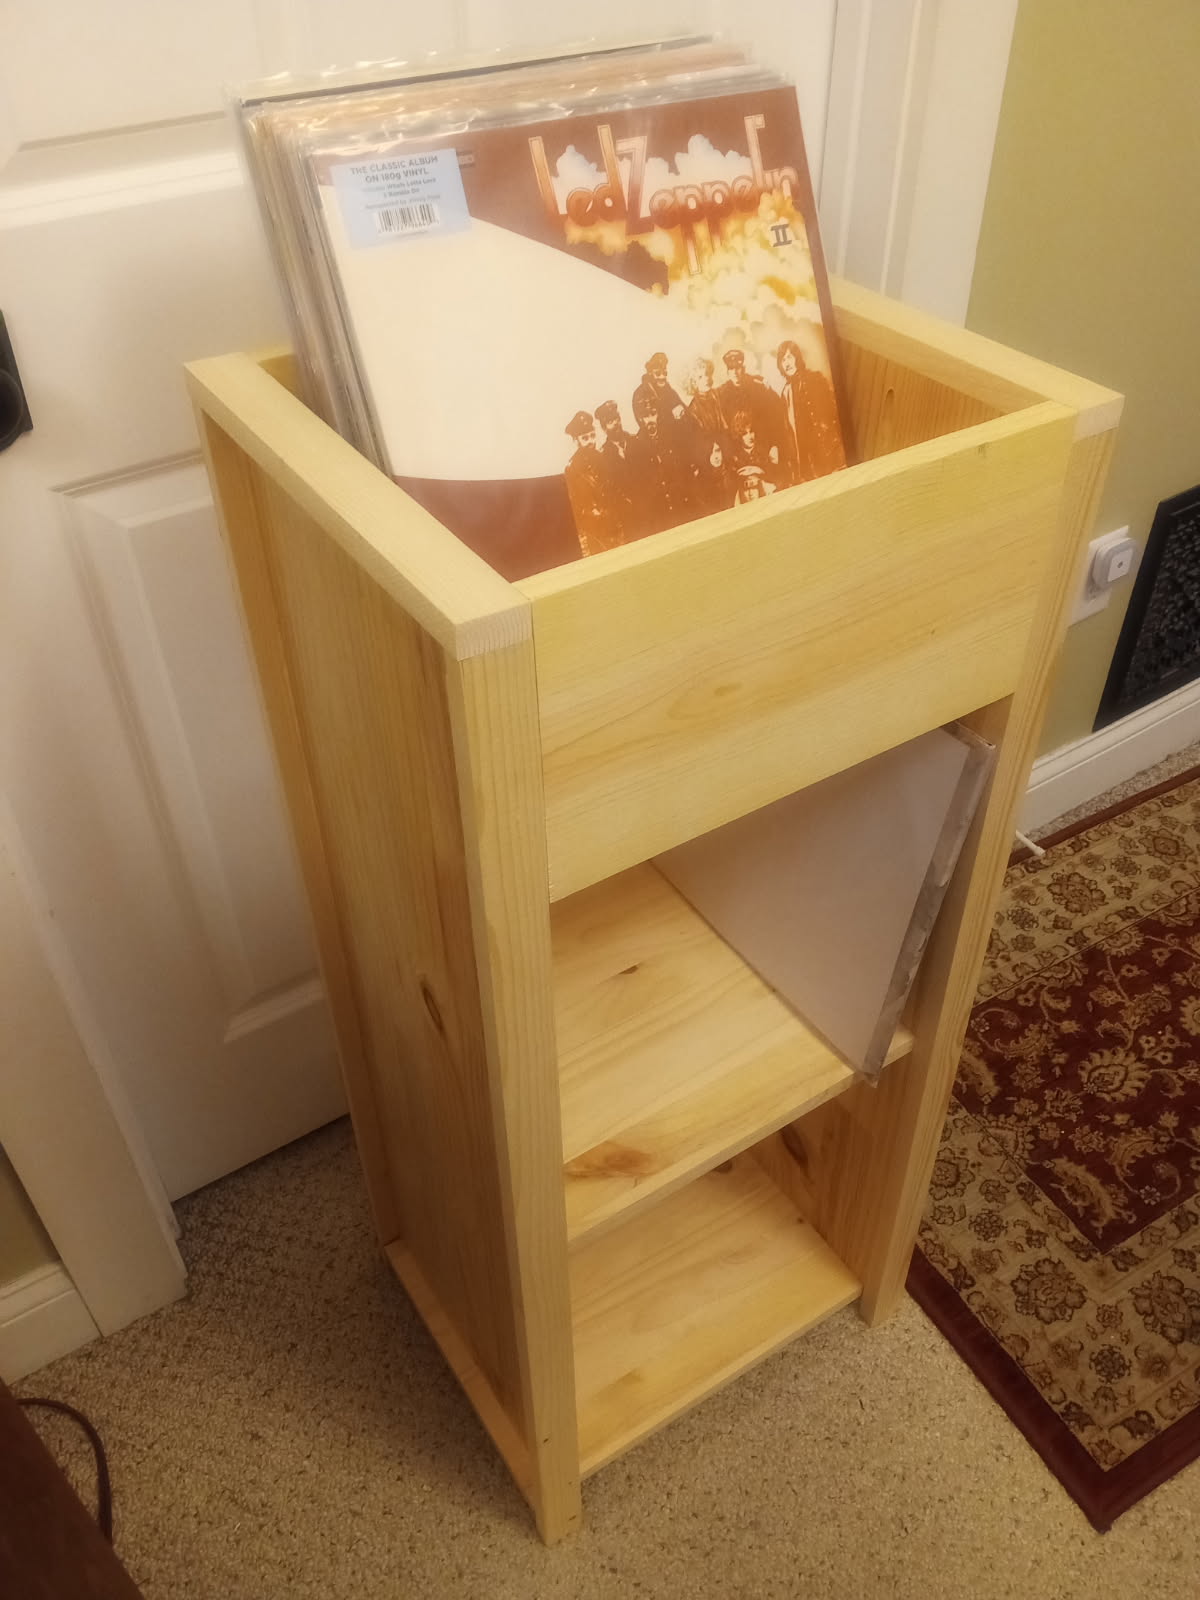
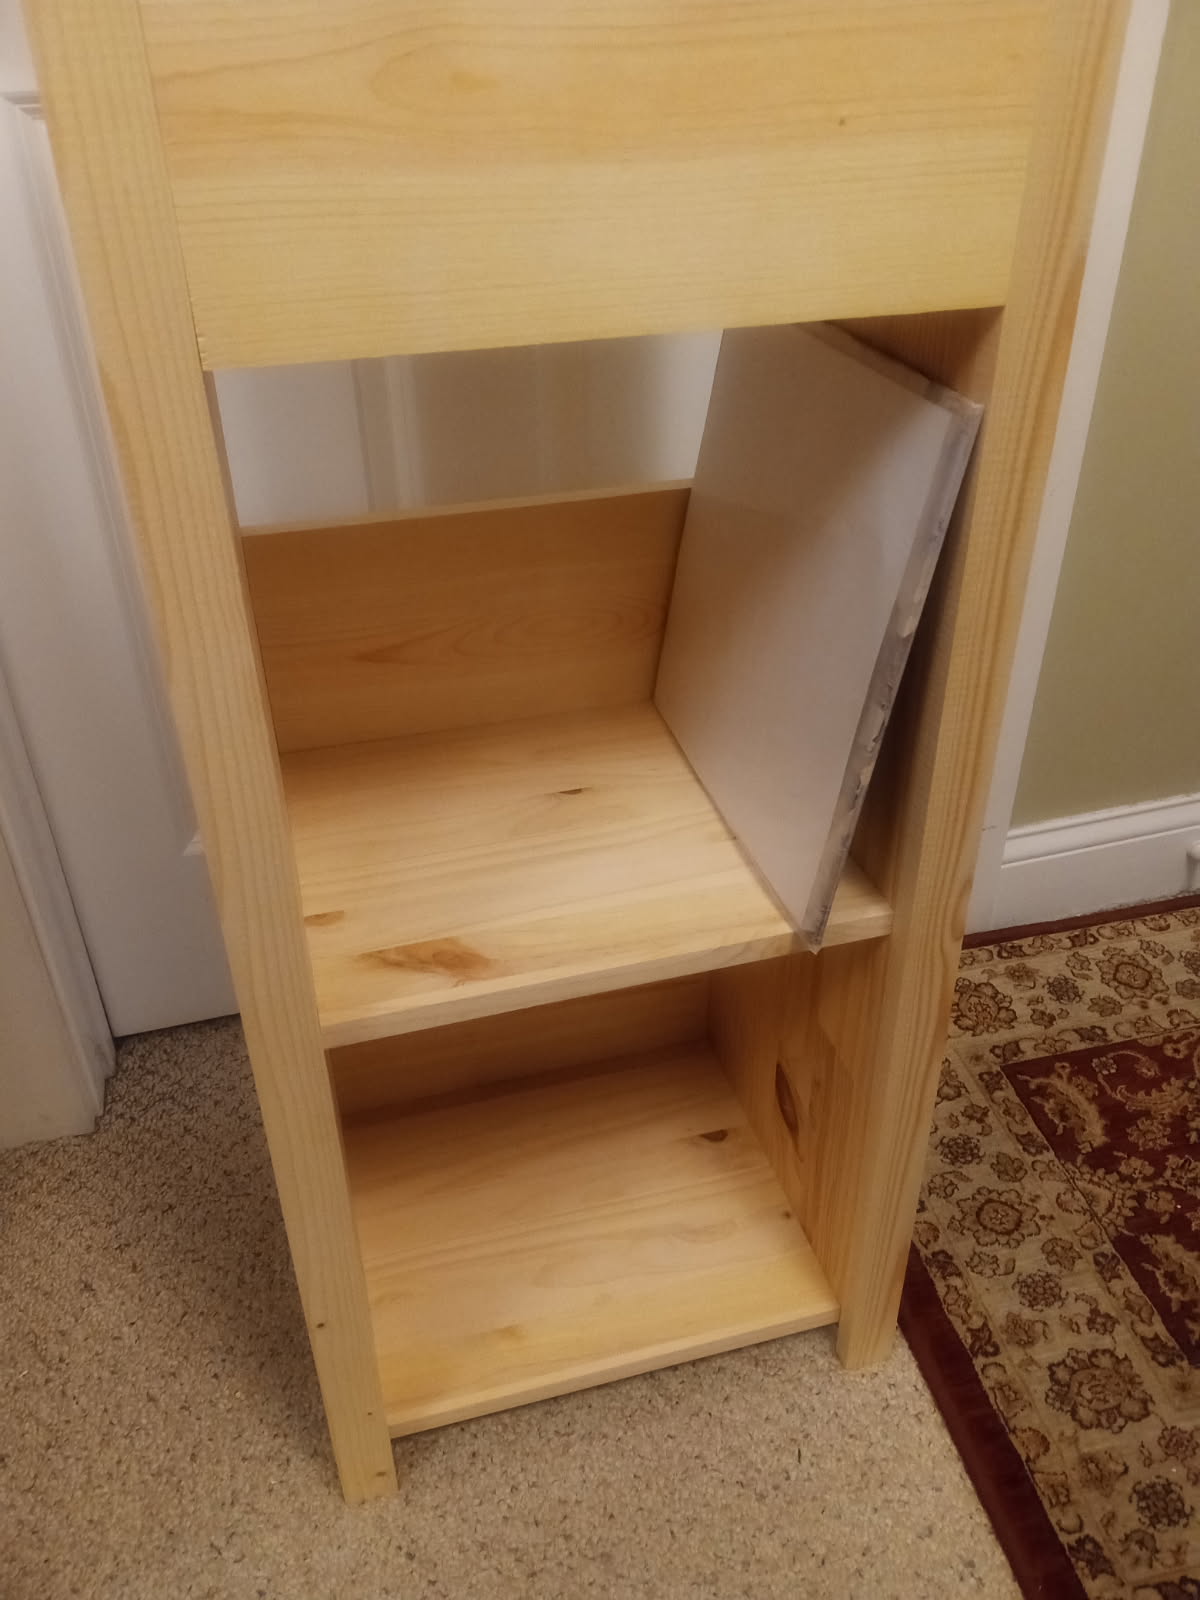
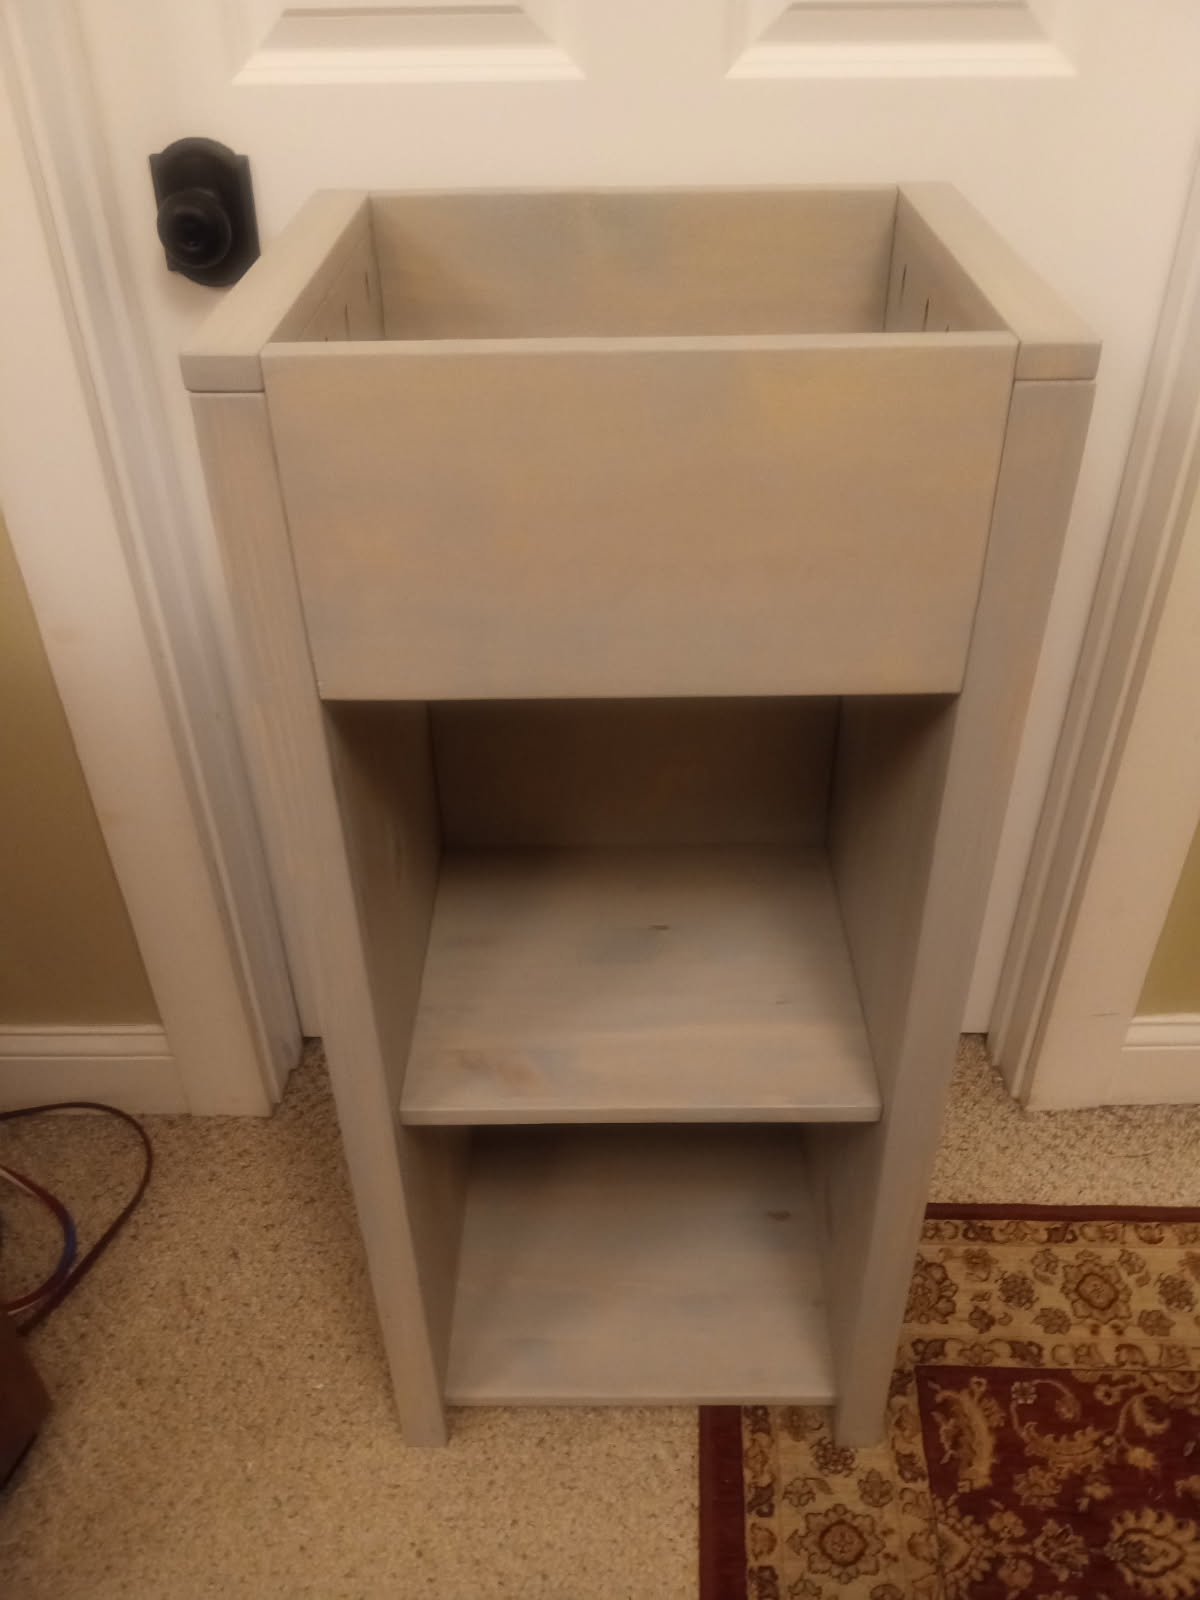
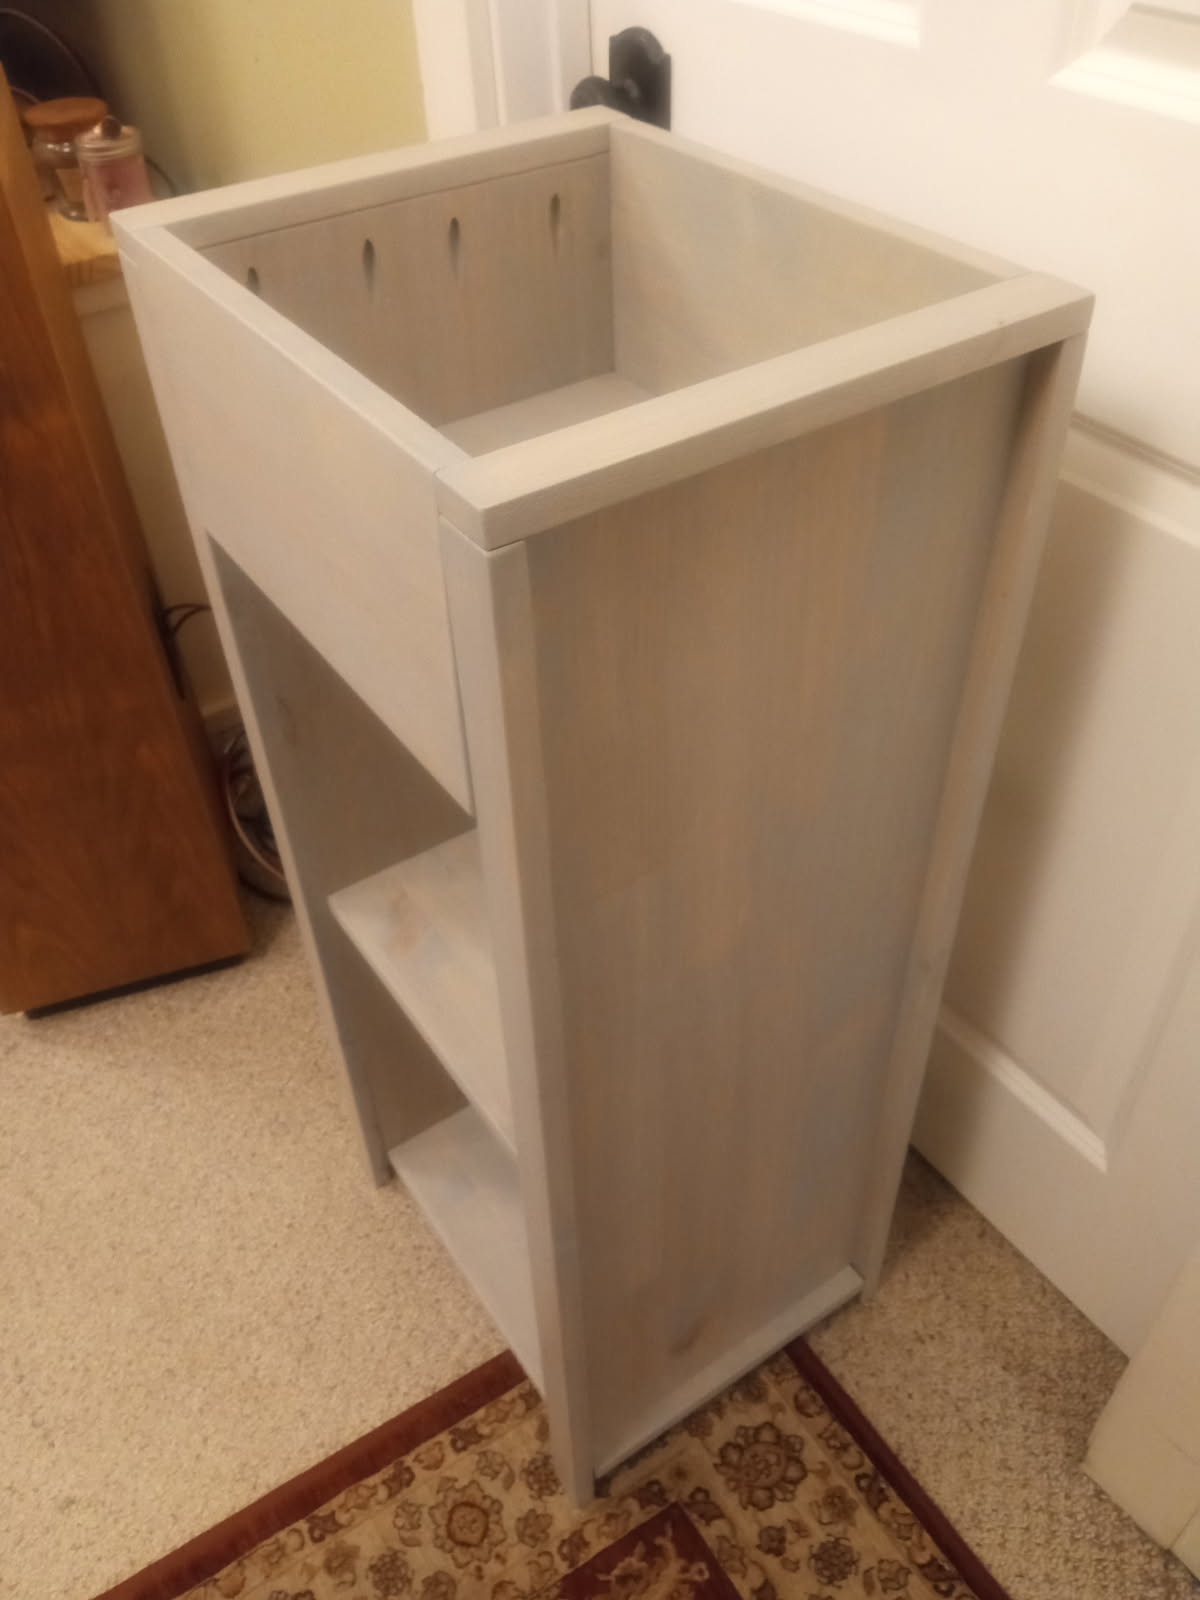
This next build would be for my father and his GF. I replaced their dieing bargain bin deck this Christmas and noticed a flat stack of records sitting next to it with no vertical storage available. They don’t have much space so something compact is critical. I’m looking for high storage density but with a spot for more convenient browsing through their most played stuff. And hoping for something that looks enough like an every day piece of furniture that it blends in a bit. So not too nice, but not too plain. Most of all it needs to be a simple and quick build, or I’ll drag my feet too much.
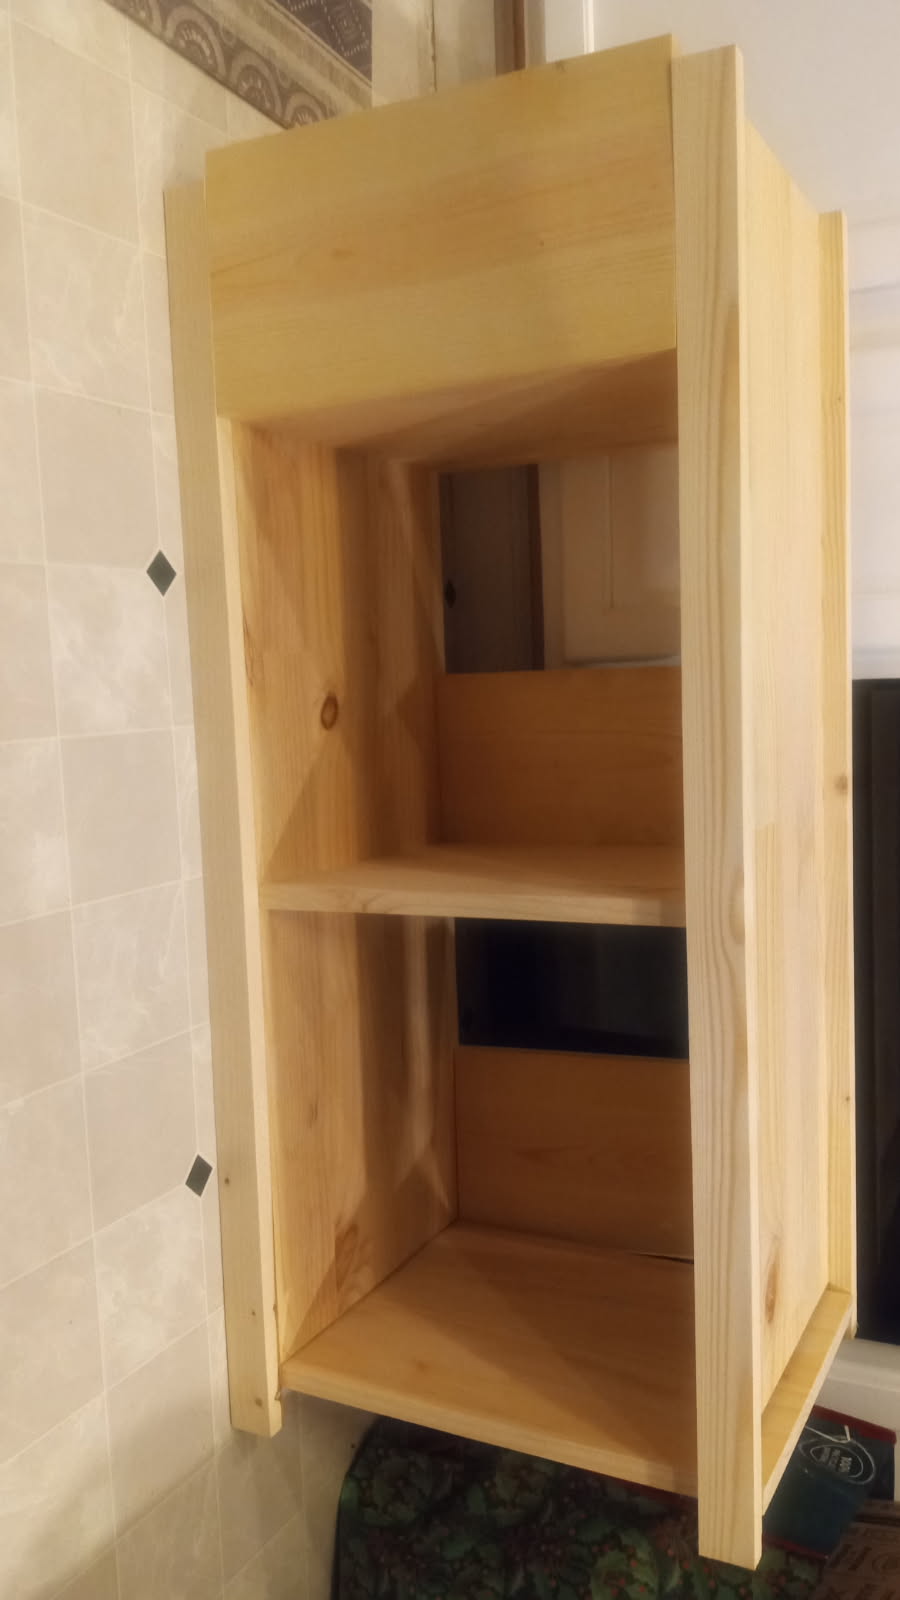
Overall dimensions of the unit itself would be 16.5" wide, 38" tall, 13.5" deep.
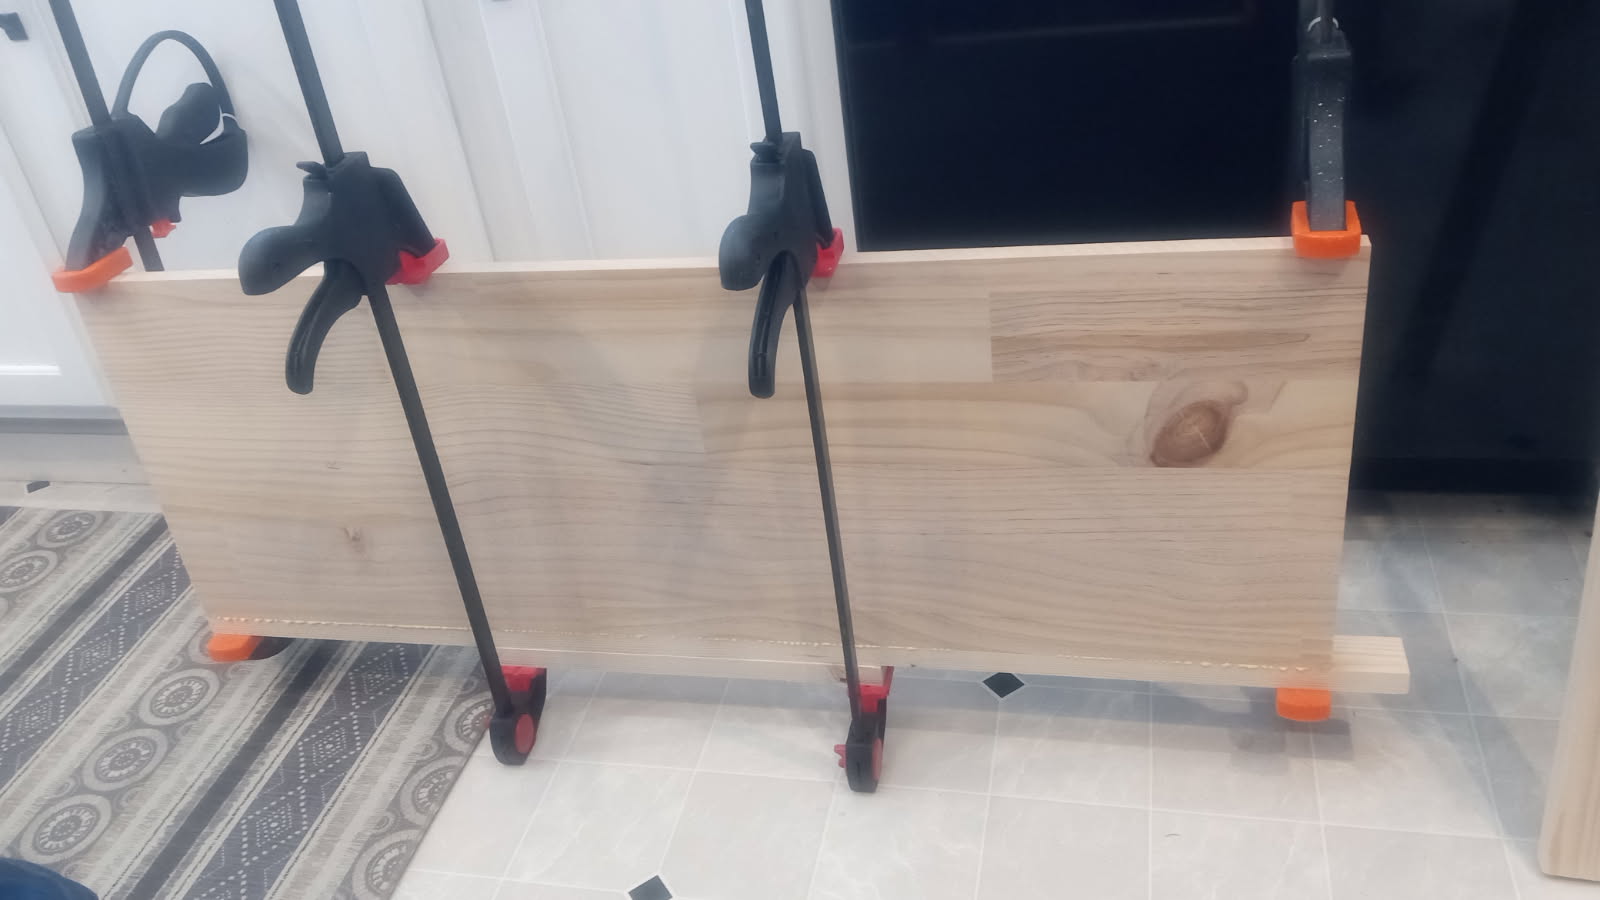
I plan to speed up the build by using available finished lumber widths. No ripping boards, just chop them down to needed lengths:
-12" wide edge-glued board for side panels and shelf bottoms
-1x8 boards for the top front/back and shelf back supports
-1x2 for the top sides, and front+back vertical supports/legs
Other ideas for speed build:
-It is small enough (no large weight-bearing spans) I might be able to use pocket screws only, no dowels. Makes assembly a bit more tricky though.
-The finish may end up more rustic.. Something like a distressed grey wash that I can do indoors. So simple hand-sanded edges may fly, instead of routing all the edges for a finer finish.
Right now they only have enough vinyl to fill the top section. But now they have a unit that plays well and is actually hooked to real speakers (instead of the dinky little onboard speaker). I’m hoping they use it more. And I’m looking forward to doing some weekend record store runs with them.
Currently still in the design phase though, so things may change. I sent the pics to him. We’ll see how it goes over. Feel free to make suggestions. I appreciate other viewpoints that could help tune my design ethos. Though alot of my build decisions end up heavily weighted by “juice vs squeeze” ratio.
Playing around with the design in my head a bit. I realized the same design could be made for a turntable up top, with a spot for a preamp and small amp just below. would only need to omit a few pieces and add a flat top. Funny enough the top would almost exactly match the dimensions of my AT-LPW40WN, and probably many others.
I picked up the lumber this evening. Sorted through about 100 pretzels to find a couple straight 1x2s. The 1x8 “quality” boards only had firewood left so I sifted through the “standard” grade ones. Scored one that is knot free, relatively straight with no cup or excessive twist. That was certainly the unicorn in the pile. I usually go with the “select” stuff, as that is orders of magnitude better quality. But you certainly pay for it (~3x-3.5x the price!). I didn’t think this project warranted it. The finish will be a bit rustic anyway.
New job has me either in heated machinist shops (0 humidity in winter) or outside loading/unloading the truck out in the cold wind. I get home to any exposed skin burning from what seems to be windburn. Realy doesn’t make me want to lug the miter saw out in the cold wind again to make the cuts when I get home in the evening. Ugh. I guess this is waiting for a reasonable weather weekend.
Sun, Overcast, or Cloudy >when outdoors for any real period of time, use sunscreen and/or face cream with sunblock. I volunteer a day a week at the ski resort and on really cold dayz - sunny or not I can look like a drunken critter by the end of a day
I drug the miter saw out in 20deg today to get started . I miscut the pieces that will go on the sides up top. They are the smallest pieces, so fortunately the least $ to redo.
I had some slight pause for using only glue on these joints. But I know I shouldn’t worry about it. Alot of the odd racking forces will be transmitted directly to the legs via the 1x8 boards at the front and back. The glue joints should mostly just see the static weight of the vinyl.
Yeah the cold was distracting enough to force a mistake. I picked up a 1x2 this afternoon to make new pieces but temps are falling.. to single digit tonight . I think I’ll wait for Wednesday when it will be above freezing.
I also picked up some Zinsser grey primer to try a grey wash with. I might lighten it up a bit with some white. Debating on what to seal it with. Currently thinking Watco spray lacquer (satin). I can spray it outside and immediately bring it in to dry. The smell is a little strong, but better than oil based poly. I have had bubbling issues with spray-can water based poly.
That was 18x up top. One I think was a double. So I’d guess a good capacity estimate would be 40x up top and 50x on each lower shelf. However I have the records outside of the covers in their own sleeve and all in another clear sleeve. If the records were in the cover and without an outer sleeve then might be able to squeeze closer to 200x total in this design. Decent for a 16.5" x 13.5" footprint and flipthrough top storage.
I envisioned the usage of it to be: Dense archival storage in the lower shelves. “Most played” kept up top. Pop a squat next to it and sort through the lower sections to find what you might want to listen to for the afternoon/evening and add that up top for easier browsing when the time comes.
I am kicking around the idea to maybe build a couple more and see if my local record store would be interested in selling them.
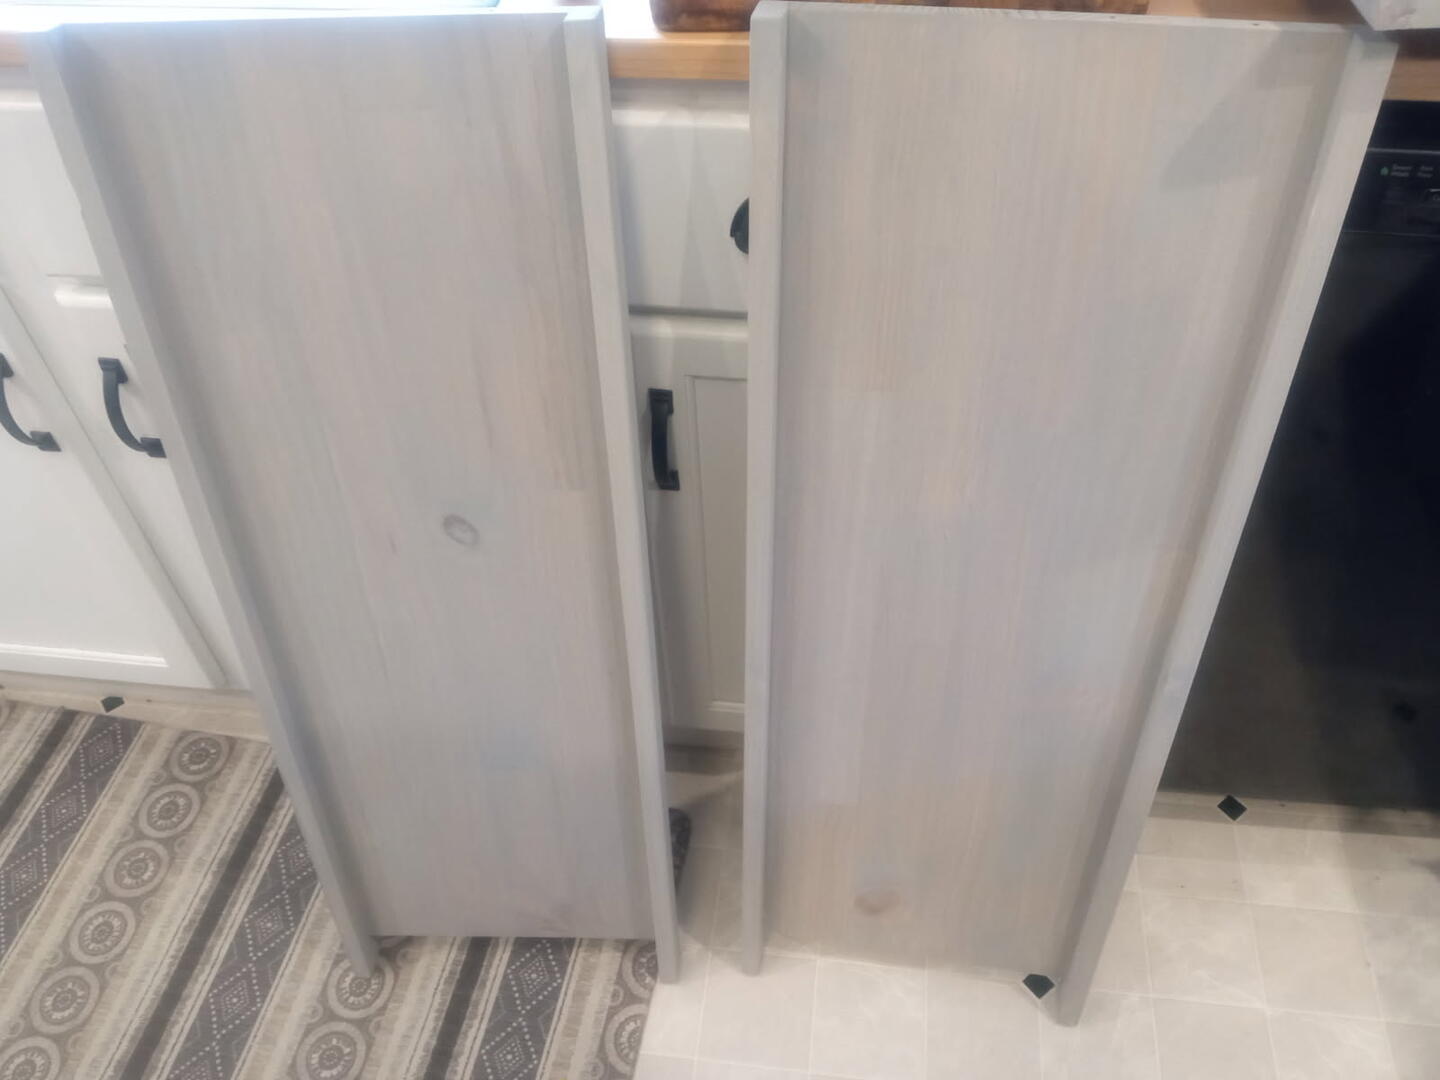
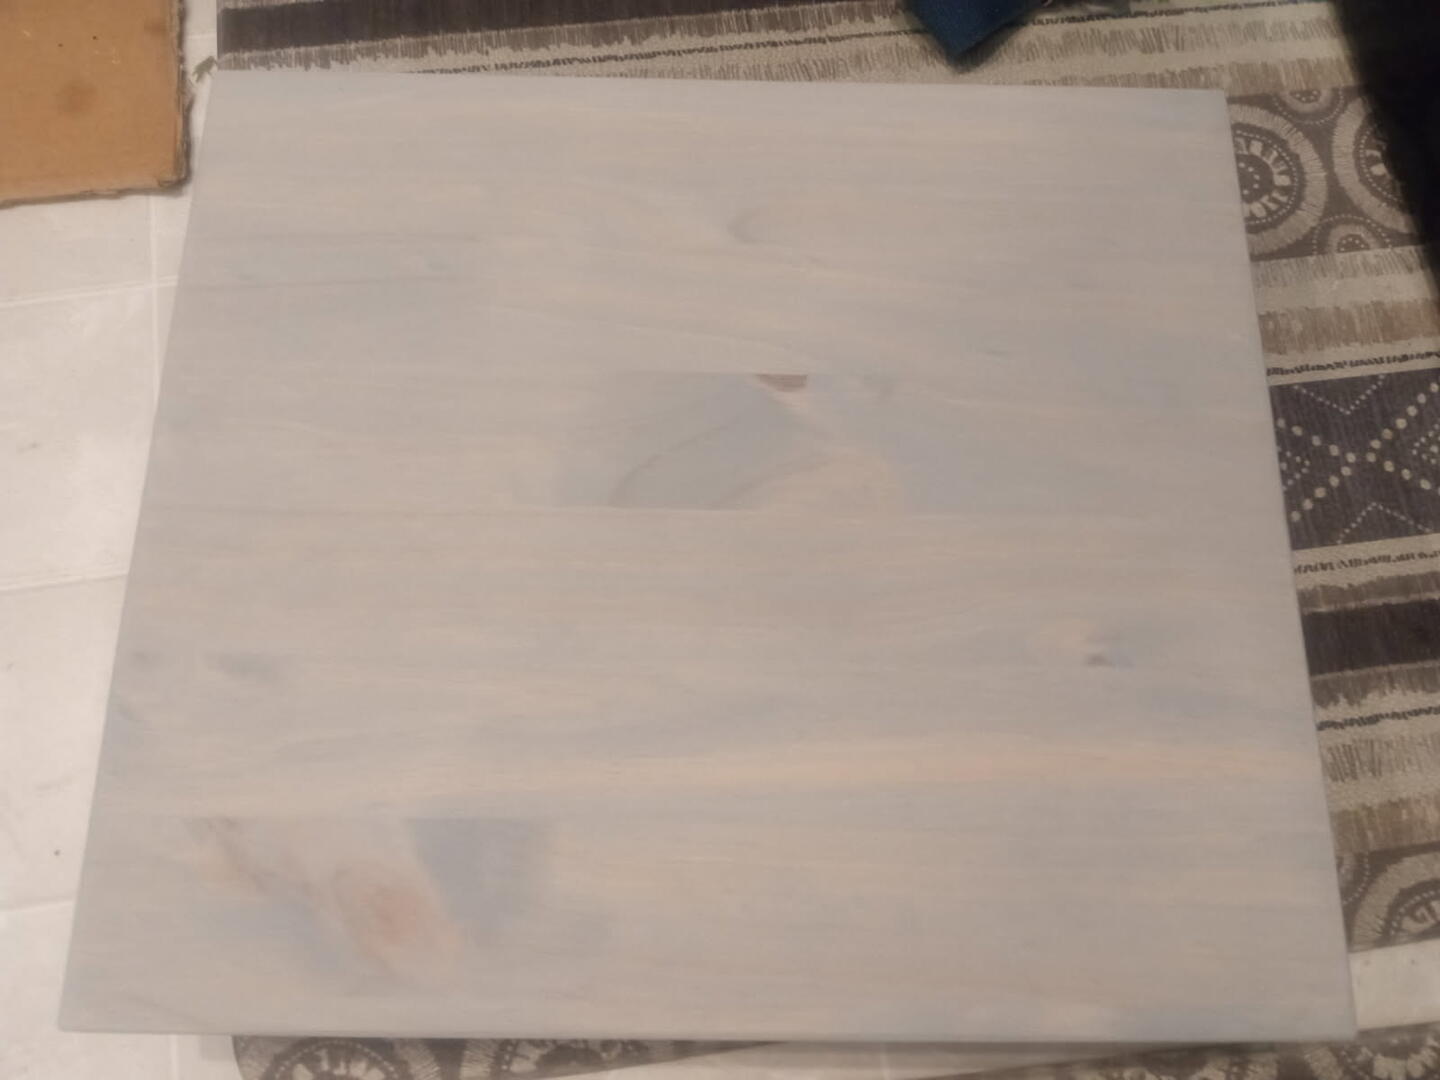
Got warm enough outside to spend an hour sanding it all down one evening (120grit+sanding block). Then this afternoon I mixed up some Greywash and applied it. Used Zinnser Bulls Eye 1-2-3 Grey primer. 1part primer and 1-2part water. Apply with a decent brush, let sit for a 30-90sec then wipe off. Easy to tweek the opacity with more/less wait time, or wiping more/less gently. You don’t even need to wipe it off if you don’t want. Kinda interested to try other colors too at some point.
Now to decide what to seal it with. Either spray laquer or spray water based poly. I have had bubble issues with the spray can water poly. Probably due to me laying it on too thick and the surface skins up before the propellant can finish bubbling out. It just dries so quick and doesn’t smell much. Makes me want to take another swing at it.
The wife and I were walking around downtown in my area Saturday. `Stopped in the local silk screen T-shirt and record shop. They have some used audio equipment for sale too. I asked if they do stuff on consignment and turns out they do!
Now I’m wondering if this storage stand and/or the other flat top variant is simple enough to produce more of. Real wood boards are a pain to acquire straight enough for “furniture”. I’m dealing with some warping of the existing stuff right now. Since I’m using all 1"x (3/4" actual) lumber, it could also be done with plywood and edge-banded. Seems a 4x8’ sheet could make two units if I massage the dimensions a little.
I decided not to “distress” it. It probably wouldn’t show up very well anyway. So I just lightly brushed it with some 320grit to knock the fibers down. Sprayed a couple cans of the water based poly (satin). The spray can was a better result than I had previously. But it starts to clog the nozzle and spatter the last half of the can.
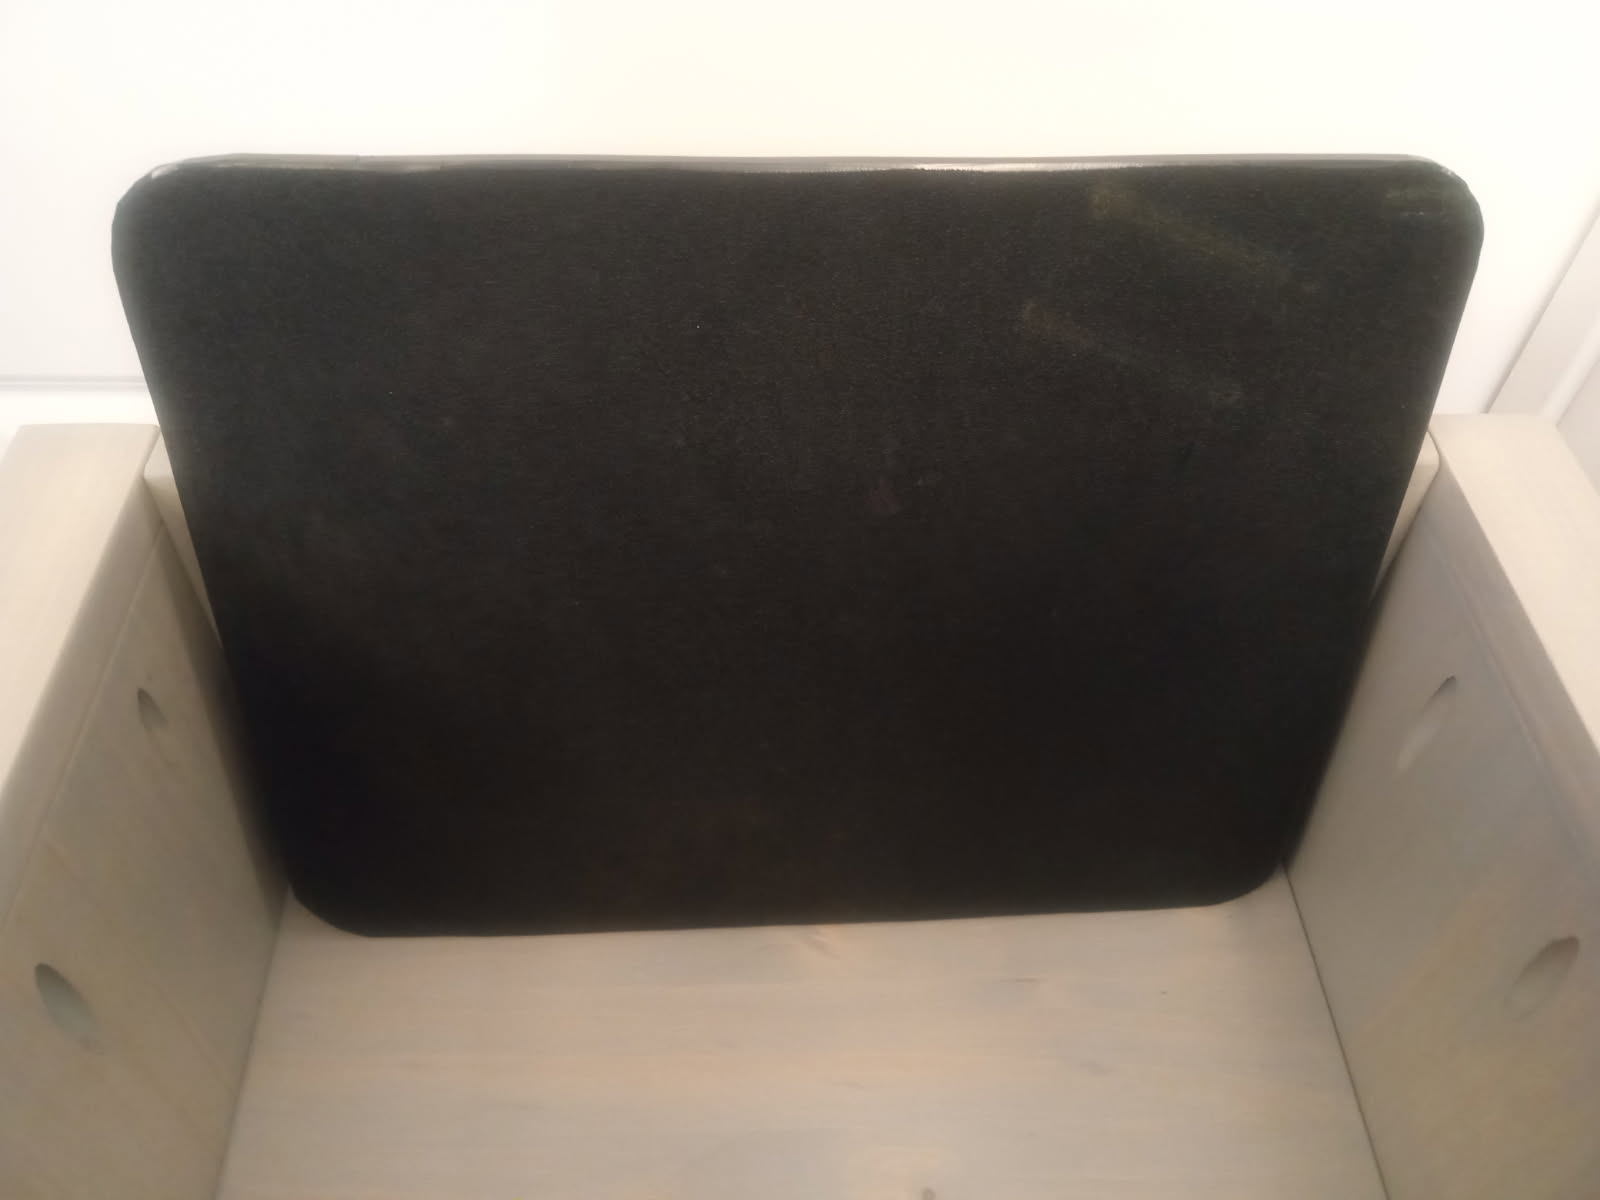
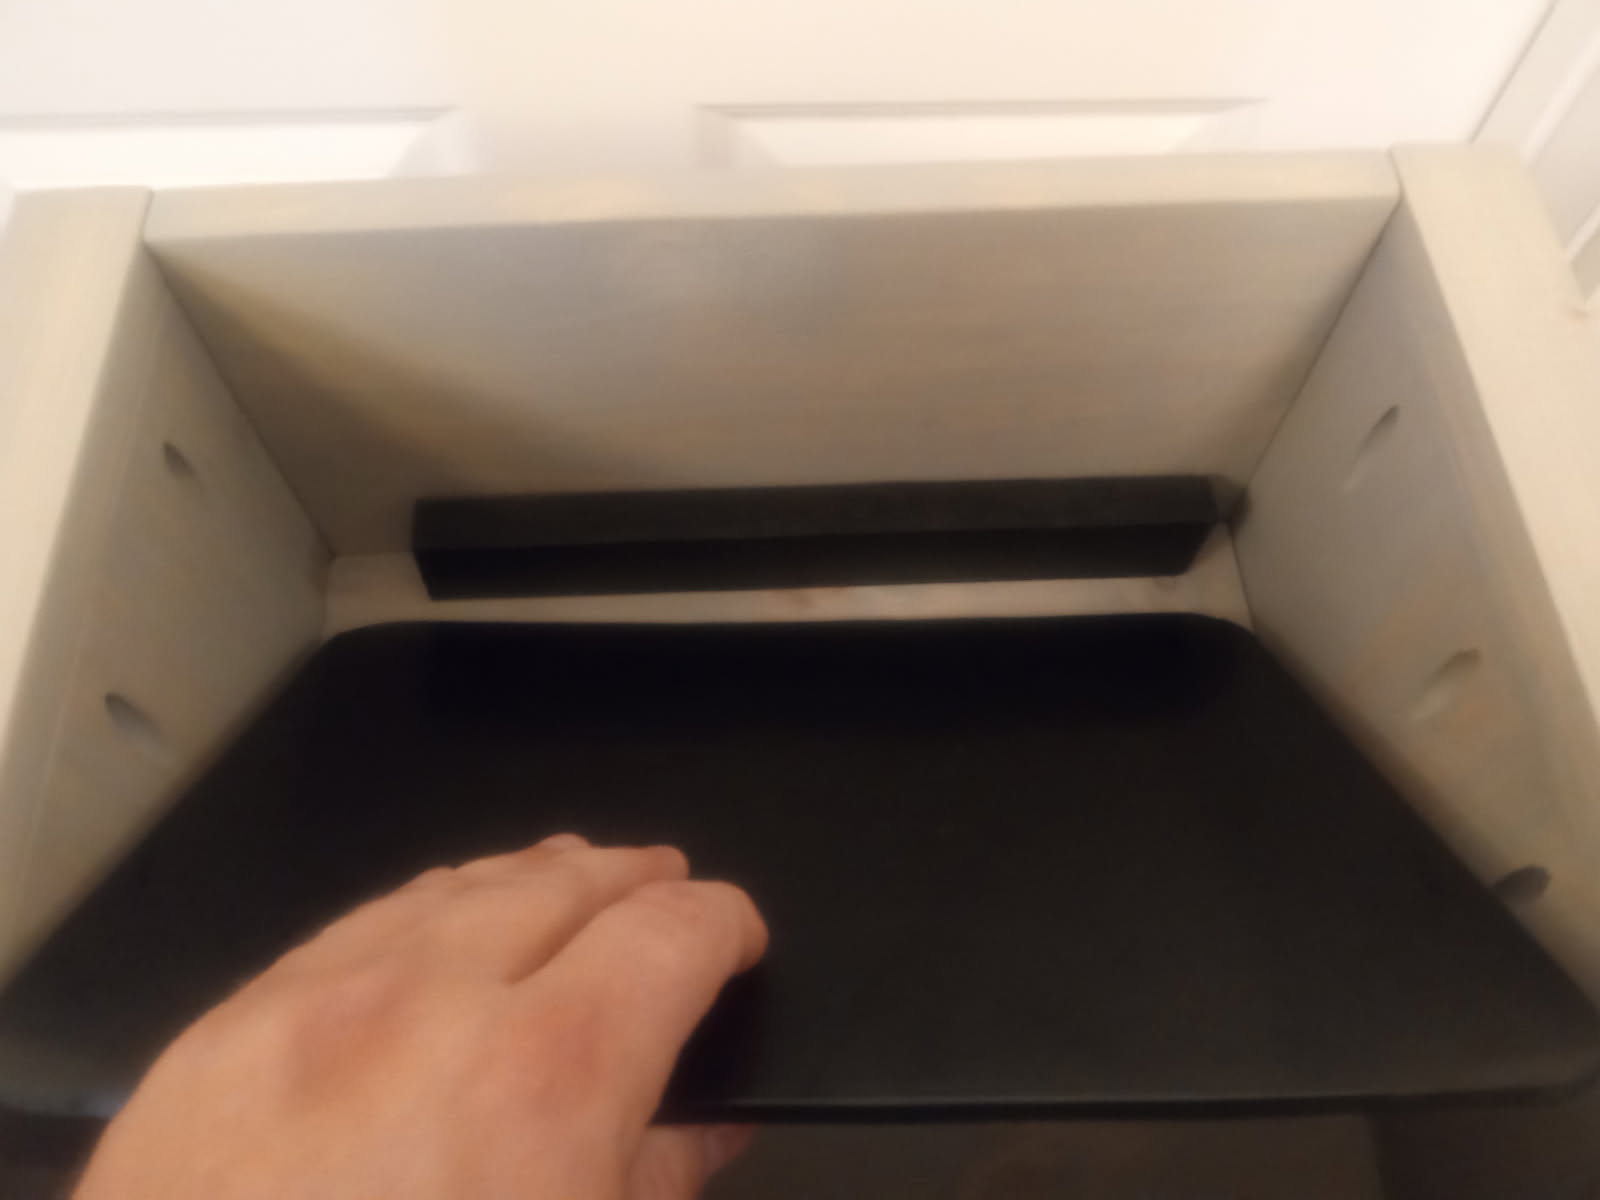
I want to add a backer board for the top so the final few records at the back don’t get a bend/crease from leaning against the edge with the weight of other records pushing on it.
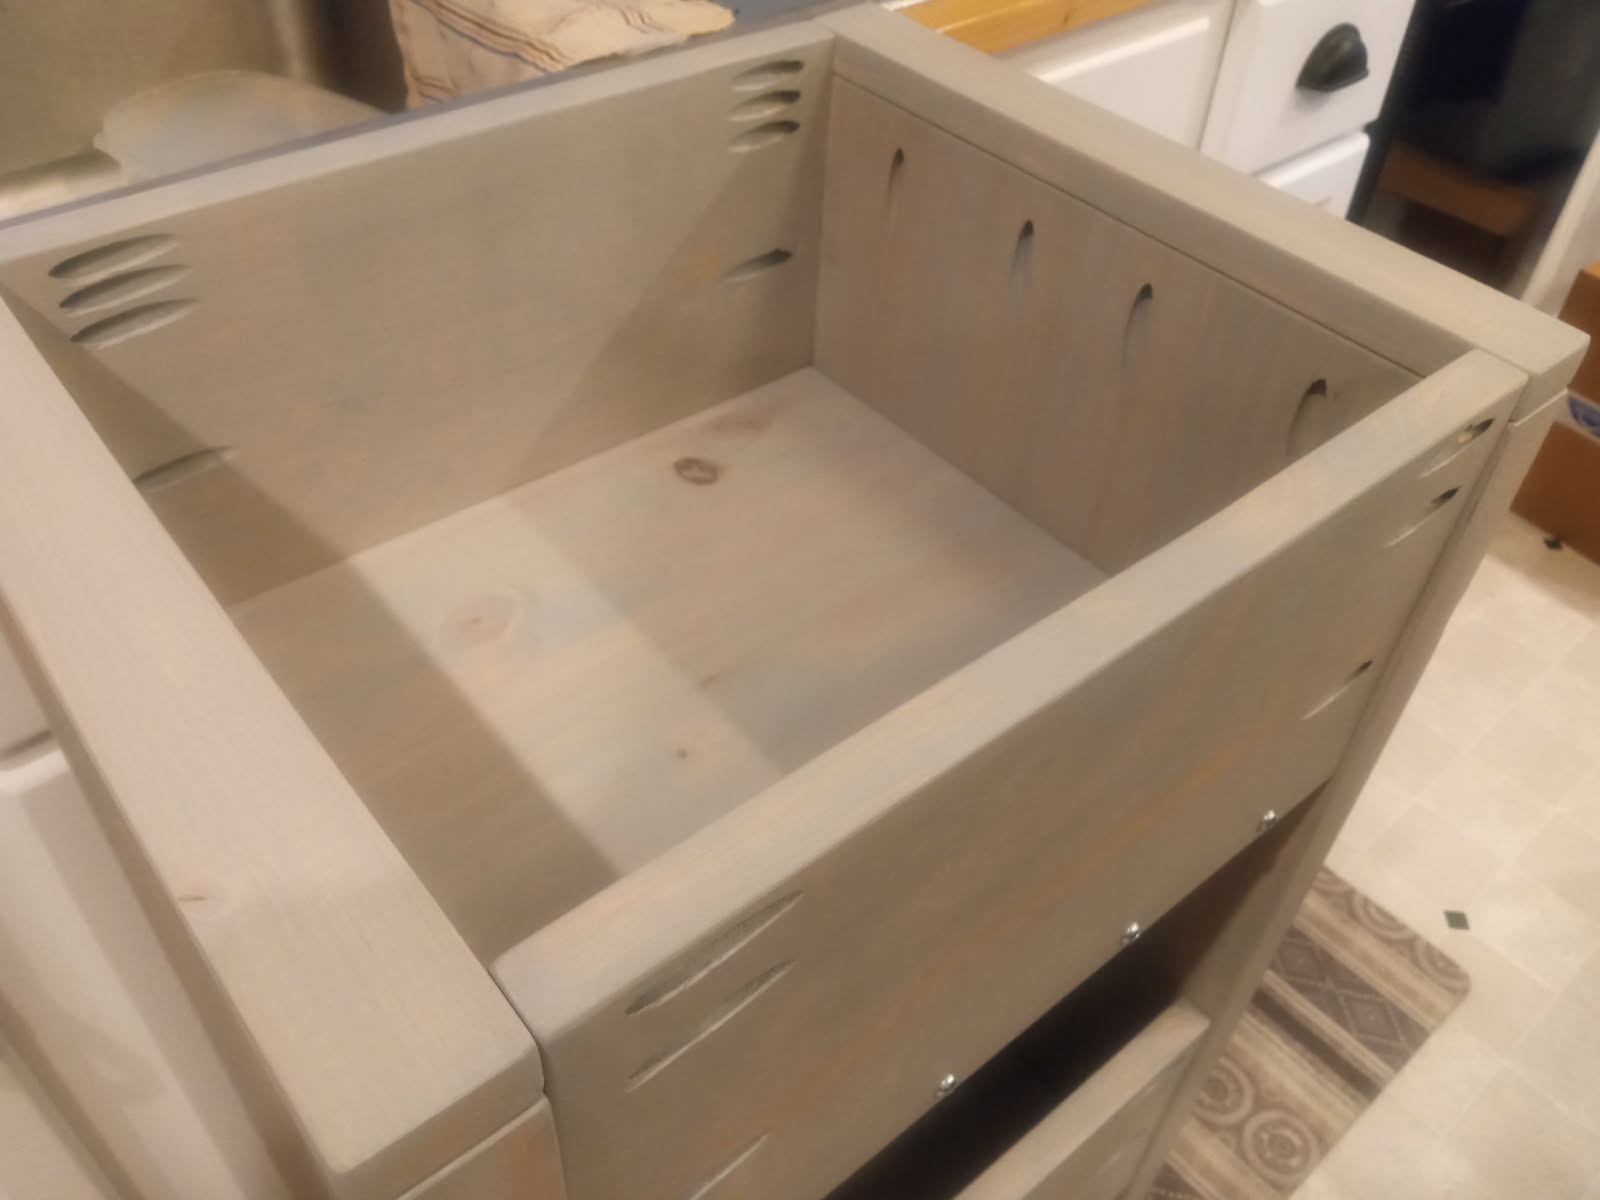
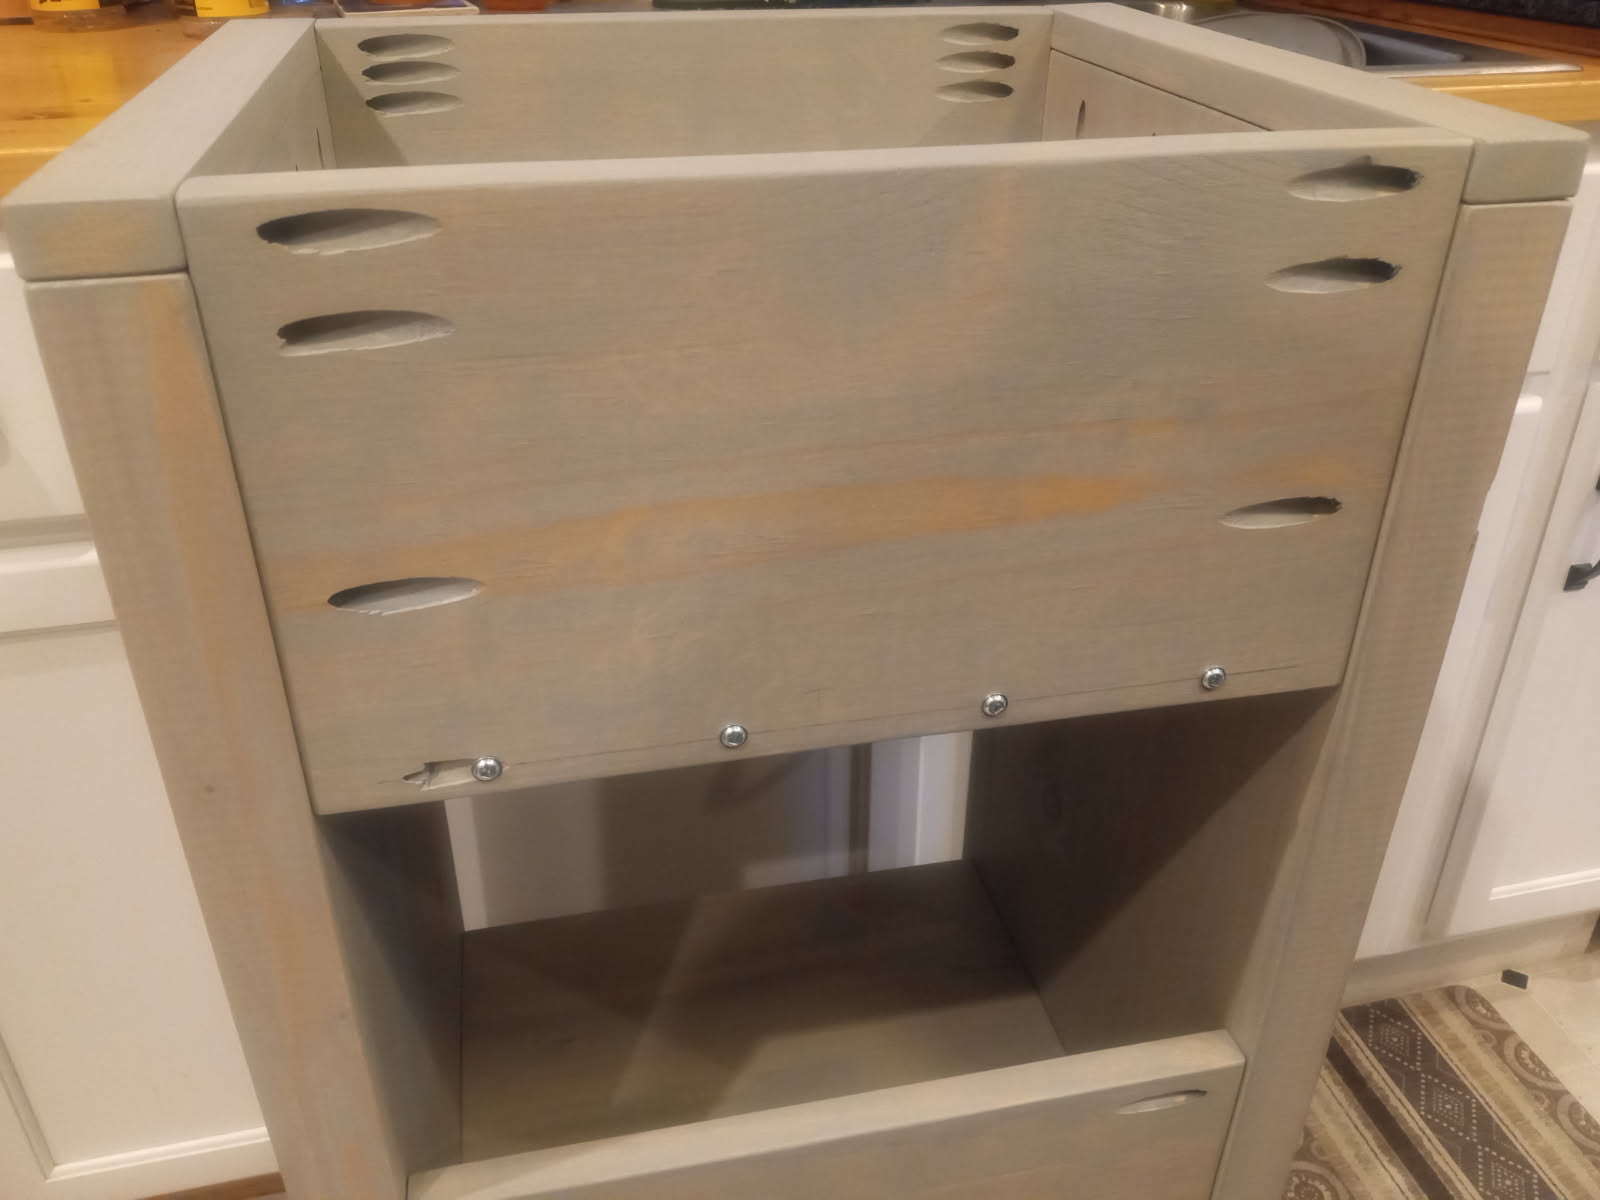
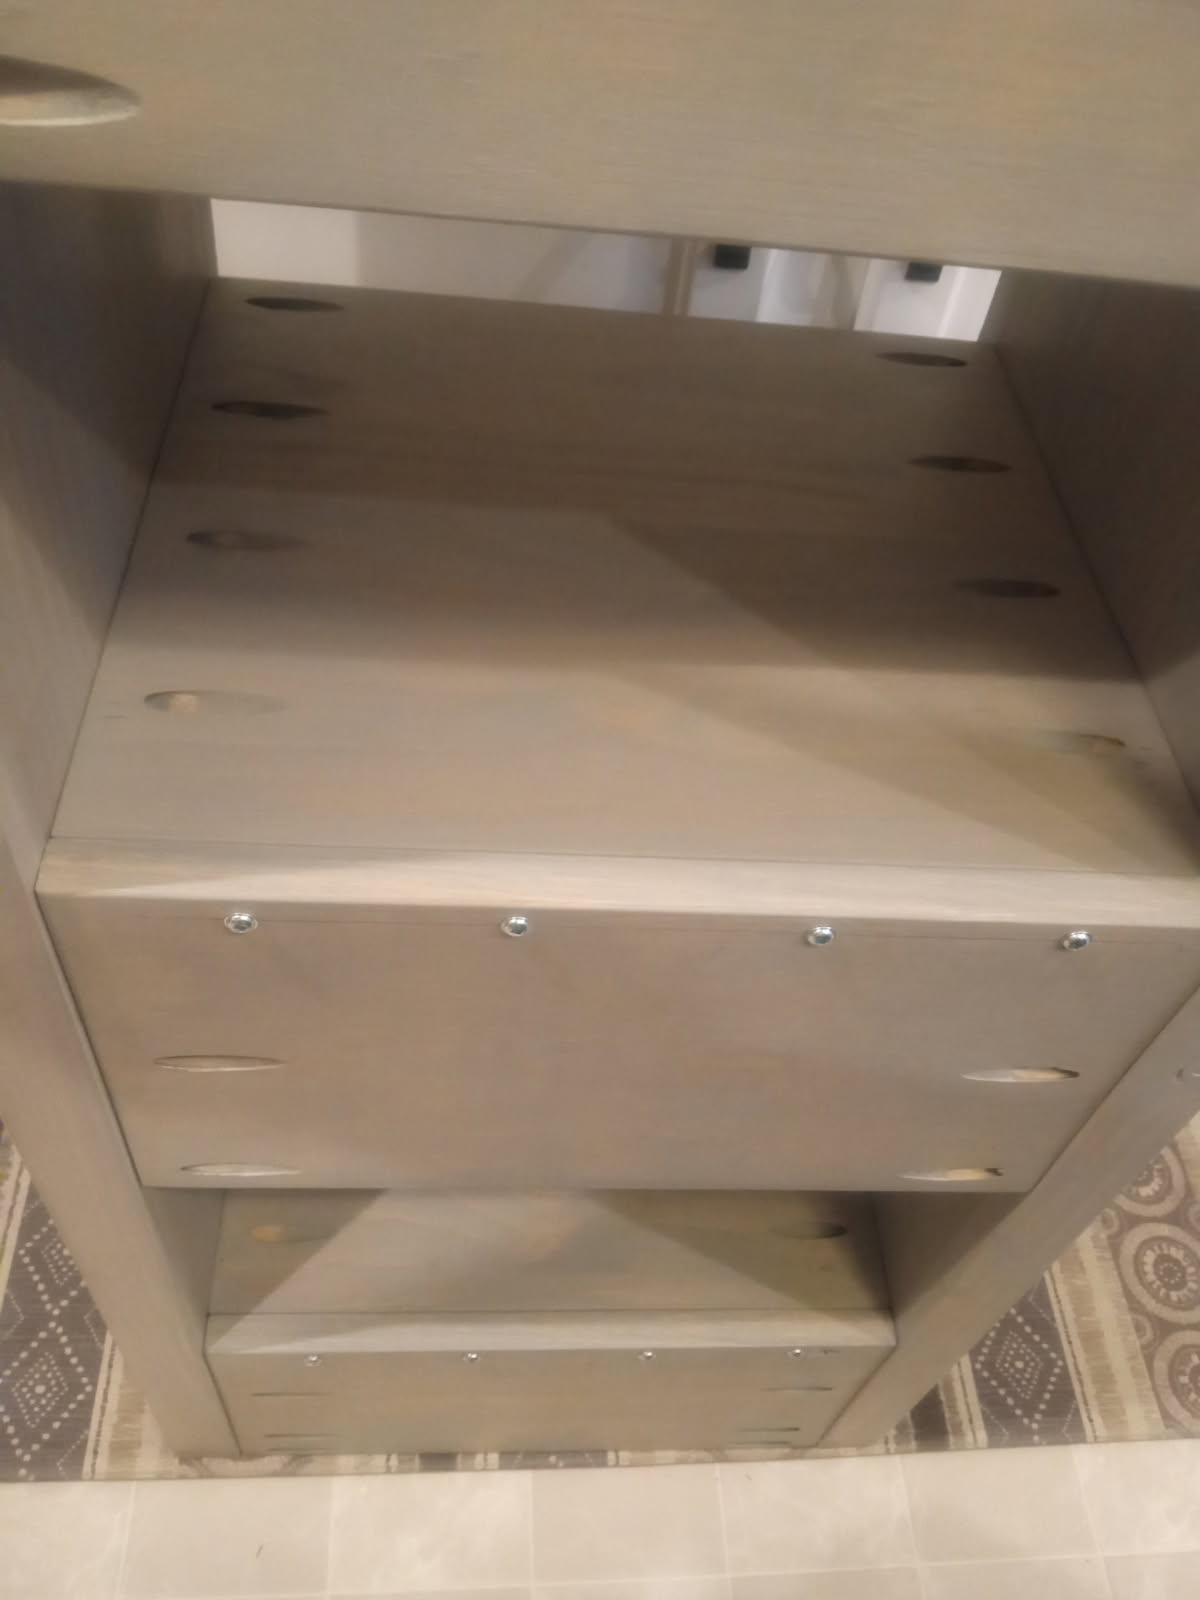
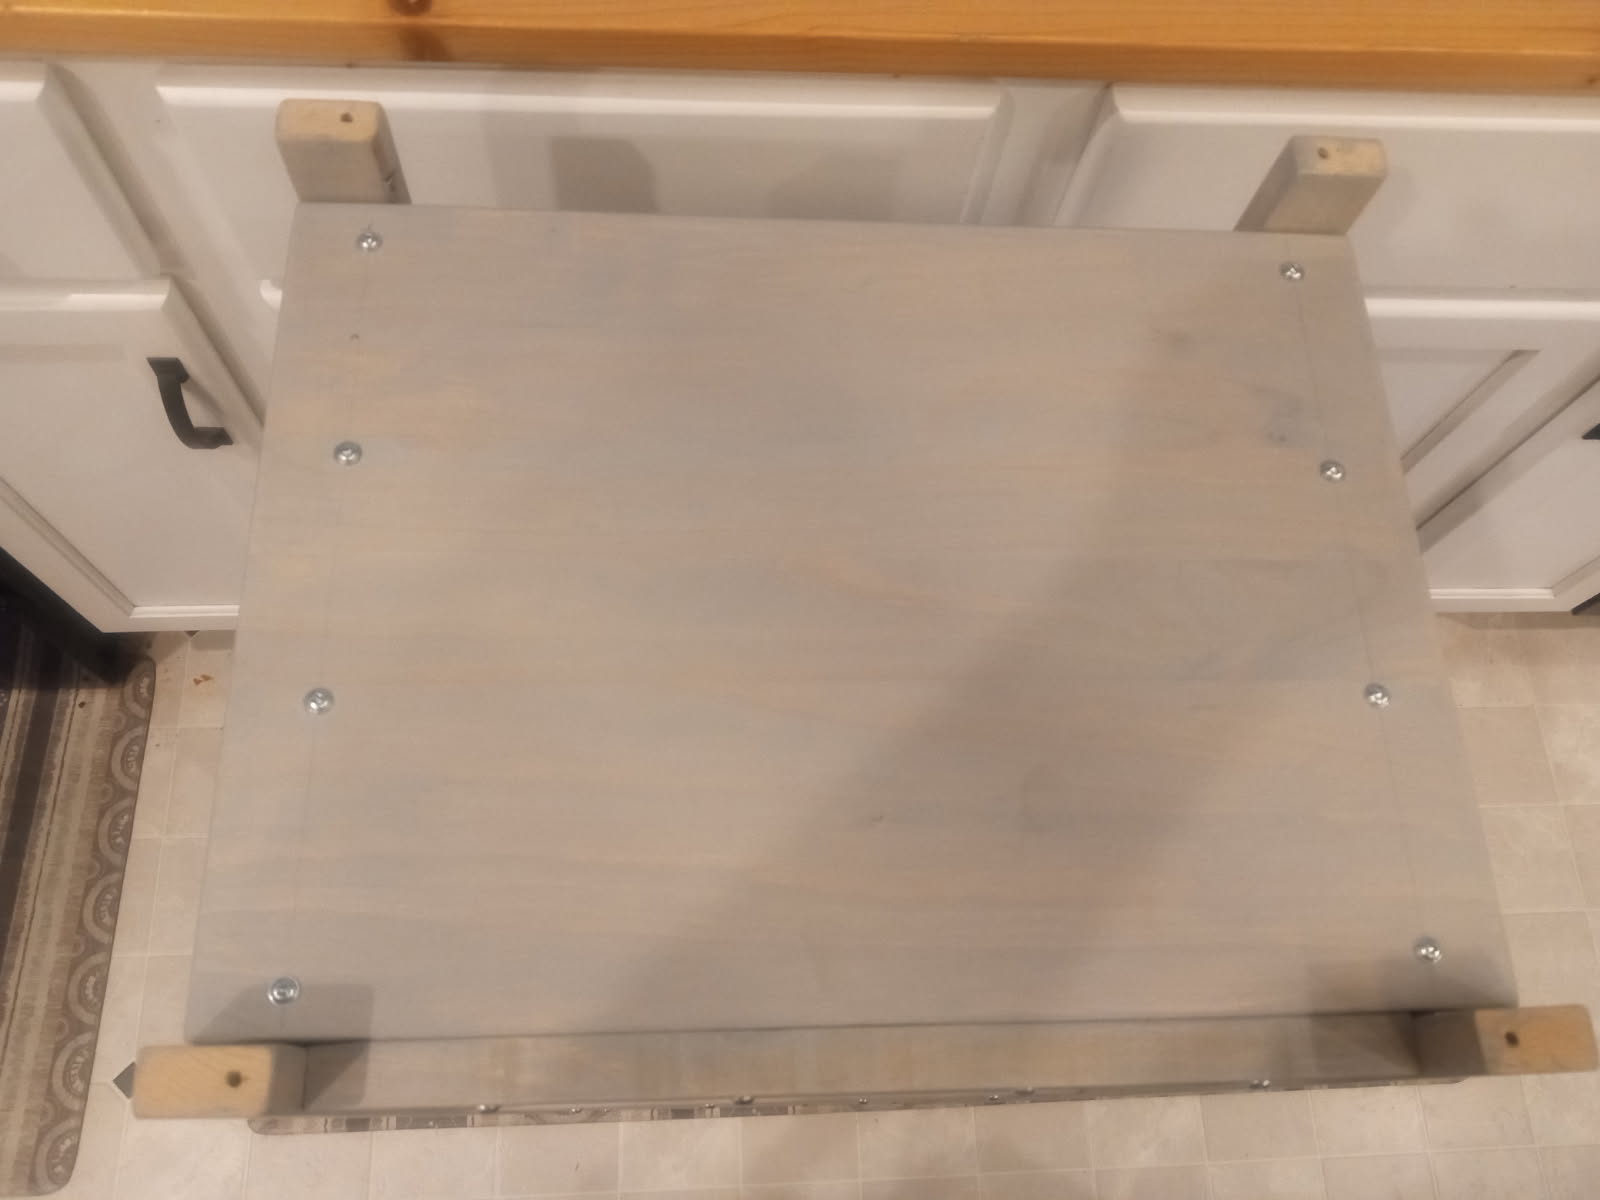
In case anyone is interested in the construction method.. Some under hood shots.
Mostly pocket screws. Some screws from the back boards into the back edges of the shelf boards. The bottom shelf board screws into the bottom end grain of the sides. I may add some more since it is in end grain. Not necessarily suggesting anyone copy these methods. This is a bit of an experiment to see how it holds up.
I grabbed some plastic scraps. 1/4" HDPE sheet and black PVC 1x2 trim board. I crudely shaped it with a box cutter and called it good enough. The idea is for it to not realy be seen anyway. It should help to initiate the backward lean, and give a little support for the records at the back of the stack.
 They don’t have much space so something compact is critical. I’m looking for high storage density but with a spot for more convenient browsing through their most played stuff. And hoping for something that looks enough like an every day piece of furniture that it blends in a bit. So not too nice, but not too plain. Most of all it needs to be a simple and quick build, or I’ll drag my feet too much.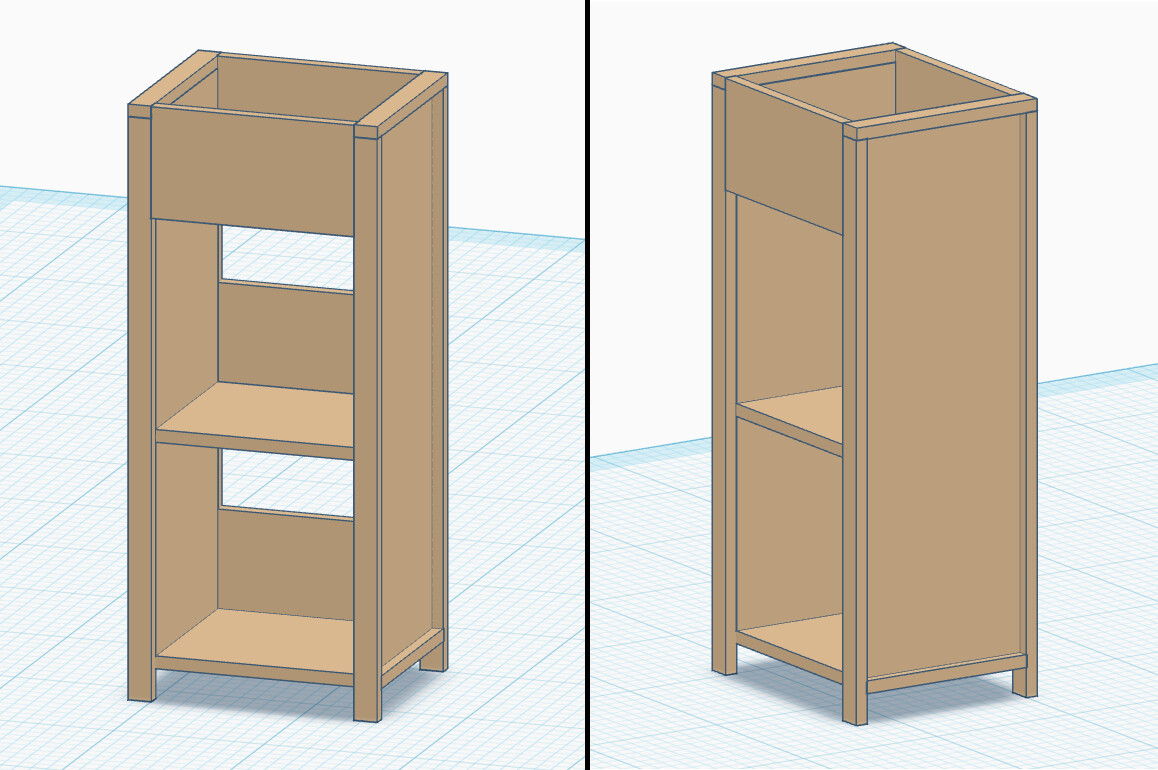
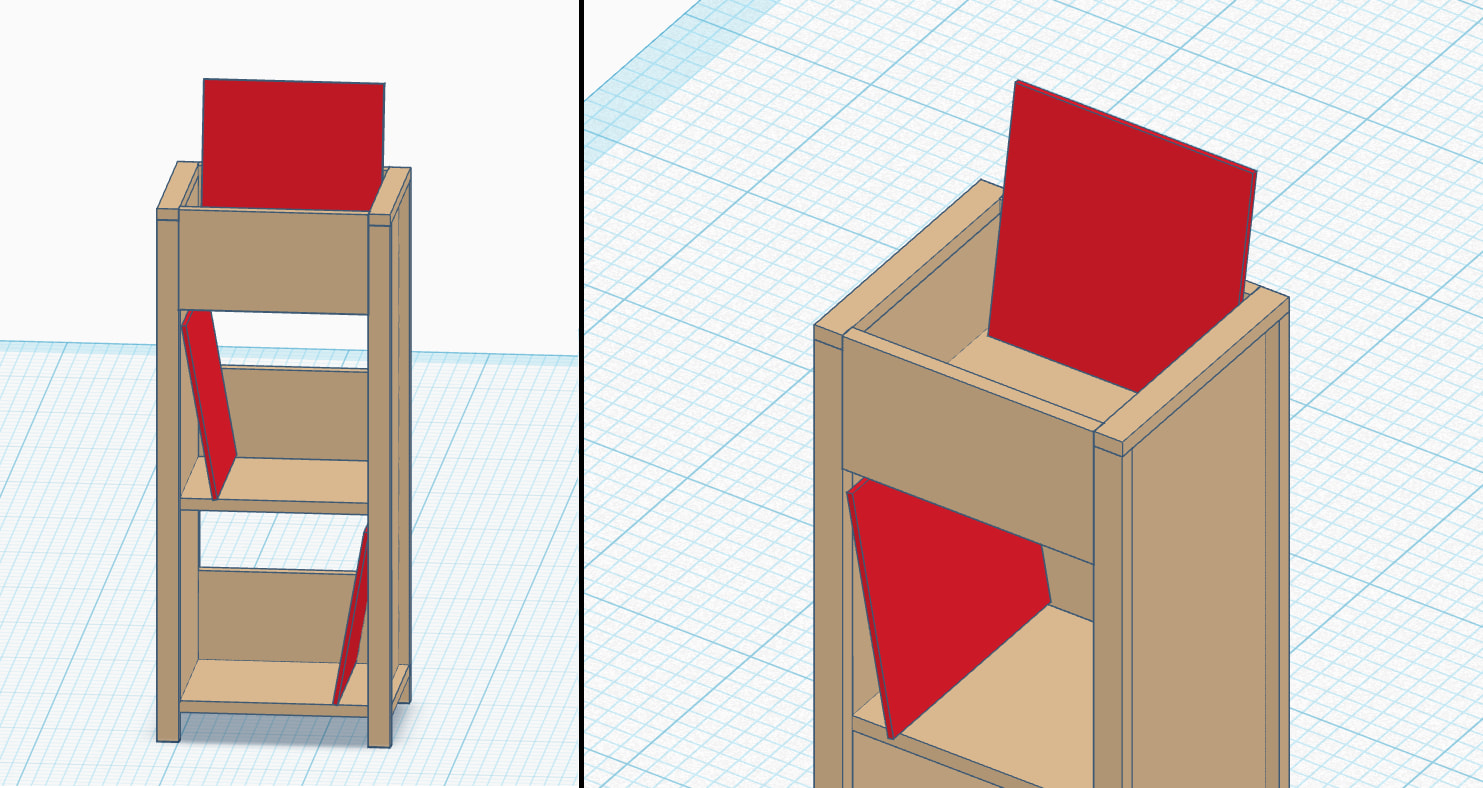
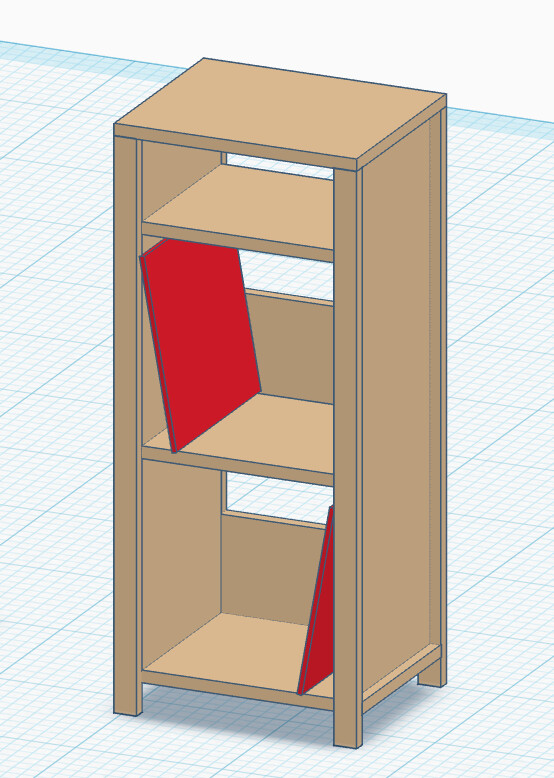
 I usually go with the “select” stuff, as that is orders of magnitude better quality. But you certainly pay for it (~3x-3.5x the price!). I didn’t think this project warranted it. The finish will be a bit rustic anyway.
 Ugh. I guess this is waiting for a reasonable weather weekend.
 . I miscut the pieces that will go on the sides up top. They are the smallest pieces, so fortunately the least $ to redo.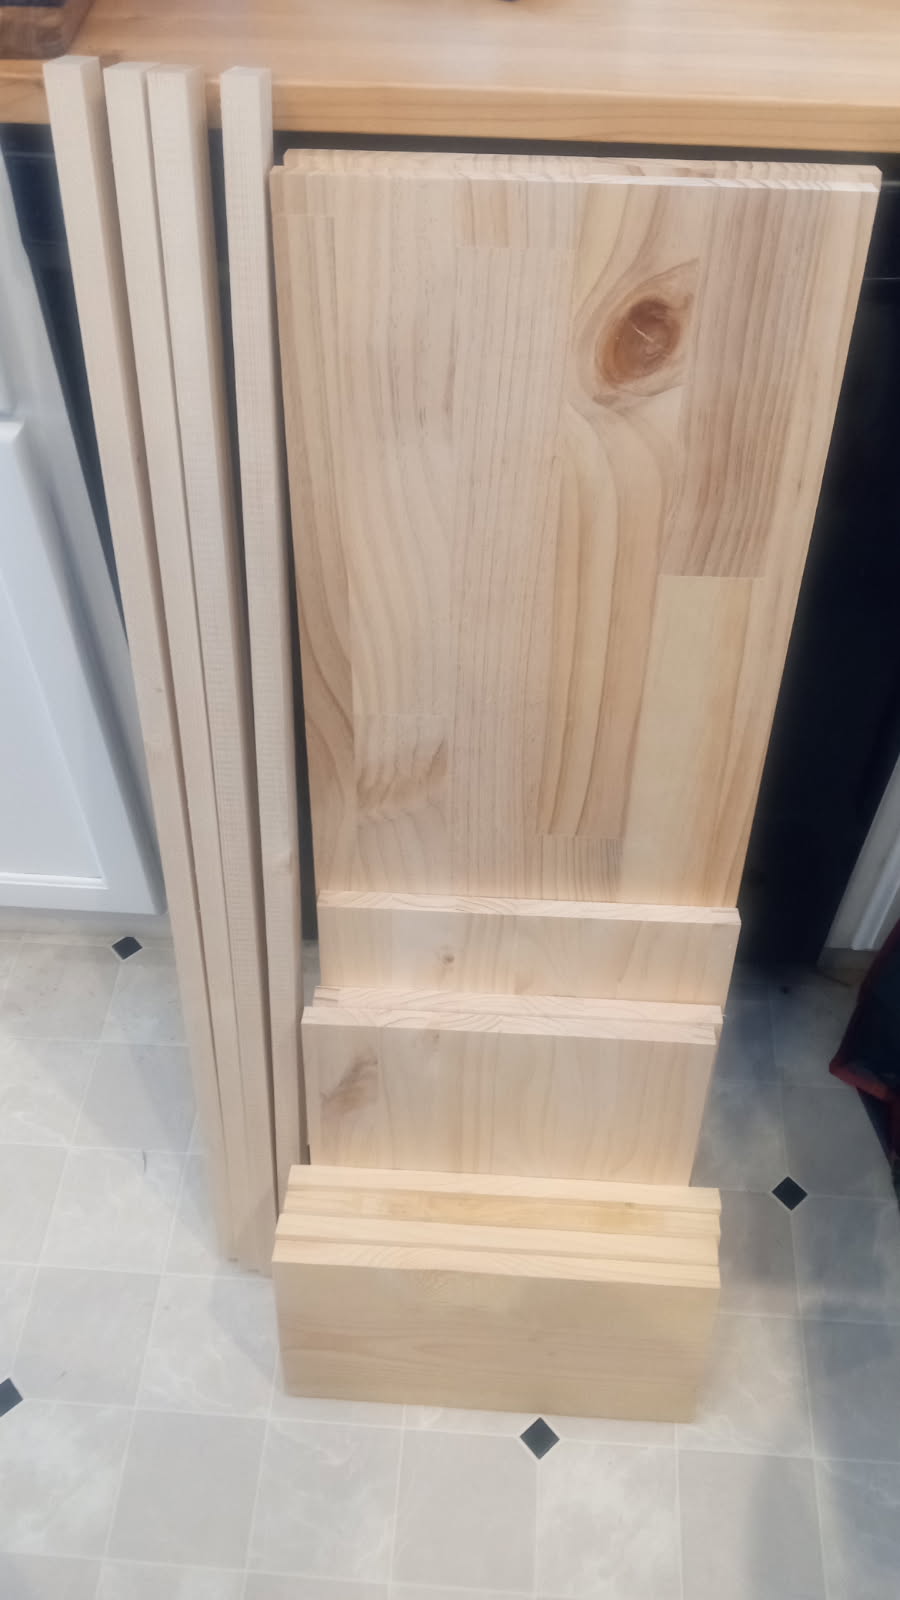
 . I think I’ll wait for Wednesday when it will be above freezing.