Project Stinger, or "Thrown-Back yet Again"

Shawn A and I have started a rebuild of my 8” 2-ways that didn’t turn out as well as they shoulda.

Part of this was the Hi-Vi F8’s behavior at 1Khz. Most was due to an ill-advised EBS alignment. Now, EBS alignments do have their place, such as with small sat speakers and a high pass XO from an integrated amp or receiver to tame/flatten them and extend excursion support to the cone. They just don’t work too well by themselves. I had to teach myself that. It looked too good on paper, and was.

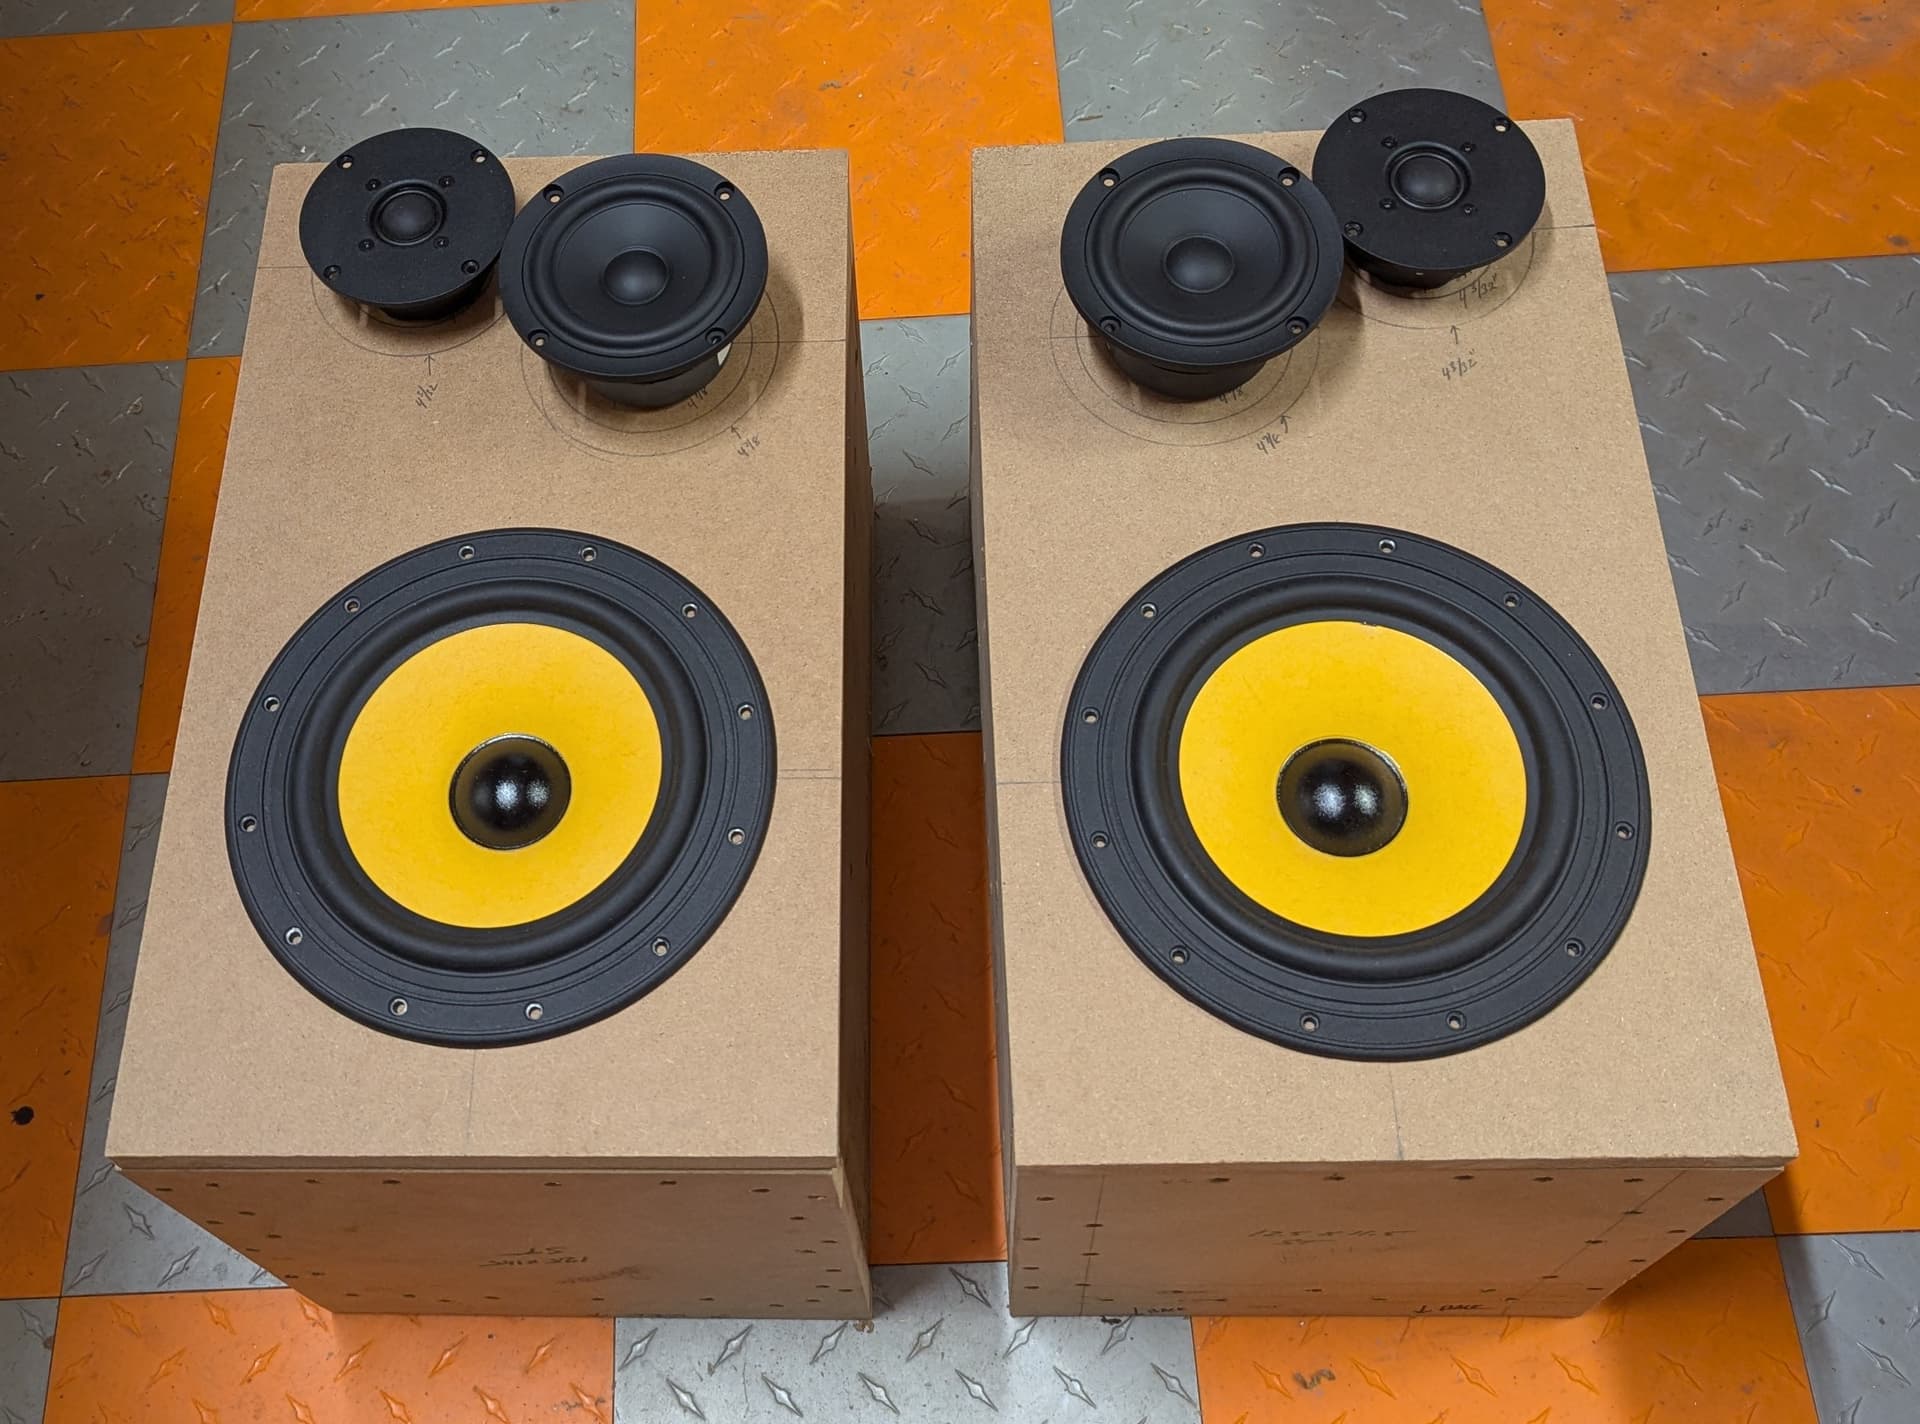
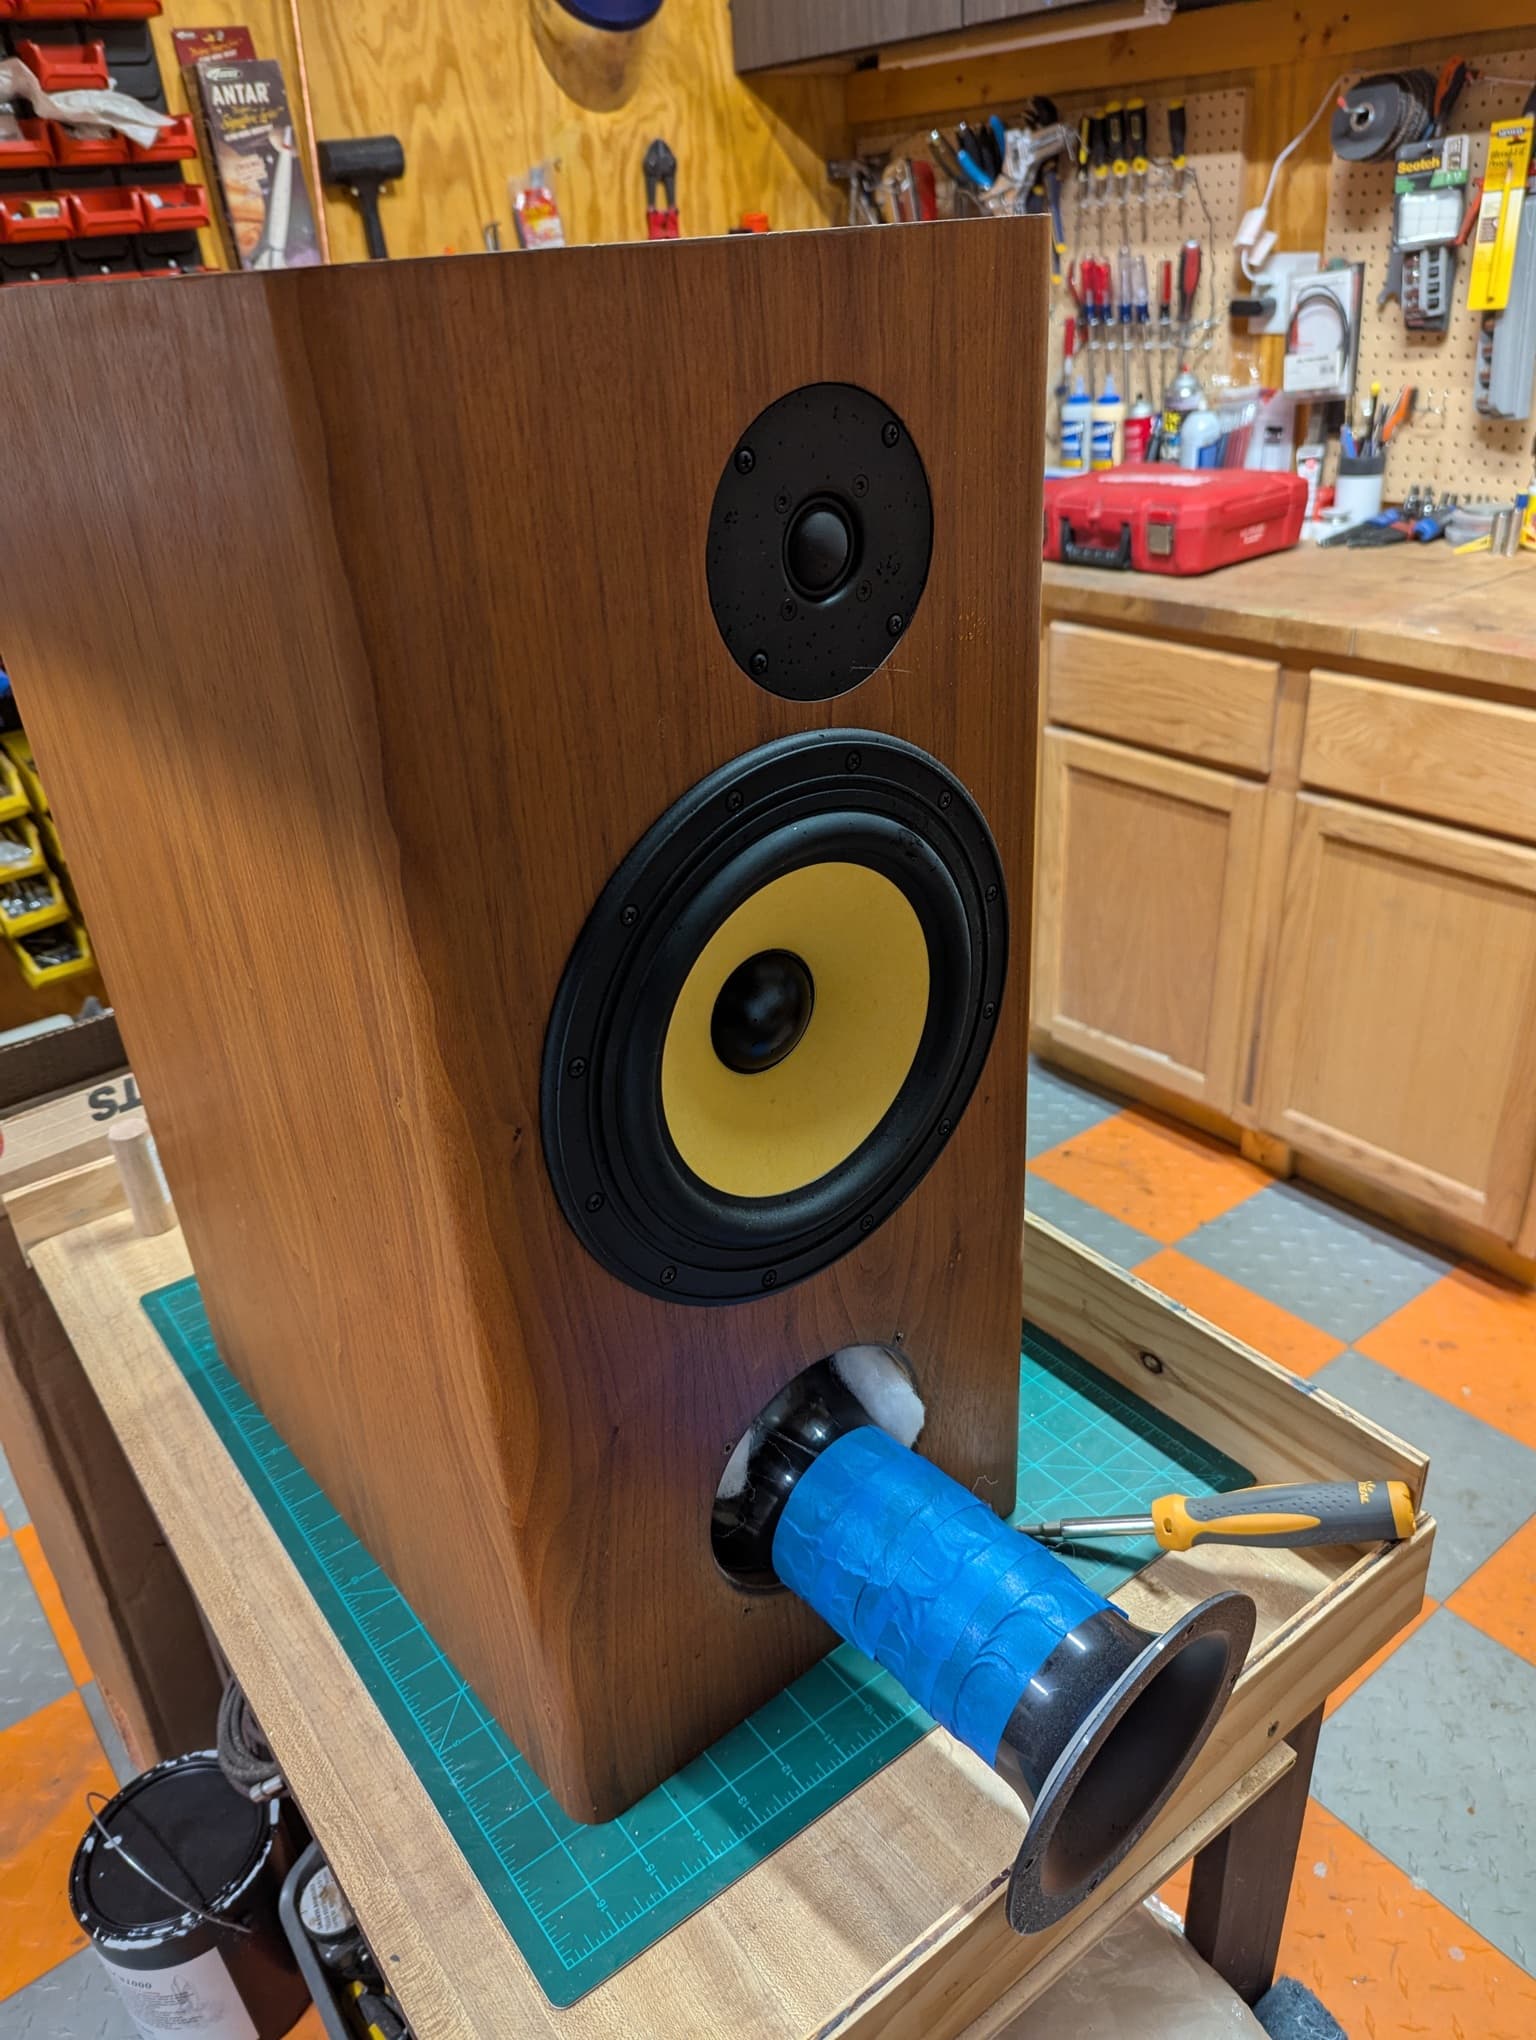
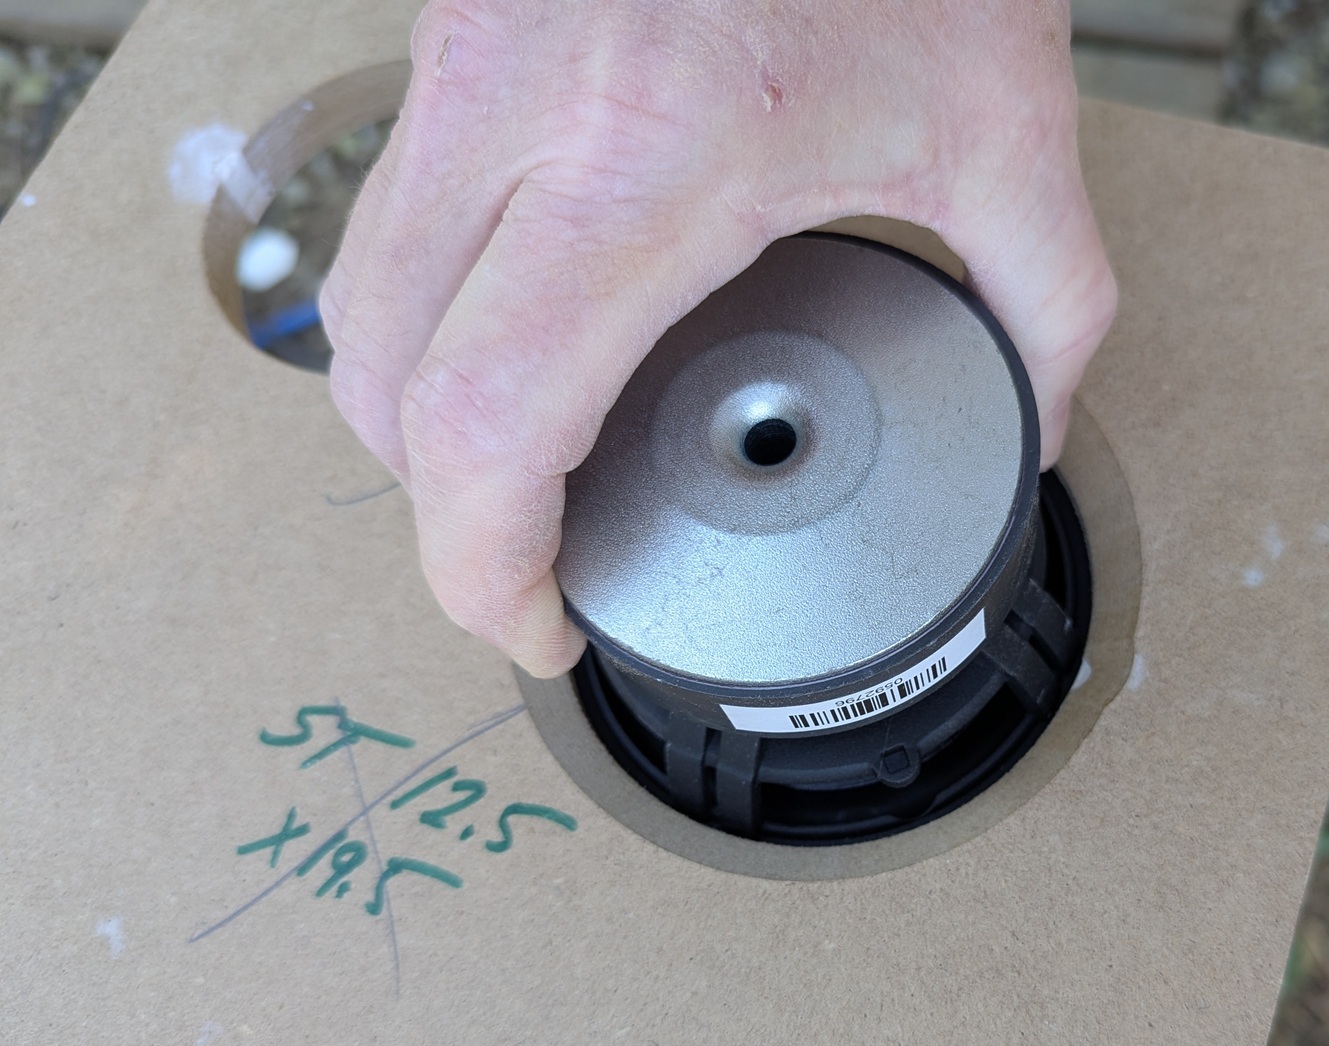
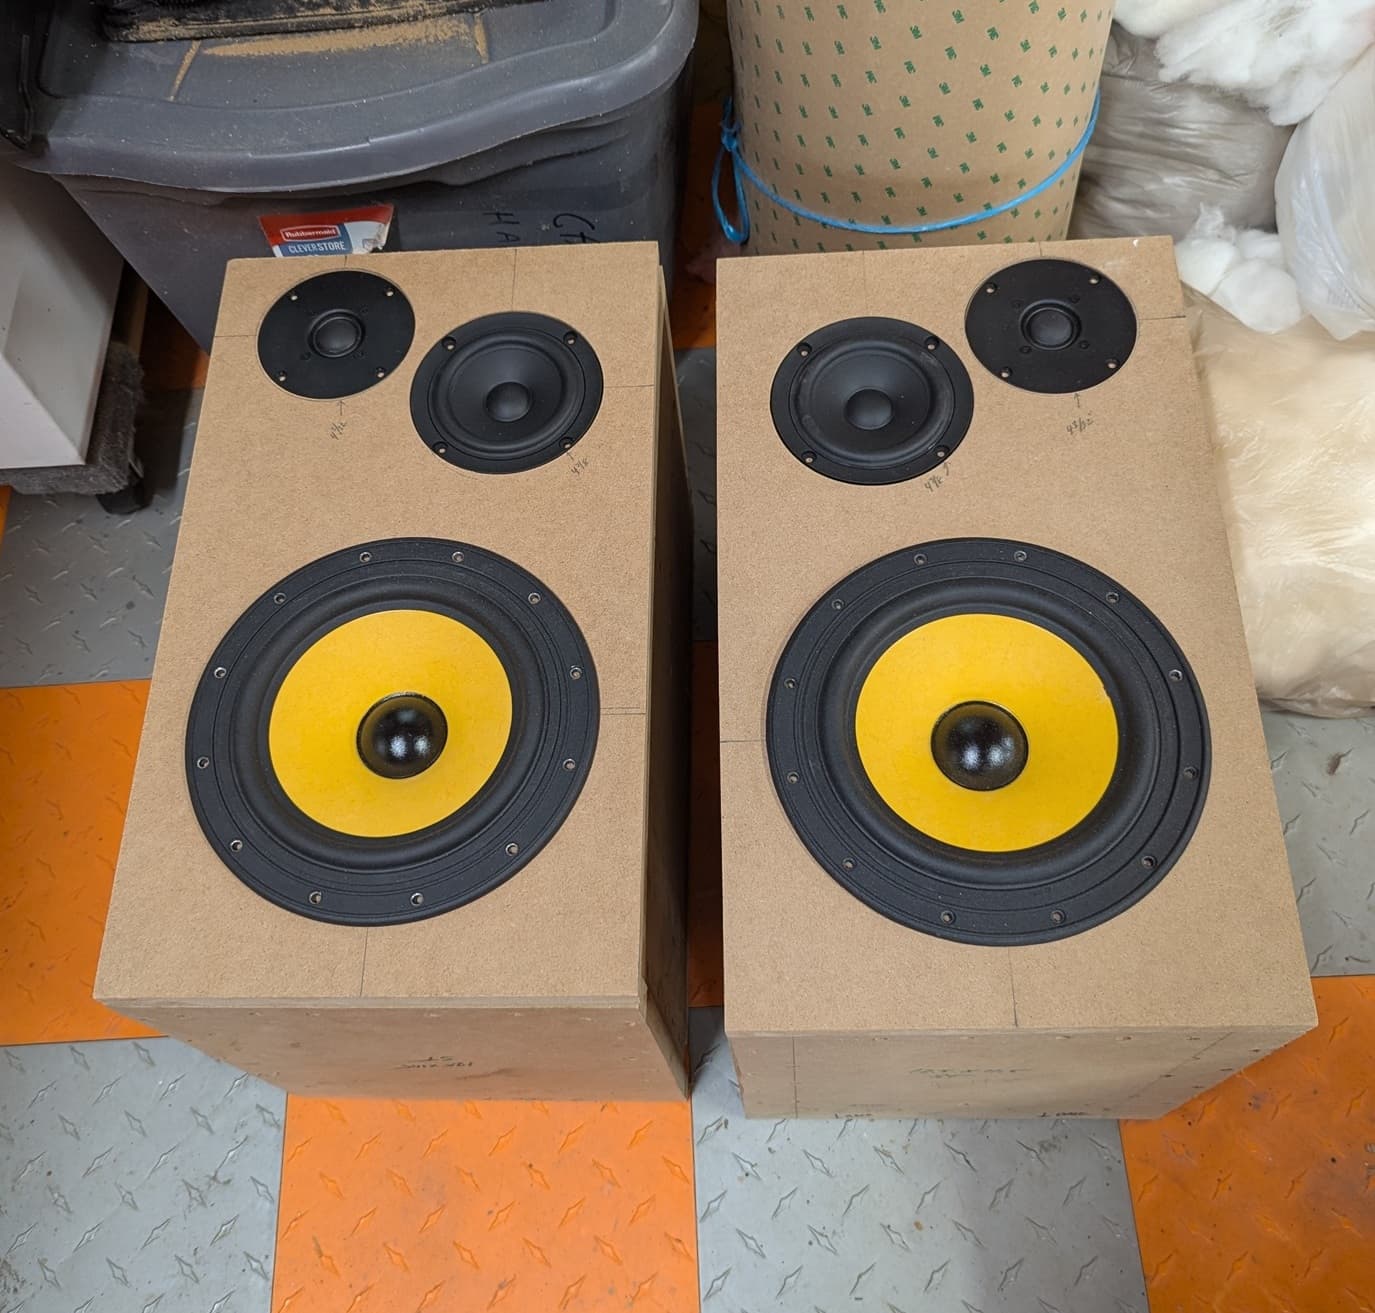
The OP was a 2-Way 8 with the Hi-Vi F8 and the Seas 27TDFC. The new project is still the F8 and 27TDFC with an added SB12MNRX2-25-4. The SB appears positively Scan-Speak grade in sims and for a 4” mid that can work to 300Hz and is sensitive, reasonably priced.

The new enclosure is better sized and looks like a 70’s - 80’s “monitor” size stand-mounted speaker. App. 1.3 cubic feet or so exterior.

With both original issues fixed, we’re hoping for some goodness.

New stuff tried in the project - usefulness to be determined.

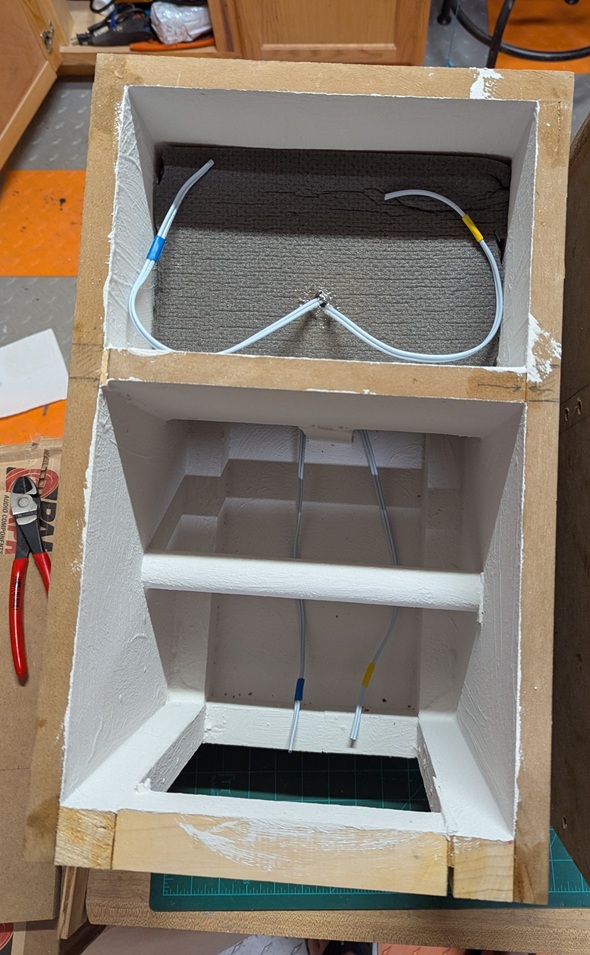
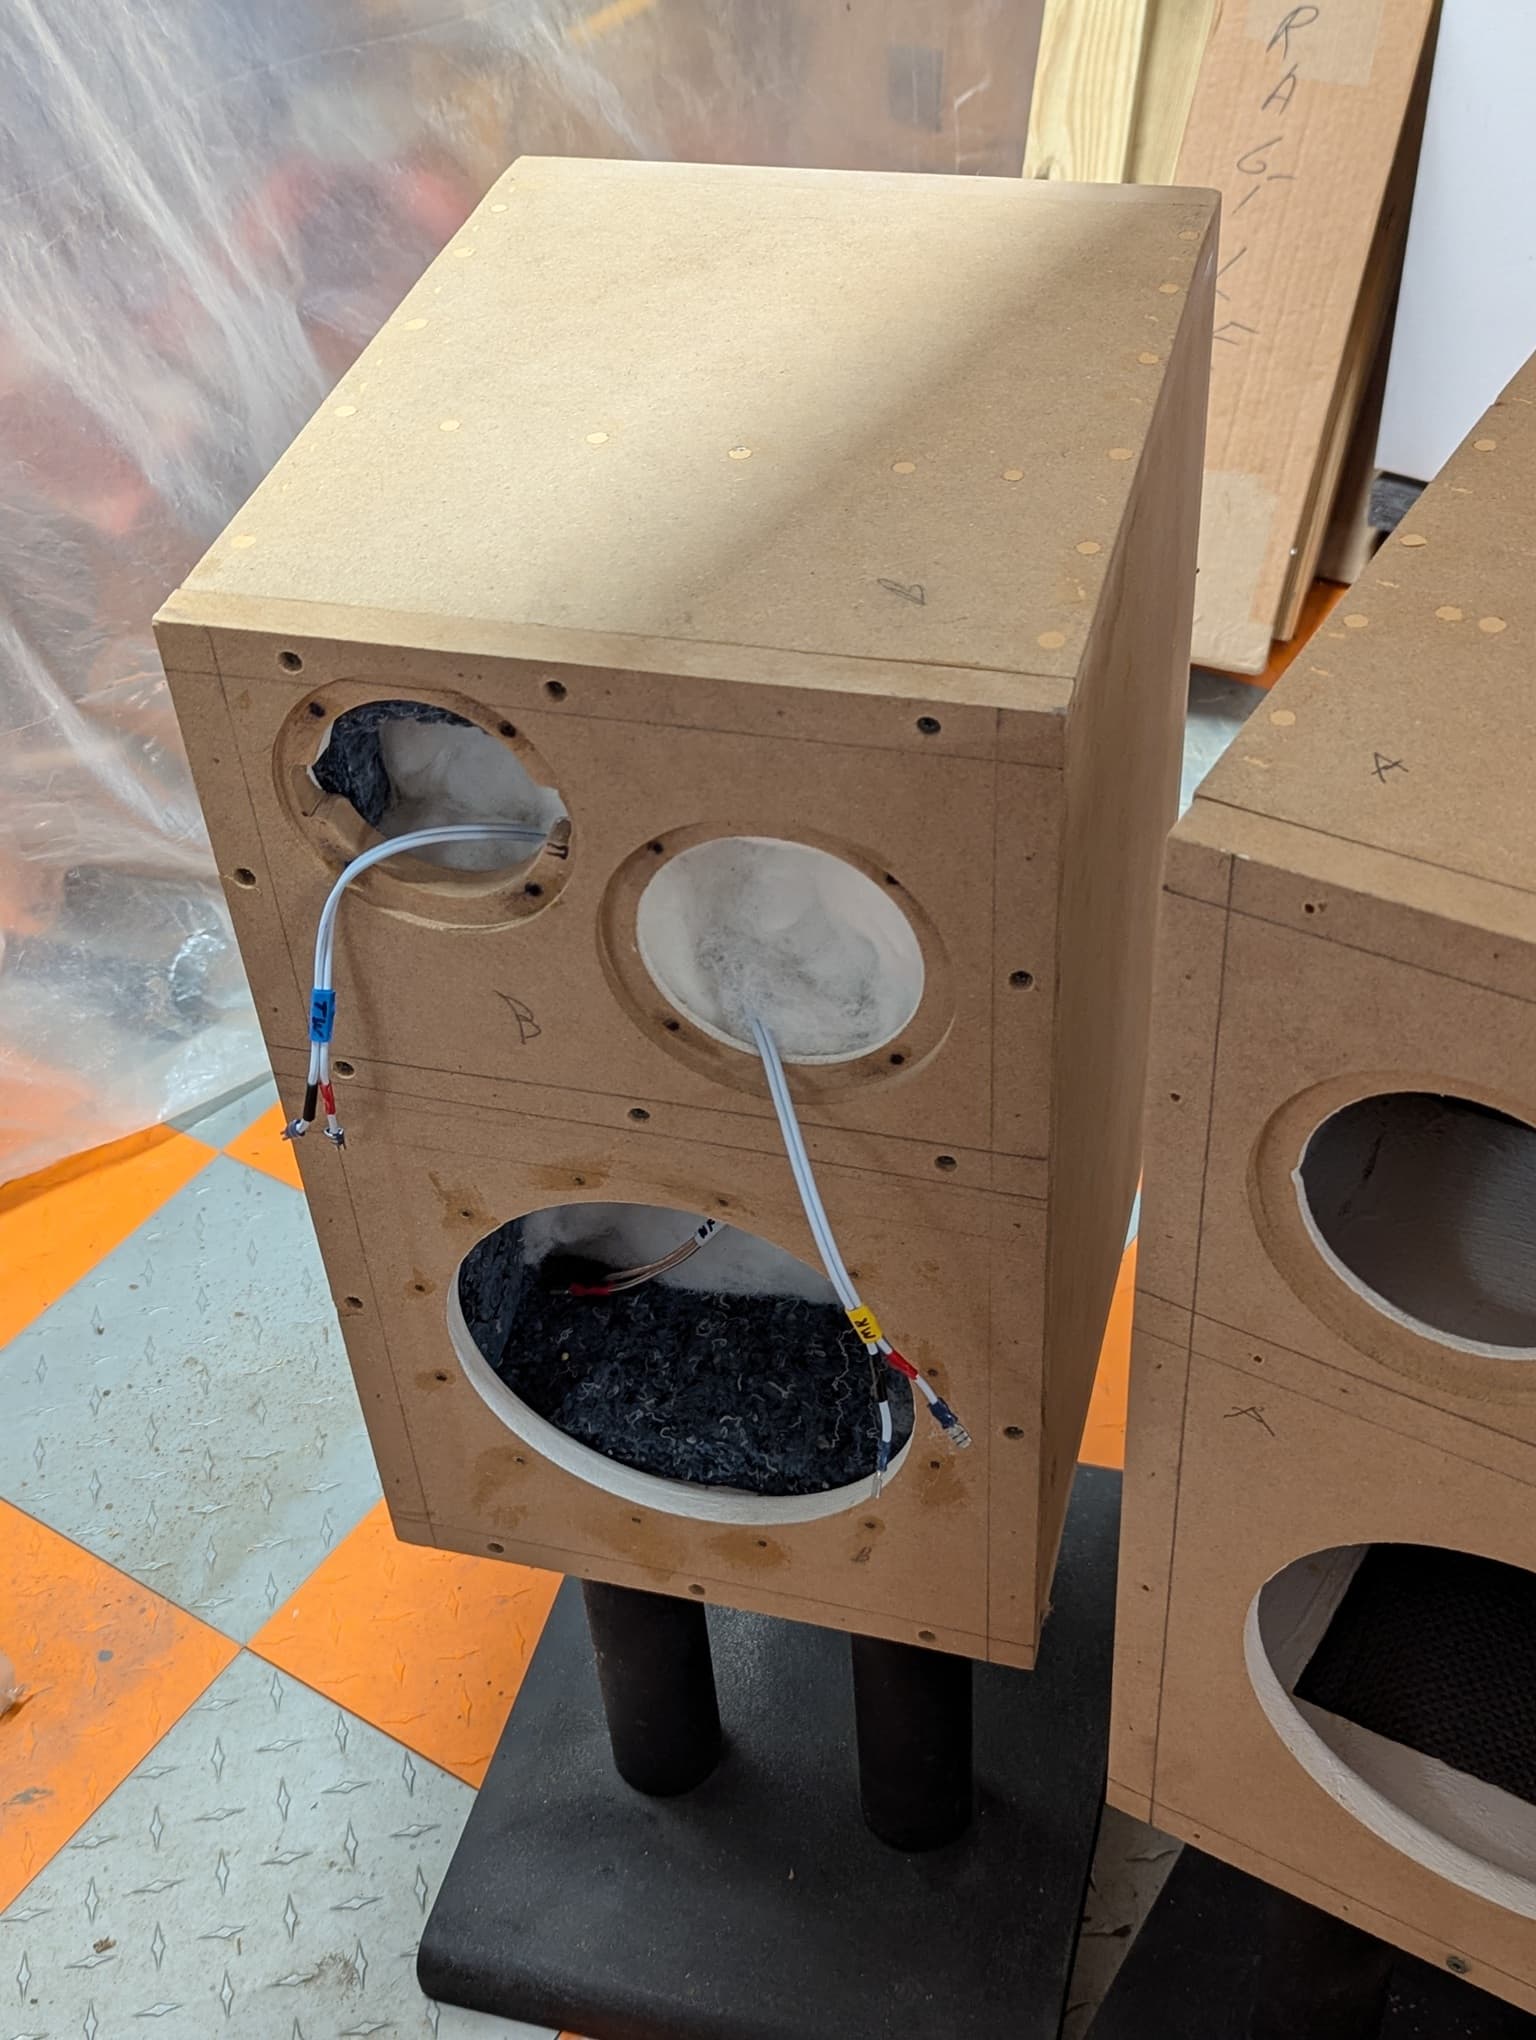
Hy-Tech SC1000 Acoustic insulating Paint (yeah, I know, but the stuff is used industrially for fan manifolds so I just had to see… :cowboy_hat_face: ) Woofer chamber got two thick coats and the mid/tweeter chamber received three extra-thick ones. Consistency of extra thick whipping cream. Insulating material is small vacuum-filled spheres floating in the paint. Jury is out.

1.25” Sonic Barrier pads - warning, contains lead so you have to either use it all (recommended due to high cost), or haz-mat the scraps (not recommended due to high cost). This stuff appears expensively bad-ass but other, less costly methods may be just as good.

Pics will follow when I get them off the phone - Shawn will elaborate on the XO.

Cheers / Robert

1 Like

I have that same SB mid and will be using them in an upcoming project. Very well built driver. The T/S parameters measured almost exactly what SB published.

Here are some pics.

  • The old cabinets, sans drivers (2.0 cf and heavily braced).
  • The quite odd industrial sound control paint
  • A cabinet drawing in PDF of the new speaker
  • Interior of new cabinets (I still make back-breakers, yes)
  • New drivers on baffles
  • The old F8/27TDFC cabs. Those, along with the ginormously heavy sand-filled MDF and PVC stands, will be for sale shortly. Pickup only, you won’t want to pay the freight :thinking:

The new cabs will also be walnut, since I have a bunch. Considering using Walnut stain on Walnut for a darker finish. The F8’s really pop visually and a darker cabinet will enhance that.

Cheers / Robert

Hi-Vi SB 27TDFC-Model.pdf (126.2 KB)

5 Likes

Looks good!

More pics. The F8 has a giant beauty ring, so no rebate/rabbet required. 27TDFC needs a 3 1/8” hole with a 1/2” rabbet. Used a Morse hole saw in a drill press. Slow cut produced great results. Nice tool, reasonably priced. The SB12 needs a 3 7/8” hole with a 1/2” rabbet. This was done the same way.

The 1/2” rabbeting bit barely fit in the pony router but it did, so life was easy today. I put a quarter-round on the back edge of the woofer cutout. Not really necessary, but looks good. The SB12 needed a chamfer to breathe, and that went well too. Never had to break out the big router for this project. Good stuff.

Ears for the 27TDFC done with a Dremel and small sanding drum. I get spooky using a router for that when I’m close to finish.

Below is mid chamfer and fitted drivers.

4 Likes

Small update - had to go back to work this week so the pace has slowed a bit.

1.) Found a resonance/hollow spot in the slot port. Fixed with MDF Biscuits above and below the terminal plate on back.

I am not a believer in the “light enclosure with more damping” school. I humbly point to the Watt/Puppy, or the 70+ pound weight of a McIntosh or B&W Tower. If it didn’t work, then they wouldn’t do it, because it takes money out of their pockets.

2.) Twelve T-Nuts on the F8? Yikes. I like them but 12? Heck, the RSS 8” subs only have six. If they were monster woofers like the old Hi-Vi D8G, it wouldn’t be quite so excessive. I used ShawnA’s method of drilling MDF, tapping with a wood screw, and treating the threads with Titebond II. Also used on the other driver mounting holes, and on screw holes for the front baffle. This gives, provided you are gentle, the ability to remove the front baffle repeatedly. Nice.

3.) Weatherstripping installed between cabinet and front baffle for testing. It’ll be removed at permanent assembly.

4.) Somewhat Laborious cable marking and color-coding. Prevents mistakes during hookup. I used cheap Zip cord-style speaker cable for initial listening and adjustment and routed through the slot port. Wahr Nuts ha-ha to connect to the installed Nordost. Almost ready to listen to - have to jig together the initial XO.

5.) Wall Damping is finished.

I have to admit, I really like the Acousta-Blue. Just plain audibly, it absorbs better than fiberglass, not to mention the non-effect of Acousta-Stuf. It doesn’t add as much mass as Sonic Barrier either. And you can glue/friction fit it. So the Sonic Barrier was installed on large panels, then Acousta-Blue over it. Acousta-Blue is itch-free, non-toxic, and made of cotton. Going to be a feature of future builds.

6.) Stuffing: Acousta Stuf at top rear of enclosure at slot port entry, then Fiberglass. Acousta-Stuf prevents fiberglass fiber exit through port. Fiberglass in the back of the enclosure. Acousta-Stuf in front of enclosure, again to keep fibers out of driver. Same scheme was used in bass and mid-tweeter enclosures.

Cheers / Robert

Shows stiffening blocks above and below the Terminal plate.

2 Likes

Harbeth, among other British brands

The Acousta-Blue is a bit thicker than I was expecting - so I put it only on one surface in my last build (in combo with felt).

I’ve always loved the look of those yellow coned F HiVi drivers!

2 Likes

This is really reminiscent of an exercise I went through with another PE board member years ago. We pursued 8” 2-ways using the F8, and in my case, the Usher 9950. It was a good learning process, but the outcome was only “meh”.

I reappropriated the F8 into a 3-way project and was much happier. In spite of was people say about the RS52A, I’ve been really satisfied with the outcome and It’s one of the few builds I’ll never dismantle and always keep in rotation. (RS28A/RS52A/HiVi F8, pic below)

8 Likes

I would love to hear those some day.

Me too! The F8 looks easy, but doesn’t really sound great running high. The resonance at 1Khz is effectively the stop. It works, but meh is a good term. We considered some 3” dome mids, including the rather controversial Hi-Vi, and settled on the SB4. Shawn reported it as a self-modeling driver. A low XO 3-way does require some fairly costly components, and explains why the 3” domes were briefly considered.
On that “note” has anyone had any luck with combo caps? 50% mylar/polyester and 50% poly as a bit of a cost reducer?

I did the work on various high value inductors. Danged if I am buying a CFAC that costs more than the drivers. Laminated steel was briefly considered but we ended up using Jantzen P-Cores. It isn’t a question of saturation, it’s the B-H curve.

Cheers / Robert

Are you coming to Iowa in 2 weeks Turn2?

As long as I feel as good as I have the past few days, that’s a given. Re; the Ziggurats (RS28A/RS52/F8), They’re big, heavy and display all the flaws of a newbie struggling to find his finishing skills. They were built in 2010. On the plus side, it’s only a mile from where they are to DIY IA.

The HiVi RT1.3WE/830874 2-ways are only hours away from debuting. That doesn’t guarantee they’ll be worthy, but I have a good feeling.

More Pics: drivers and baffles mounted and connected with test leads and temp weatherstripping.

I made an old school Neubecker-style jig with available terminal strips. Added big posts because it is easier than changing speaker cables :face_with_monocle: . Mine are banana plugs. Almost ready to listen to…

6 Likes

Randomized driver layout, bold woofer color to catch the eye. I’d put this solidly in old school monkey coffin territory. :smiling_face_with_sunglasses:

With the 90deg corners that would be a candidate for countertop laminate.

I think there was some Sansui in the DNA :grinning_face: We only needed 3 or 4 more drivers per cabinet with some chrome rings for that really good multiway sound!

Shame the stands aren’t tall enough - they kinda match the cabinet and oh man are they sturdy.

Got a nice 70s/80’s Floor Standing Monitor look. Current plan is to Quarter-Round the front vertical edges and Walnut veneer. Walnut will be hit with Walnut Danish Oil for a dark finish. Part of the theme.

I’ve done some countertop laminate - it’s pretty easy. Just need to avoid scratching it. Leaves interesting router shavings. The flat black or “slate” looks cool.

Cheers / Robert

Safe to say you’re right on the money when it comes to my inspirations for this collab. I wanted a more-or-less compact cabinet. The way Robert constructed the cabs is borderline insane. They are not for the week of spinal strength to try and pick up.

shawn

First Impression - it is going to sound good. Some padding is needed on mid and tweeter, and Fb needs to come up a couple Hz. The first is going to be fairly easy. Since I am on a plant rebuild, not much time available other than to work and sleep.