Speaker stands (from mostly scrap MDF)

Recently I purchased the FOSI LC30 speaker/amplifier selector. It has really changed the way I “voice” my speakers, allowing me to A/B the speaker I am designing with two different crossovers (A & B) or A/B against an existing speaker that I can use as a reference.

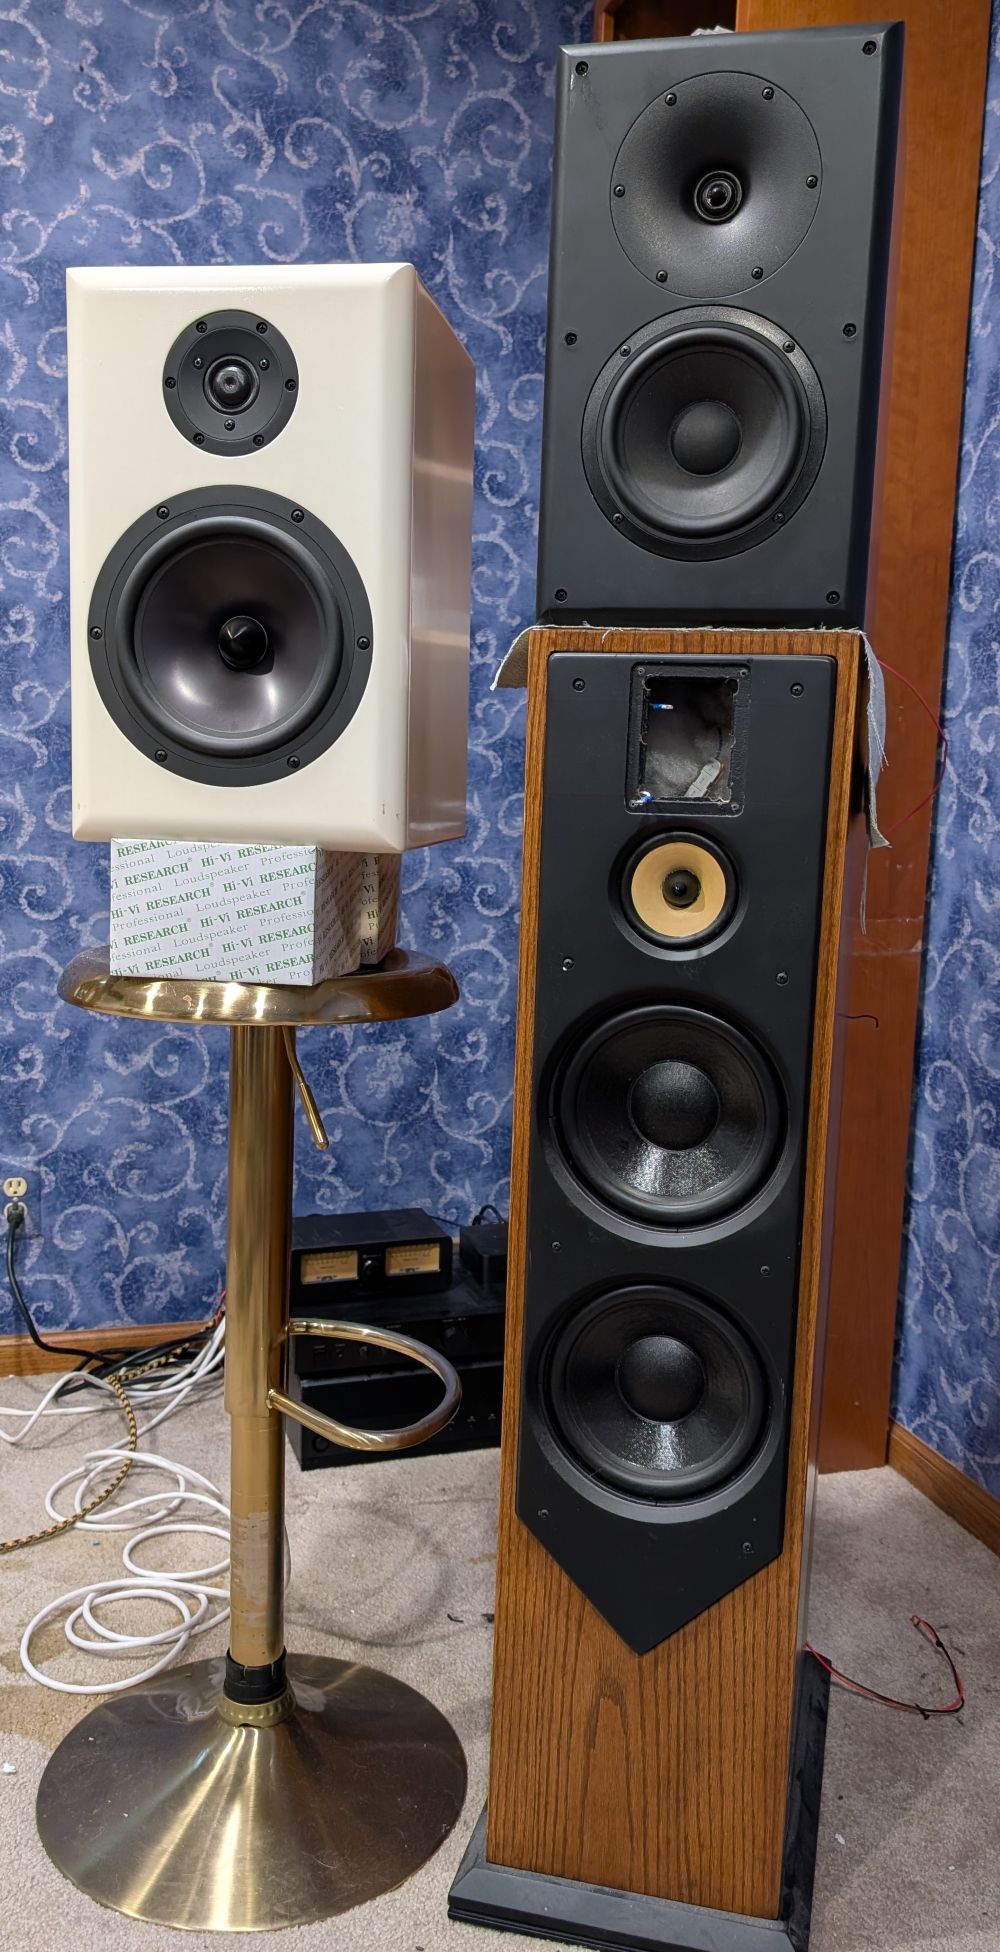
However, I don’t currently have good places to listen to the speakers so I use my home-office. Below is a picture of the setup I used before CSS Detroit. To keep my speaker building privileges intact, I needed to put the kitchen island stools back in the kitchen.

I looked for some commercial stands but the reviews tended to be underwhelming. I figured I could build something more substantial while also customizing it to my house. I have a lot of scrap MDF for wainscotting the house, so built these much like I would wainscot a wall. I also have plenty of construction adhesive, wood glue and paint for the house.

Not counting the cost of MDF, glue or paint, these cost about $67 a pair. ($134 for all four stands.) Some of the costs could have easily been avoided (e.g., kitty litter and neoprene foam) but I was focused on making them sturdy and attractive. Construction screws ($10), Inside-corner moulding ($24), shoe moulding ($48), two 30-lb bags of Tidy Cat kitty litter ($18), 1/8-inch neoprene sponge foam ($22), heavy-duty 1-inch rubber feet ($12).

For comparison, Dayton Audio’s wood or steel stands are ~$110, weigh 28 lbs and have a capacity of 75-130lbs. The tall ones below are 32-inches and weigh 40 lbs, the shorter ones are 26 inches and weigh 45 lbs. I’m sure they can hold 200+ lbs.

LEFT: Stand 1 is a half-done tower speaker. Stand 2 is a kitchen stool plus two HiVi speaker boxes.

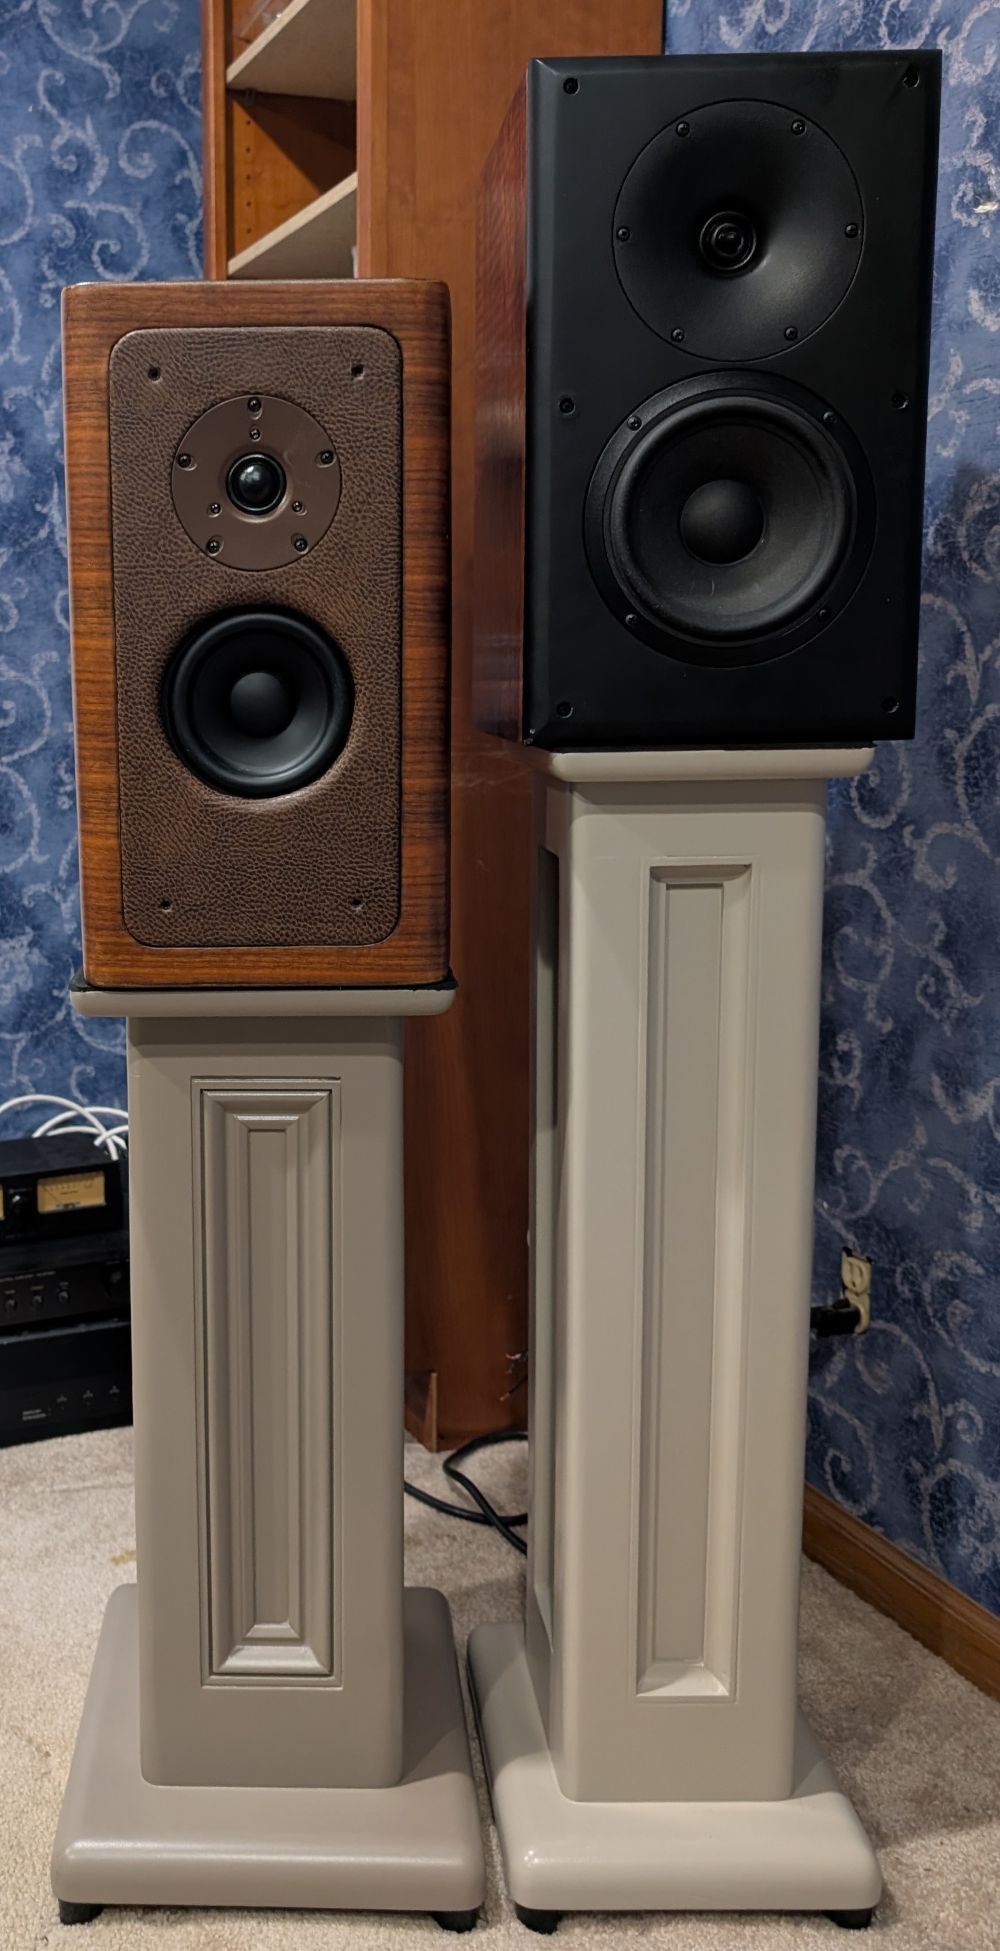
RIGHT: New DIY stands.

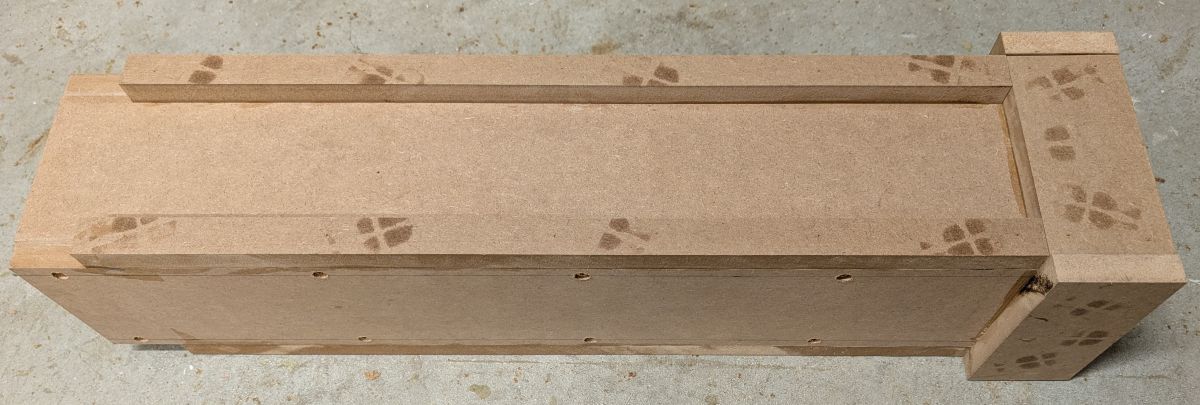
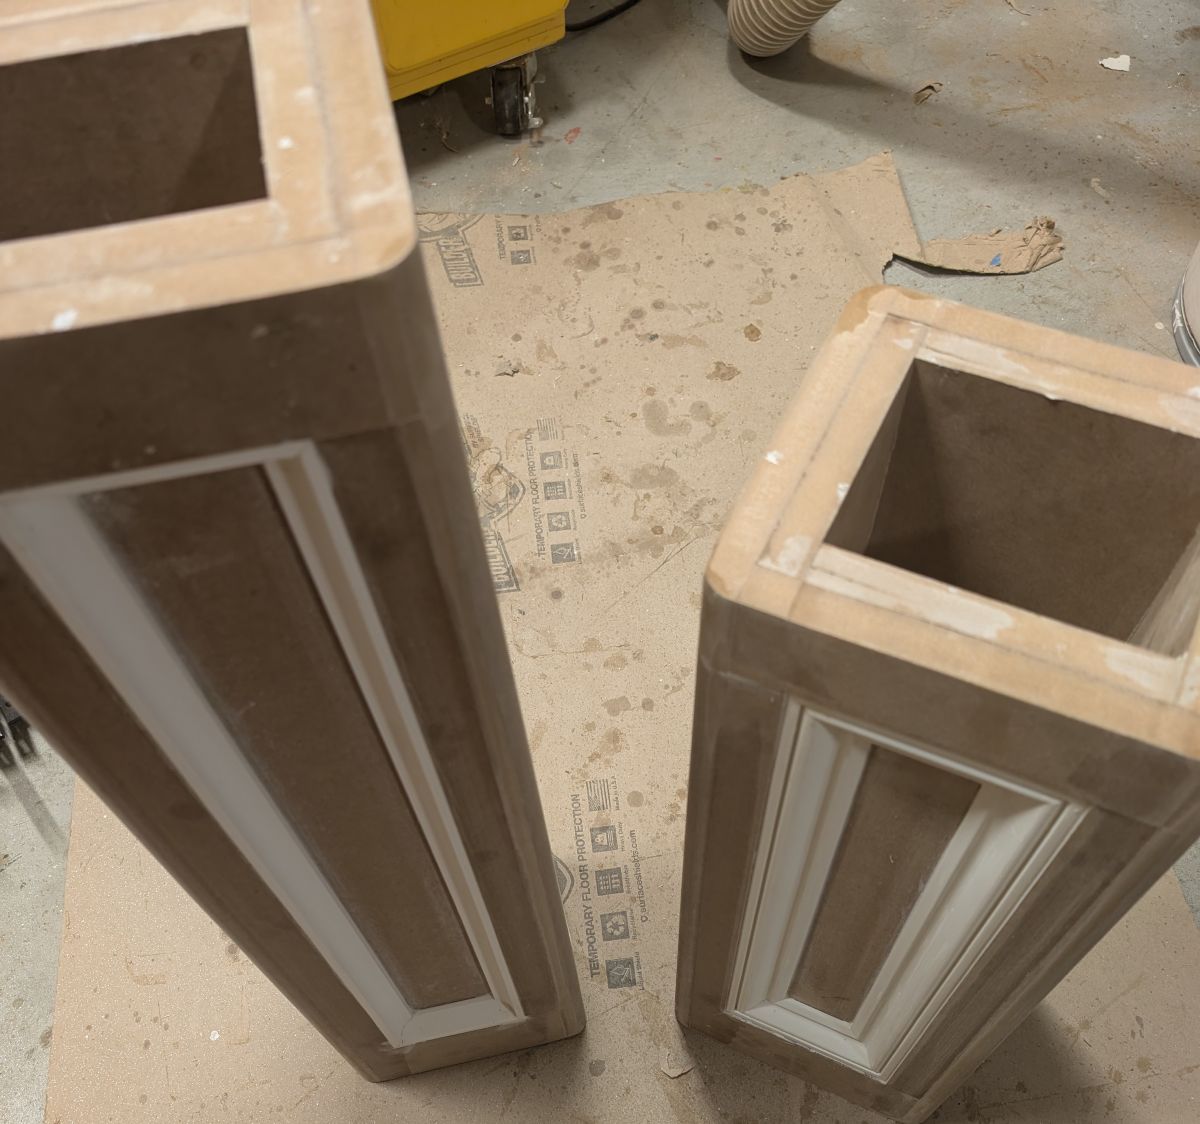
Base stand is a rectangle of MDF, glued with Loctite PL200 construction adhesive and attached with 1-3/4” construction screws. Pic below is building up the rectangular column and adding the equivalent of rails and stiles.

I flush-trimmed and then added a 3/4-inch roundover to eliminate sharp edges.

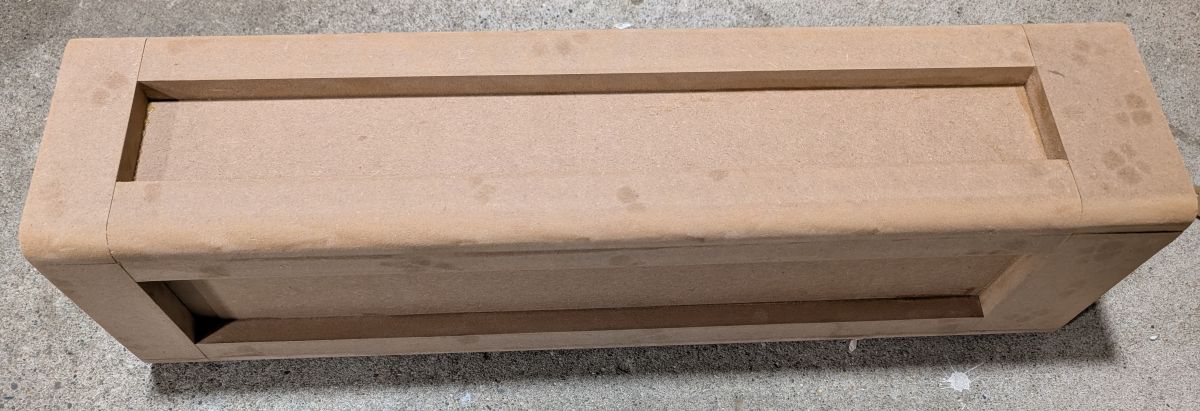
Added trim moulding. Inexpensive PVC inside-corner trim and shoe moulding from Lowes.

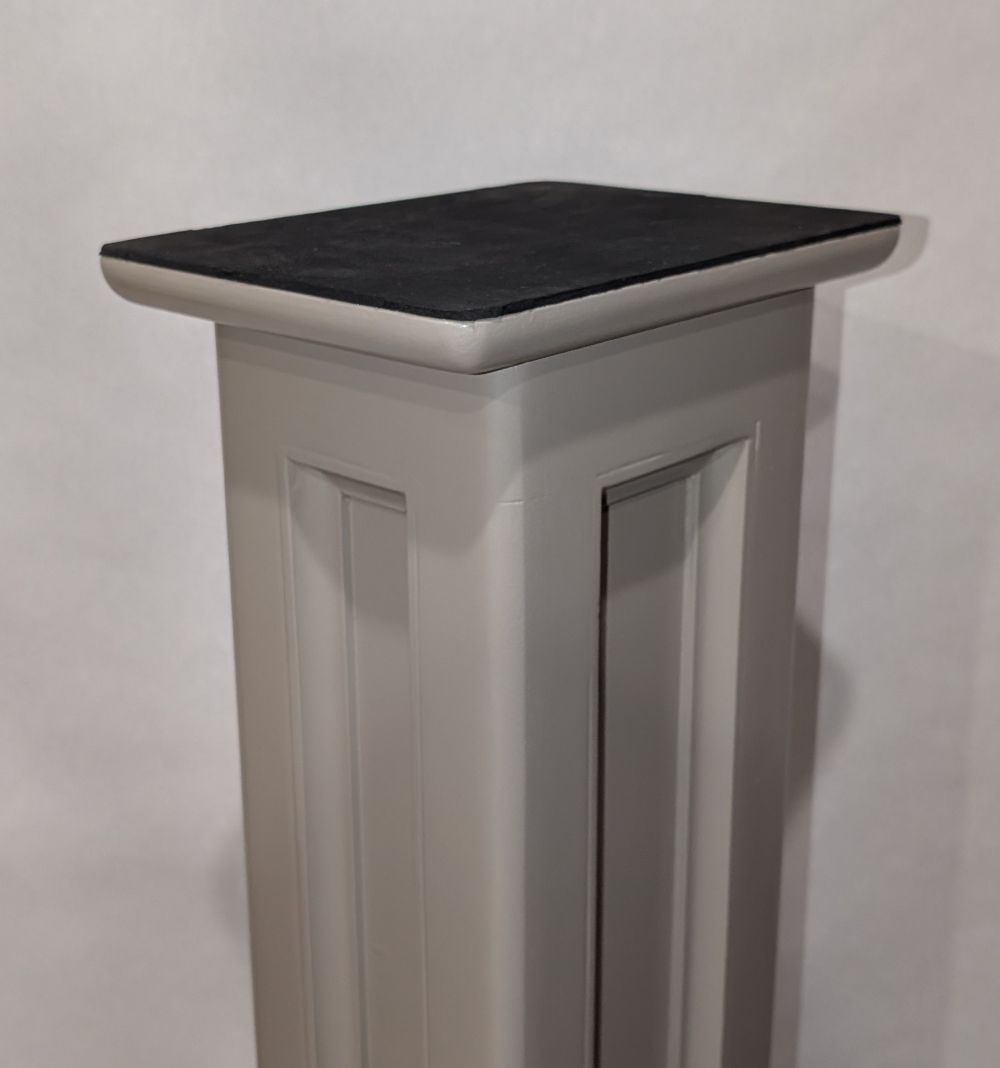
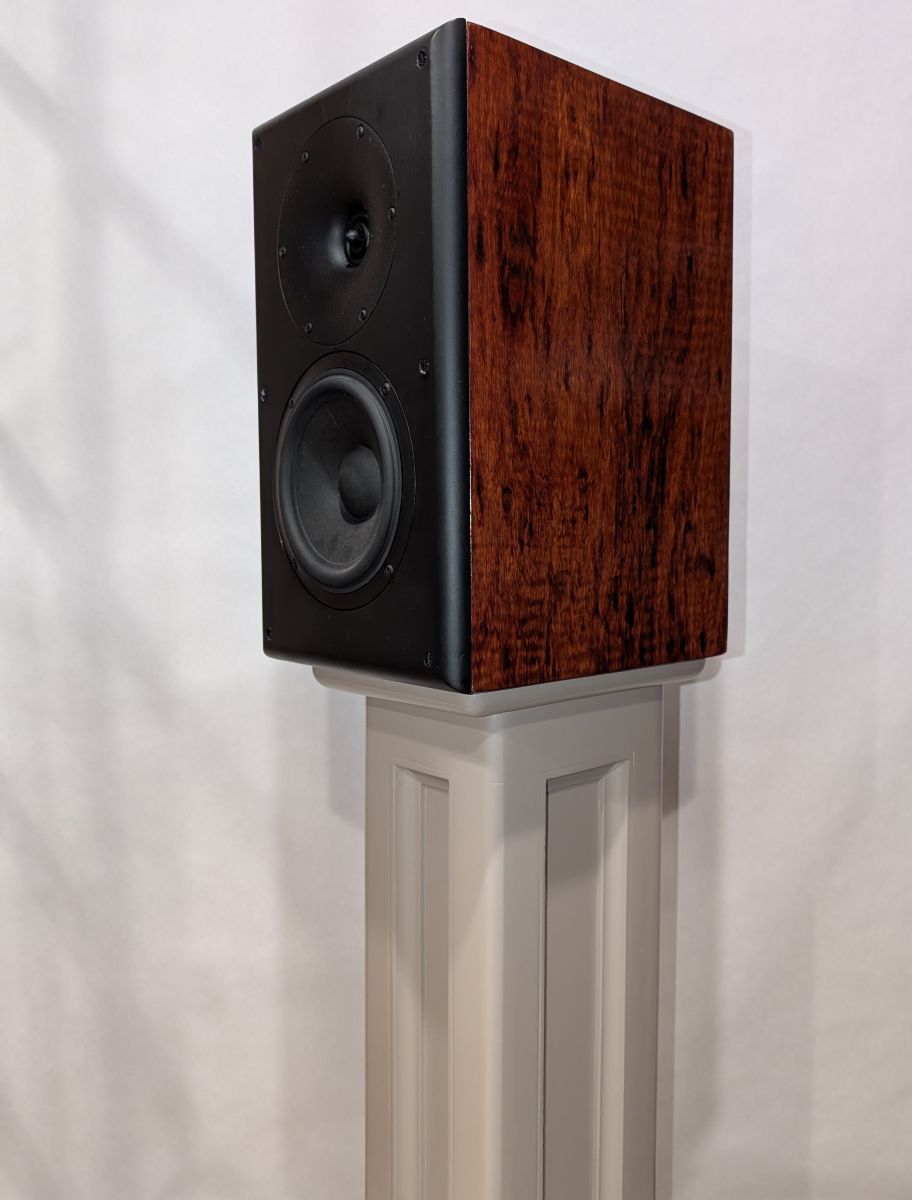
Somehow I did not get a picture of the top and base. Top is 3/4-inch MDF with a 3/4-inch roundover. Top is kept as small as possible. I measured several of my speakers and choose a size that such that a typical speaker would fit right on top or even hang over the edges of the stand about 1/2-inch. Bottom is two layers of 3/4-inch MDF with a 1-inch roundover. Top and bottom attached with construction adhesive and 4 construction screws. I didn’t weigh them before adding 15lbs of kitty litter to each they would have been 25lbs (tall, skinny) and 30lbs (short) without.

Cheap 1-inch furniture feat from Amazon (12 for $12)

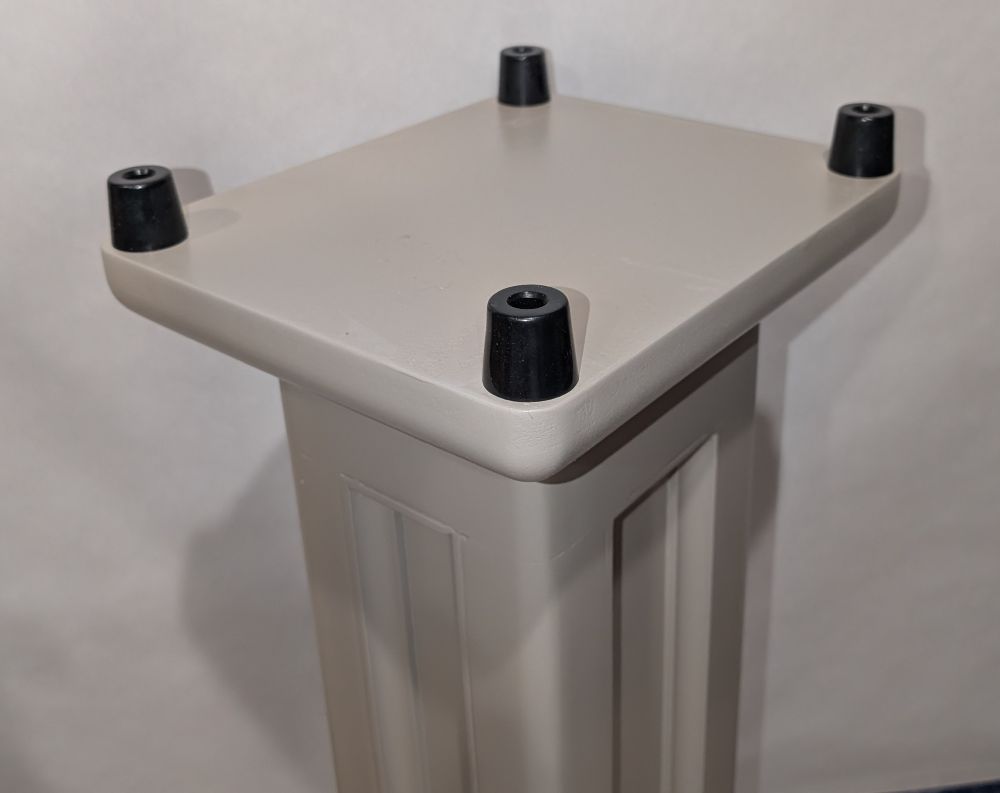
Some 1/8-inch neoprene sponge foam for the top (12-inch x 54-inch roll for $22 on Amazon).

32-inch stand. 40 lbs ea.

26-inch stand. 45lbs ea.

12 Likes

Nicely done!

Those look top notch!! Definitely a good use of scraps👍🏻

…but just a smidge to tall for tower speakers.:face_with_tongue:

Wainscoting looks really cool! :+1: Super heavy and solid. In comparison, the cheapy pine stands that I sometimes bring to events are only 15 lbs. How do you like the FOSI LC30 speaker/amplifier selector?

Those look excellent, especially with the moulding inside the rectangular recesses.

The best thing you can do for a speaker, structurally speaking, is make it heavy. The second best thing you can do is give a speaker something heavy to transmit its reaction force into that will have minimal motion as a result. A wooden box stand filled with dry quartz sand is a perfect support. Any remaining kinetic energy will be dissipated in random directions through the sand. If the bottom of the speaker could be bolted to the stand, then the transfer of kinetic energy to the stand would be maximized. If you want the speaker to vibrate (like a Harbeth box deliberately meant to be active) then you need to decouple it from its stand, which is the mechanical ground that sinks the kinetic energy, but if you don’t want the speaker box to vibrate, then couple it as rigidly as possible to its base. The weight of the stand, with some spikes, makes sure the stand is as rigidly coupled to the subfloor as it needs to be, but the stand’s own mass is the sink for the vibration energy.

Here’s to overthinking and overbuilding.

1 Like

Bolting the speaker to the stand would be best - but would spikes on the speakers help over the speaker just sitting on the stand?

I have given this a fair bit of thought and I wonder if the problem takes care of itself. A bookshelf speaker has a woofer with relativity low moving mass and therefore does not need a super heavy box to sink its equal but opposite reaction.

I really like it. I bought it for fun - I have some (ugly) speaker selectors but it has that cool “vintage” look. But where it has turned out really useful is voicing a new speaker design. I can set it up to switch between either (1) two different versions of a crossover for the speaker I am designing or (2) the speaker being designed and a reference speaker. The remote control allows me to instantaneously switch without moving from my listening position.

2 Likes

Randomly looks up Fosi unit on eBay…


:rofl:

4 Likes

I didn’t get the vaccum tubes in the box. Oh wait, i have the douk audio one :frowning:

The one thing that would have made this even better would have been independent volume control for each speaker out - then the speakers could have been level matched. maybe voltage matching on the amp side too… but it’s got dancing VU meters…!!!

I’m a big fan of traditional millwork, those remind me of nice newel posts, well done!

1 Like

I want some adjustable stands.. But I always get hung up on how to build something with strength and adjustability without rattling. Oah and my usual “must be simple to build” requirement would apply.

Simplest thing I can come up with is a line of T-nuts down each face of a square MDF/ply tube that lines up with holes in a section that telescopes over. Then align the holes at the desired height and use bolts with hand knobs to tighten down and clamp the whole thing together, preventing rattles or squeaks. Wouldn’t be particularly quick to adjust. Which would be fine for home use, but not so great a solution to bring to the gatherings.

For that I suppose just having shorter stands and mix/match a few different height spacer blocks is more practical. That might be the way to go anyway if I can figure out how to make it look ok enough.

If you used a single stereo preamp source to send two identical, stereo signals out to two separate stereo power amplifiers, then I think you could level match the switching process by carefully adjusting the input gain level on just one of the two stereo power amps until a very good SPL match is obtained. Then, to switch back and forth between two different stereo speaker sets, you would simply press the Spkr button relay and the Amp button relay at the same time. Does this make sense? :level_slider:

Sort of, assuming both are integrated amps. Some of amps are pure power amps, no volume control. But I think if I use 2 identical integramps and feed them the same signal and level match on pink noise should be able to compare speakers.

Yes, level matching SPL is the only challenge. Two stereo amps with volume controls would work as Bill describes. For now, I have a partial workaround. I have a pre-amp with separate left/right volume controls and a 5 channel power amplifier. I sum to mono in my Wiim settings and use RCA Y-splitters from the preamp to amp. I send the two left signals to input A and the two right signals to input B. (The two amp inputs are A/B and speaker outputs are 1/2). I level match with Pink Noise. BUT, I’m limited to mono.

1 Like

I suppose a preamp with balance would also work. I didn’t have any proper preamp with channel balance at the moment.

Mono for voicing is pretty adequate. Usually I am trying to voice the mids with a single speaker. Might sound a bit thin, but bass is not I usually voice on.

1 Like

I cheat and have a minidsp flex htx that use as a mixer but it’s main use is for tapping signal to feed bass bins, overkill for that. But the flex’s are much more transparent sounding than the 2x4hd’s IMO. Keep a cheat sheet to remember all my inputs and outputs. Also use to to feed motu2 for voicing measurements and can tinker with notches, though I don’t always trust dsp notches compared to real passive notches. I think in dsp world it’s not apples to apples, passive component implementations tend to have more beneficial side effects, to ears feels more natural vs hitting with dsp hammer sometimes but have to admit I havent jumped deep into those weeds yet. Errr… go see diyaudio thread for the once again rehash of dsp vs passive, at least not as violent as ASR.

But back to on topic, gives me a gogillion options for input output mixing and experiments (linkwitz transform on a whim etc.)