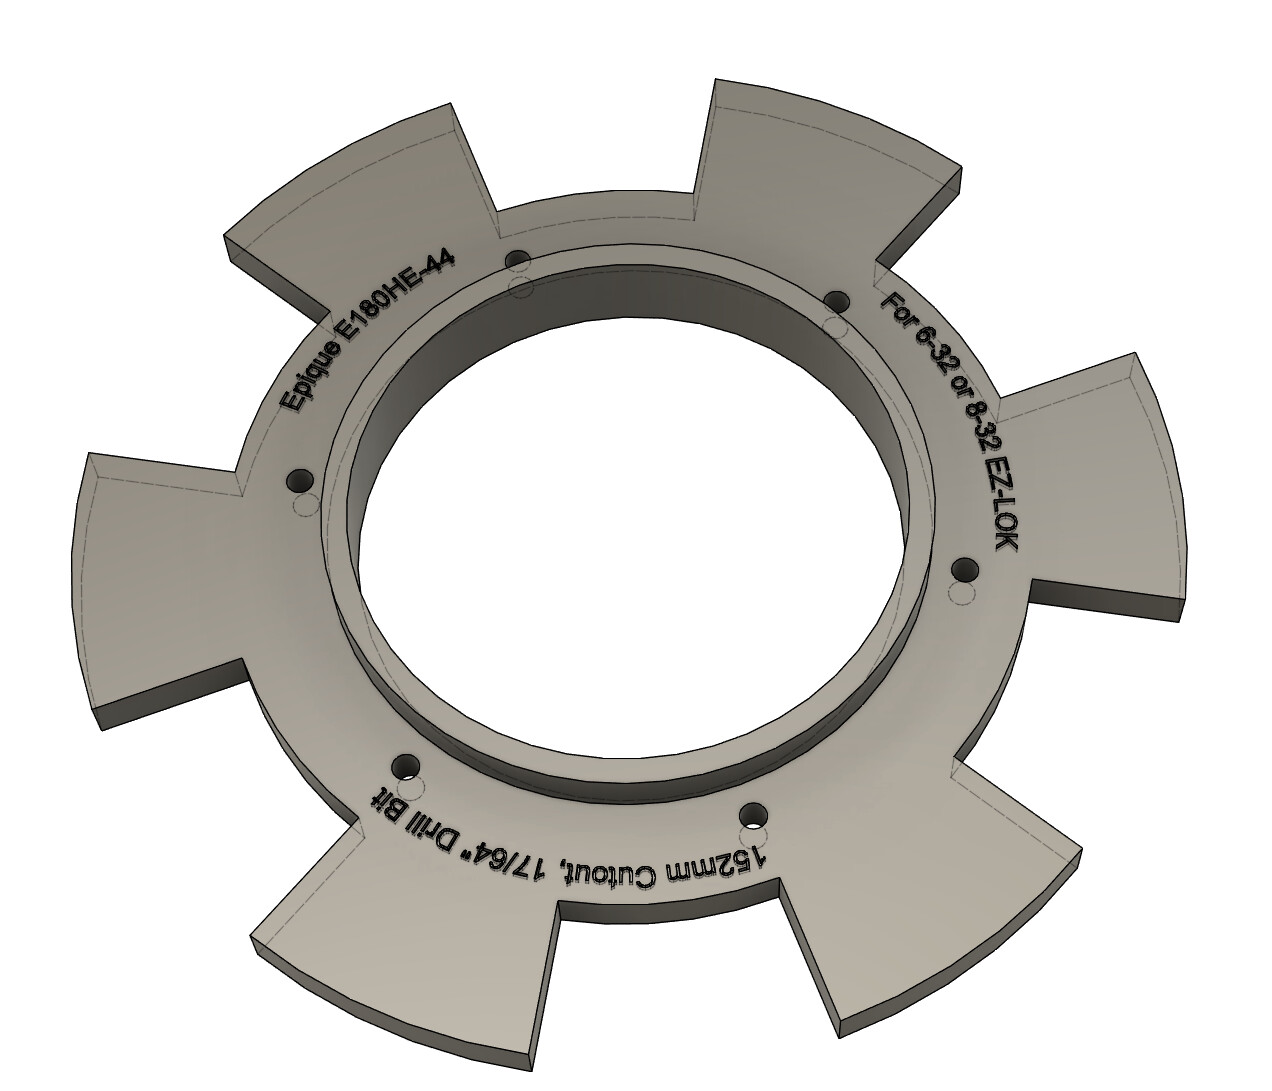
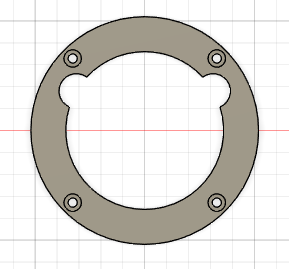
I’m working on making some 3D printed templates for some of my next projects (Wolf’s Monoculus and a small 7” Epique subwoofer) and want to run the first one by MAC crew to see where I could improve on the design. Current features:
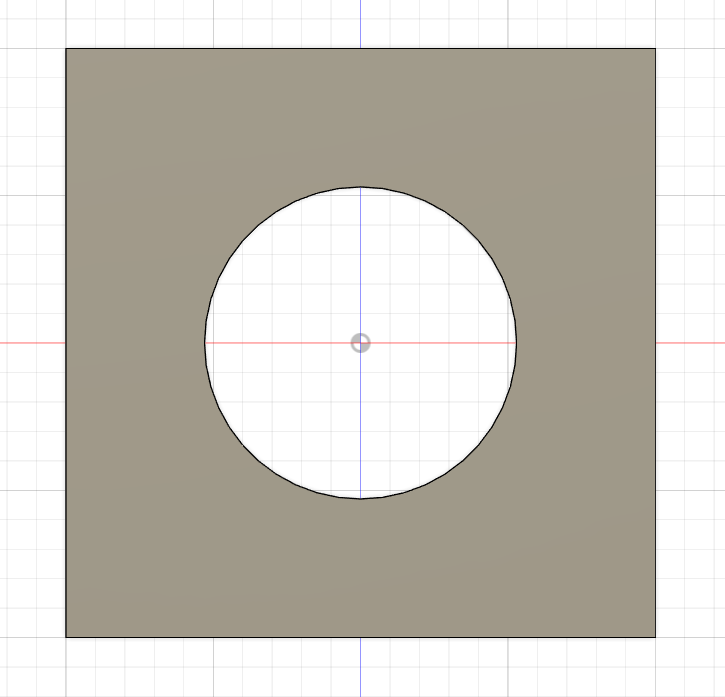
Drill-out guide is 1/2” thick, I think this is sufficiently thick such that it would help keep the drill bit straight when using a hand drill.
Inner ring is also 1/2” thick to fit the cutout. If it’s snug enough all one would need to do is rotate the template until the screw holes are in your preferred spot.
The outer tabs are for two things. First, they’re for clamping the guide in place. Second, they provide a perpendicular edge to measure to when orienting the screw holes.
Text embedded in the template so I don’t need to look up appropriate drill bit size and such.
Plan is to make these as-needed for other drivers and inserts, then keep them on hand for future use. Tentative plan is to use ASA for making them so they’d be a bit more robust. In an ideal world I’d press a metal sleeve into these somehow so the holes would not be subject to deformation, but I’m not sure how to go about that.
This is a great idea! I may have to make one of my own someday. I do a lot of 3D printing at work, mainly jigs and prototypes, and have a few ideas.
McMaster-Carr sells drill bushings. In a lot of styles, press fit, flanged, etc. In my experience, drilling through a 3D print can be risky. Good chance the bit can catch the print and rip it up. May be possible if you’re careful though. drill bushings | McMaster-Carr
Printing ASA flat is always a challenge. Even with an enclosed printer and active heater. Would suggest rounding/filleting any corners as they have a tendency to lift. Also printing with a brim will help lots.
A minor thing, but ABS would be a bit cheaper to print with. Unless you need the UV protection of ASA, it’ll save some monies.
Lastly, that text if fairly small. Increasing the font size would make it print more clearly.
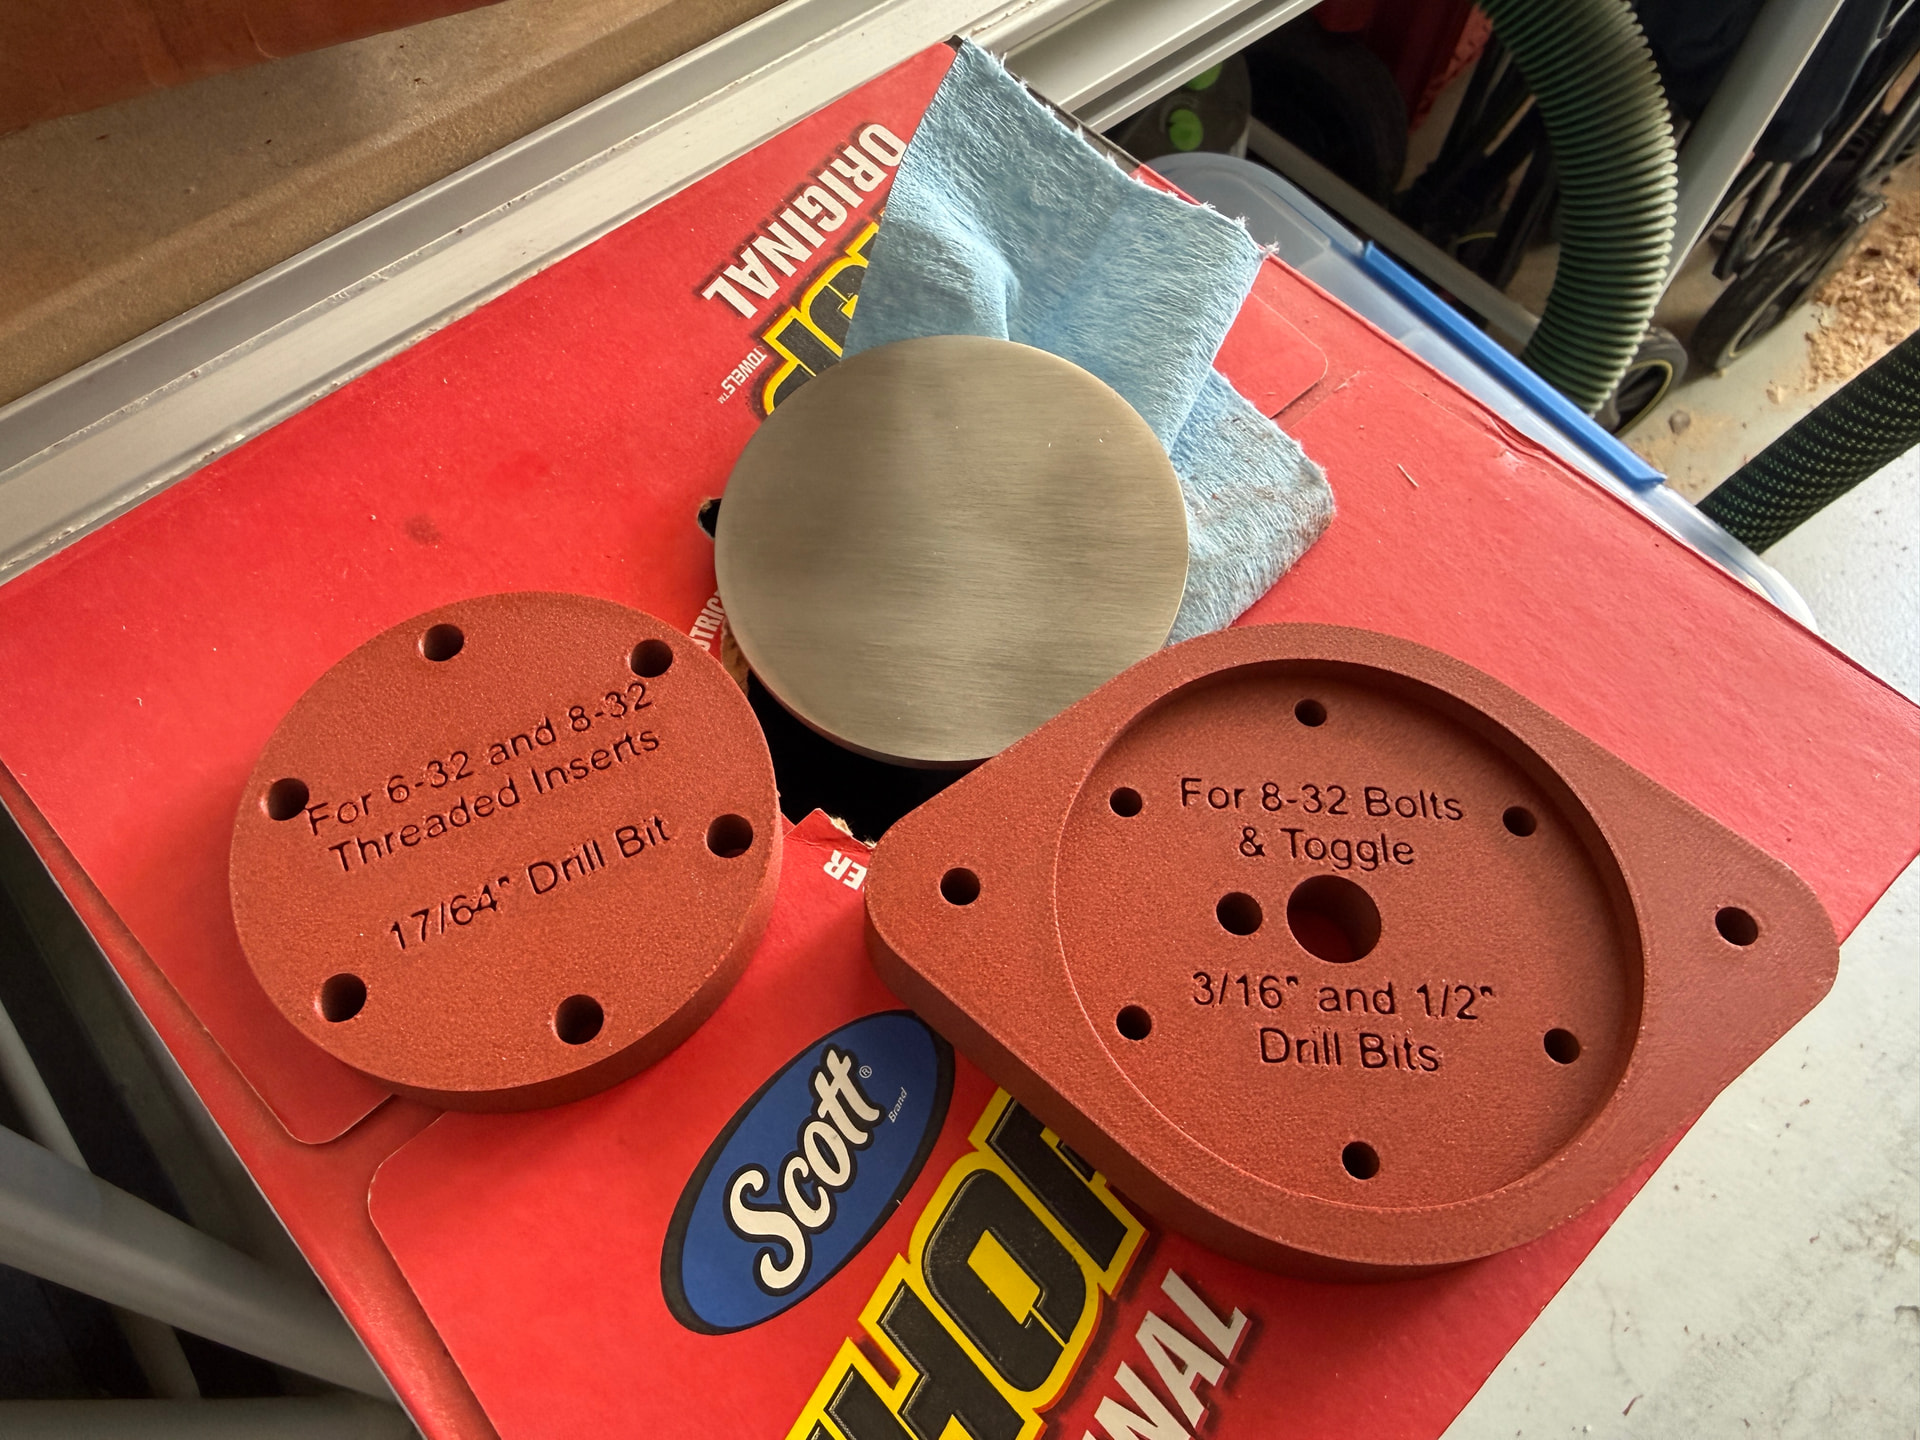
Hey Waffle, thanks for the advice! Definitely a few things to think about here. I already made a few other jigs in kind of the same vein (photo below). I haven’t had the bit catch and throw anything at this time, but it does whittle down the holes a bit so the jig can’t really be used forever. The bushings from McMaster-Carr could be perfect!
Text size should be okay, it just looks small because the part is kinda large. Photo below has the same size of text.
I don’t have much experience with ASA but have a few rolls of it for trying out a few things. The two things I’ve printed so far (a poop chute+bucket) seem to be printing very well. At least, so far. Reason I’m using it for that is I just got a second printer I’m planning on only using for TPU and ‘advanced’ filaments. Since the fancy filaments need more heat, I didn’t want hot poop sticking to a chute made of PLA or something else that isn’t particularly heat resistant.
I don’t have ABS - heard it’s pretty smelly and I work in the same room often. But maybe I should pick up a few rolls during a sale or something. I have SO MANY rolls of other filament though!
I only print in PETG and TPU. Tried pretty much everything else and these two do everything I need them to do and they are both very easy to print with.
For templates I print the outer template and another template that nest inside that is for the through hole.
I put paintertape down on the baffle and on the bottom of the outer template. Layout where I want the tweeter to be and then superglue the the template in place, painters tape to painters tape.
Drop in the through hole template and cut that through with a top bearing pattern bit.
Remove the inner template and cut the recess for the driver.
For screw holes I normally do those manually but have been tossing around some ideas for a captive mounting system.
Let me put a few together for you guys. All the templates I currently have fit tweeters I have already used.
I only use ABS for 3D printed crossover boards because it is quite a bit more heat-resistant than PLA and even PETG and I want to account for the possibility that the resistors may get hot. Although, if they are hot enough to soften (not melt) PETG, I probably have bigger problems.
I do not work in the same room, but I have a decent air purifier I got free from my utility company back when they had some deal going on that I run in the printing room for ABS.
I do this for routing a lot, but because I don’t like using super glue if I can avoid it, I use double-sided tape and painters tape-to-painters tape to avoid damaging the work piece with too-adhesive double-sided tape.
PETG softens about 185F, so yes if a resistor is getting that hot then you have other issues. ABS softens around 220F. While technically neither tempariture will ignite wood or MDF you wont want to toutch it and you will start to damage capacitors.
You can “temper” PETG by baking it at 80-100C and it is considerably better when done correctly but you have to watch for warping. Thankfully where I work we have lab ovens that opperate at 85C for testing electrical product. It makes it easy for me to leave a part in the oven overnight (letting it cool slowly) and take it out in the morning before turning the ovens back on. This is almost ideal and what I have noticed is that the product behaves much more like an injected part. The same thing can be done with a toaster oven.
Most of the time this is not needed as PETG is pretty good right off the printer but if you need that extra stength and stability it definetly does make a difference.
For those without printers PETG is the same plastic as pop bottles so that gives you an idea of the type of plastic we are talking about.
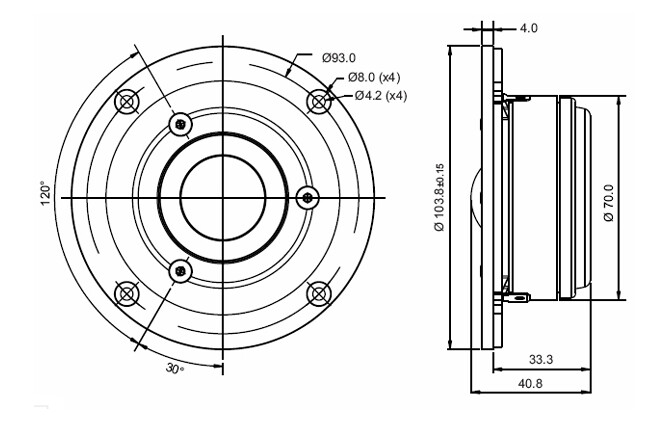
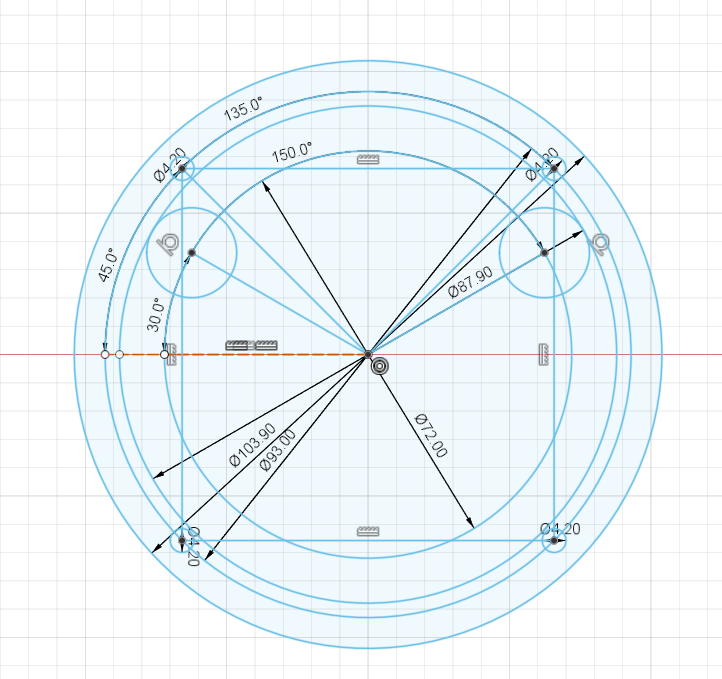
If the internal hole is round you can let the template float and you don’t have to glue or screw it in place. For this tweeter it makes the most sence to screw or glue the template in place, so I added screw holes that are countersunk so that you can screw it in place and these holes will work for the teeter when you are done machining:
Polyethylene, but what is the TG? Looked it up, Terephthalate Glycol. (I used to mix, dry, and change resins out for a former plastic injection employer. )
PET is also known as Mylar or Polyester, and is also used as the Film in those kinds of capacitors.
Correct there is a Glycol modifier to help it with 3d printing but with PE it is not actually needed. There are a lot of people who actually cut pop bottles to make their own filament from used bottles.
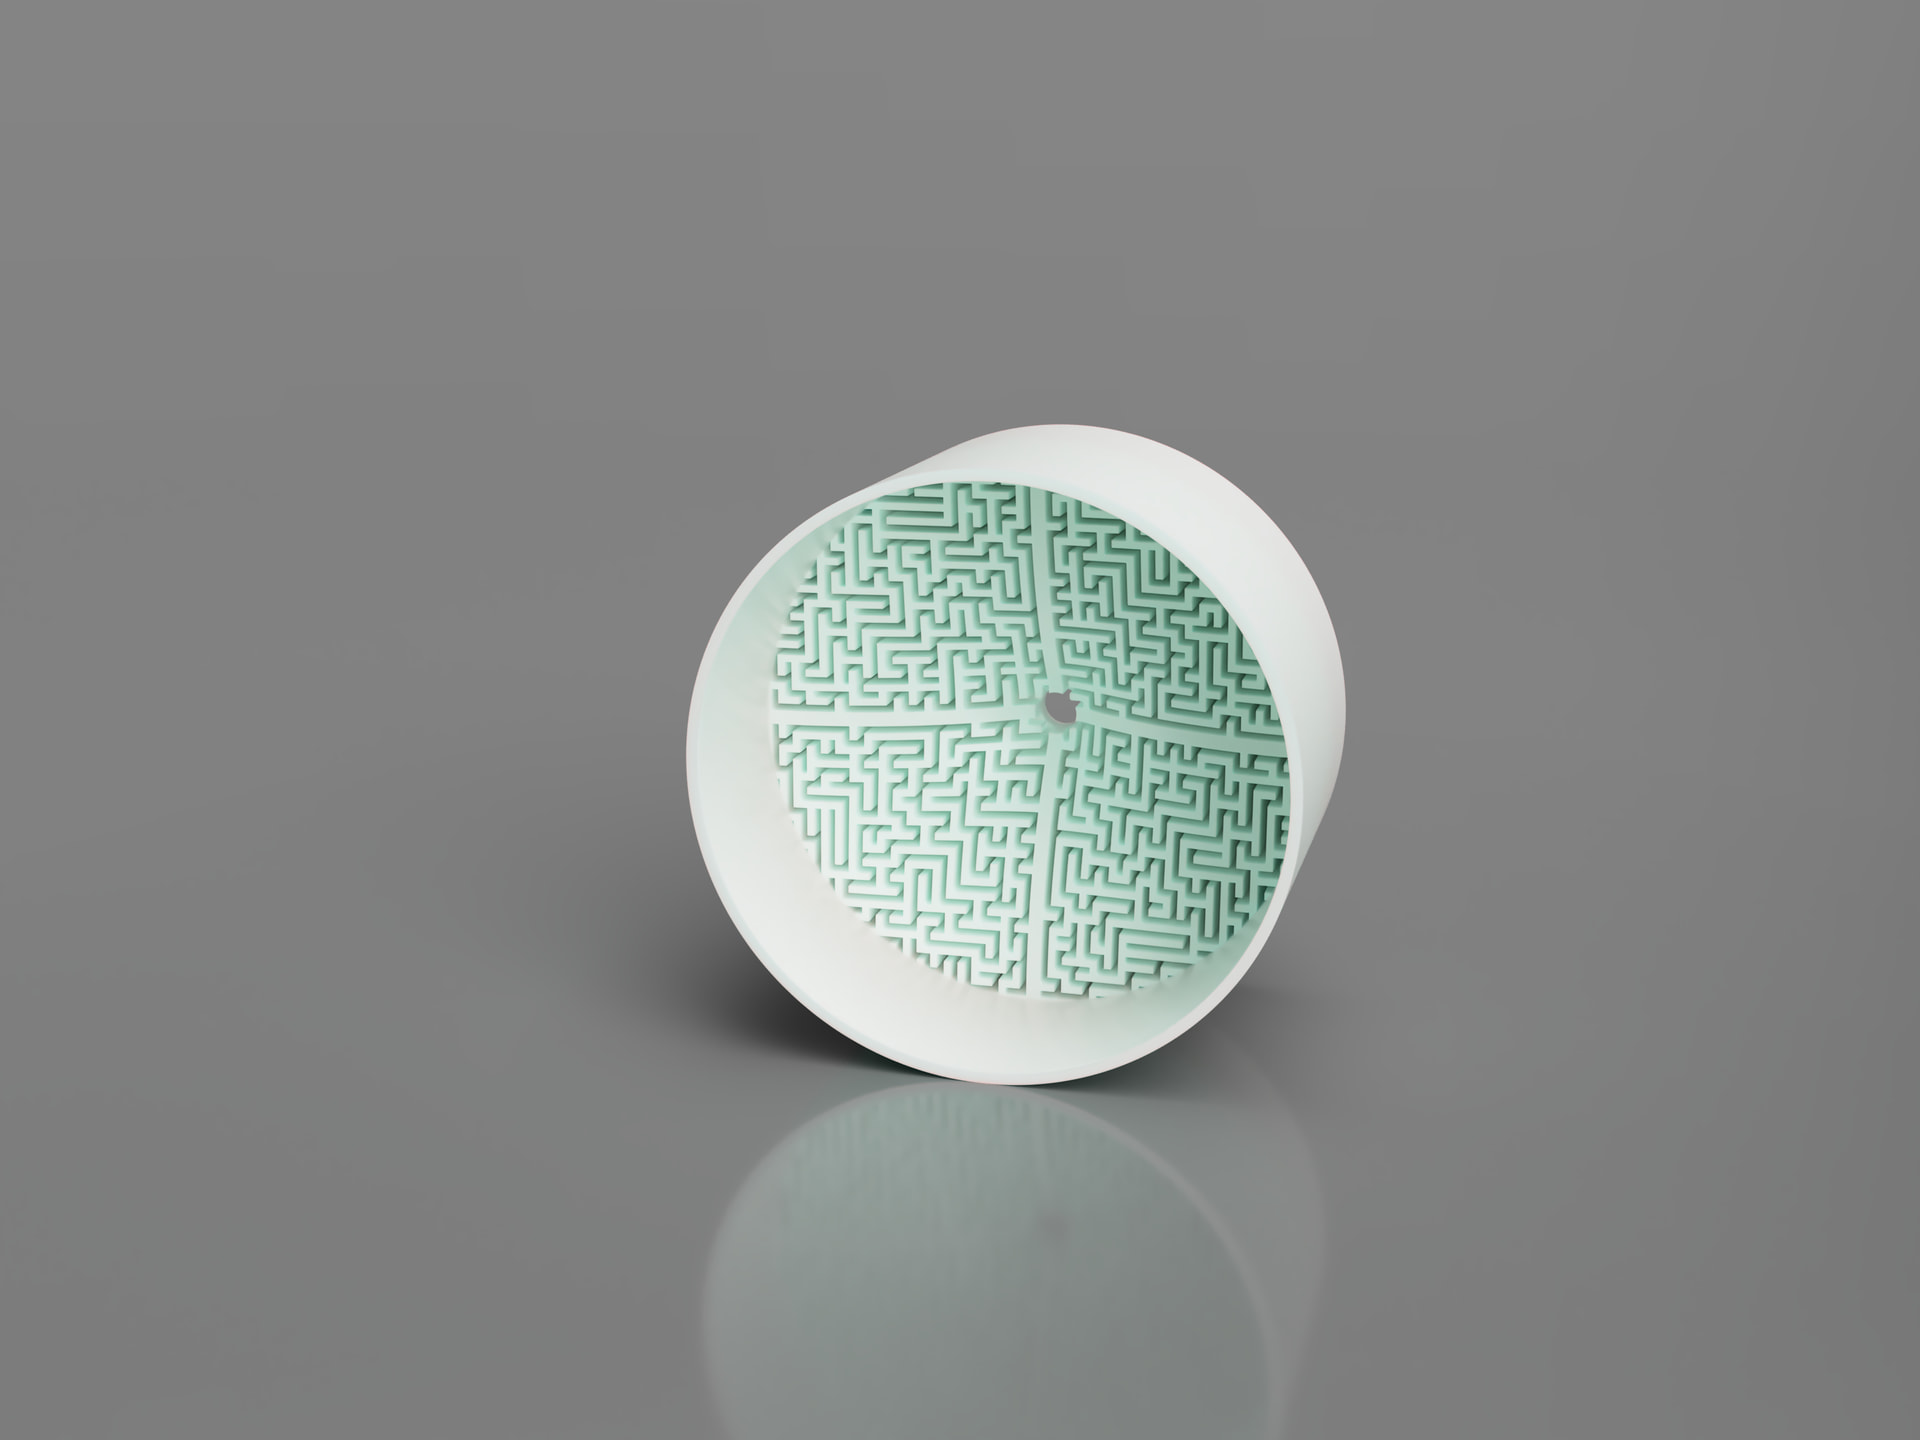
Yeah that text is clear! Always hard to gather a scale in CAD.
What printers do you have out of curiosity?
ABS does have some smell; and ASA is better but still has some too. Would definitely recommend some sort of a filter; a carbon based one. You can buy rechargeable ones that sit in your printer, helps a lot.
ABS/ASA just gets more difficult to print and stay flat the larger the object is.
I agree with Ken too; PETG ought to be absolutely fine. I just find it sometimes fun to print something that’s a bit of a challenge for overkills sake. PETG is a bit more flexible, and ABS stiffer, in general. Some good info: PETG vs PLA vs ABS: 3D Printing Strength Comparison
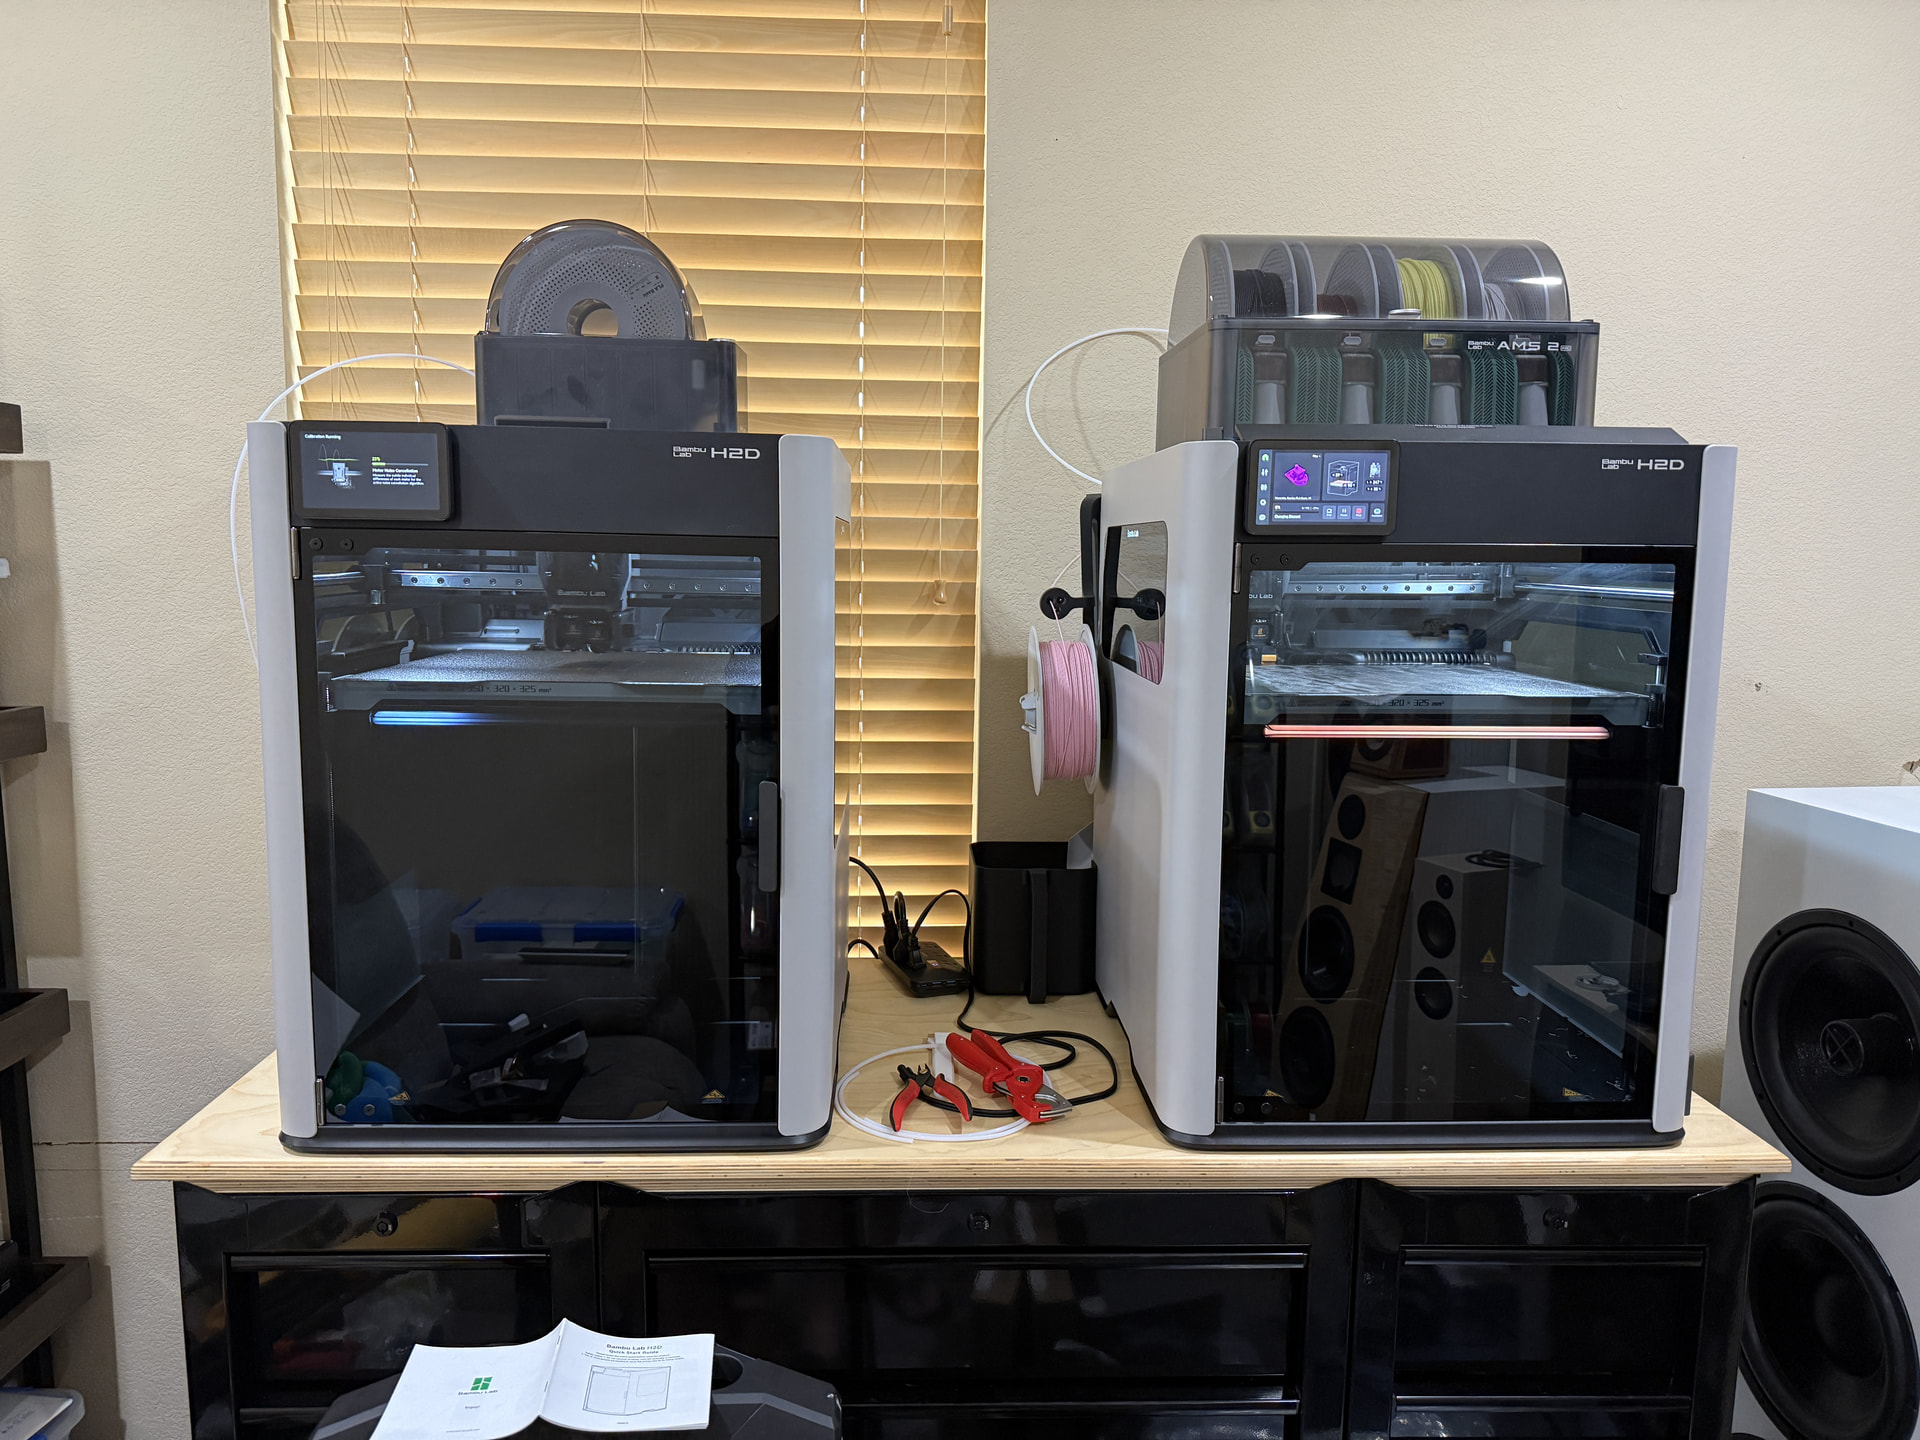
My wife and I kind of went all-in on this last year and grabbed a Bambu H2D when it launched. After several thousand hours of runtime we just decided to get a second H2D so we don’t have to alternate between ‘fun’ projects (like D&D miniatures, cute animals, etc.) and more ‘serious’ things like tools and fittings and speaker stuff.
My intent for the second one is to basically keep it set up for TPU and the other harder-to-print materials. Once the other parts arrive for it the first real print (I’ve been making accessories for it right now) will be a TPU liner for a back cup on a TB coaxial mid.
One of the reasons for investing in the second one was I looked into the cost of having the TPU liner made by a local company instead of setting up our current printer to handle it. They quoted $100 PER PRINT, which I thought was ridiculous. They also only had 95A TPU, and I wanted to experiment with 85A and 90A as well. This stuff is like, I dunno $30-$40 a roll and I’m certain I could get at least four prints out of one roll.
So anyway,we have some pretty decent manufacturing capability if anyone needs something made.
I’m pretty biased at this point, but it’s a really nice machine that has definitely been worth the cost. That said, I hear several of the less expensive models produce better quality prints out of PLA and PETG. But if you want something big, need at least two nozzles, and want it it to be dead simple to use….this is the one, IMO.