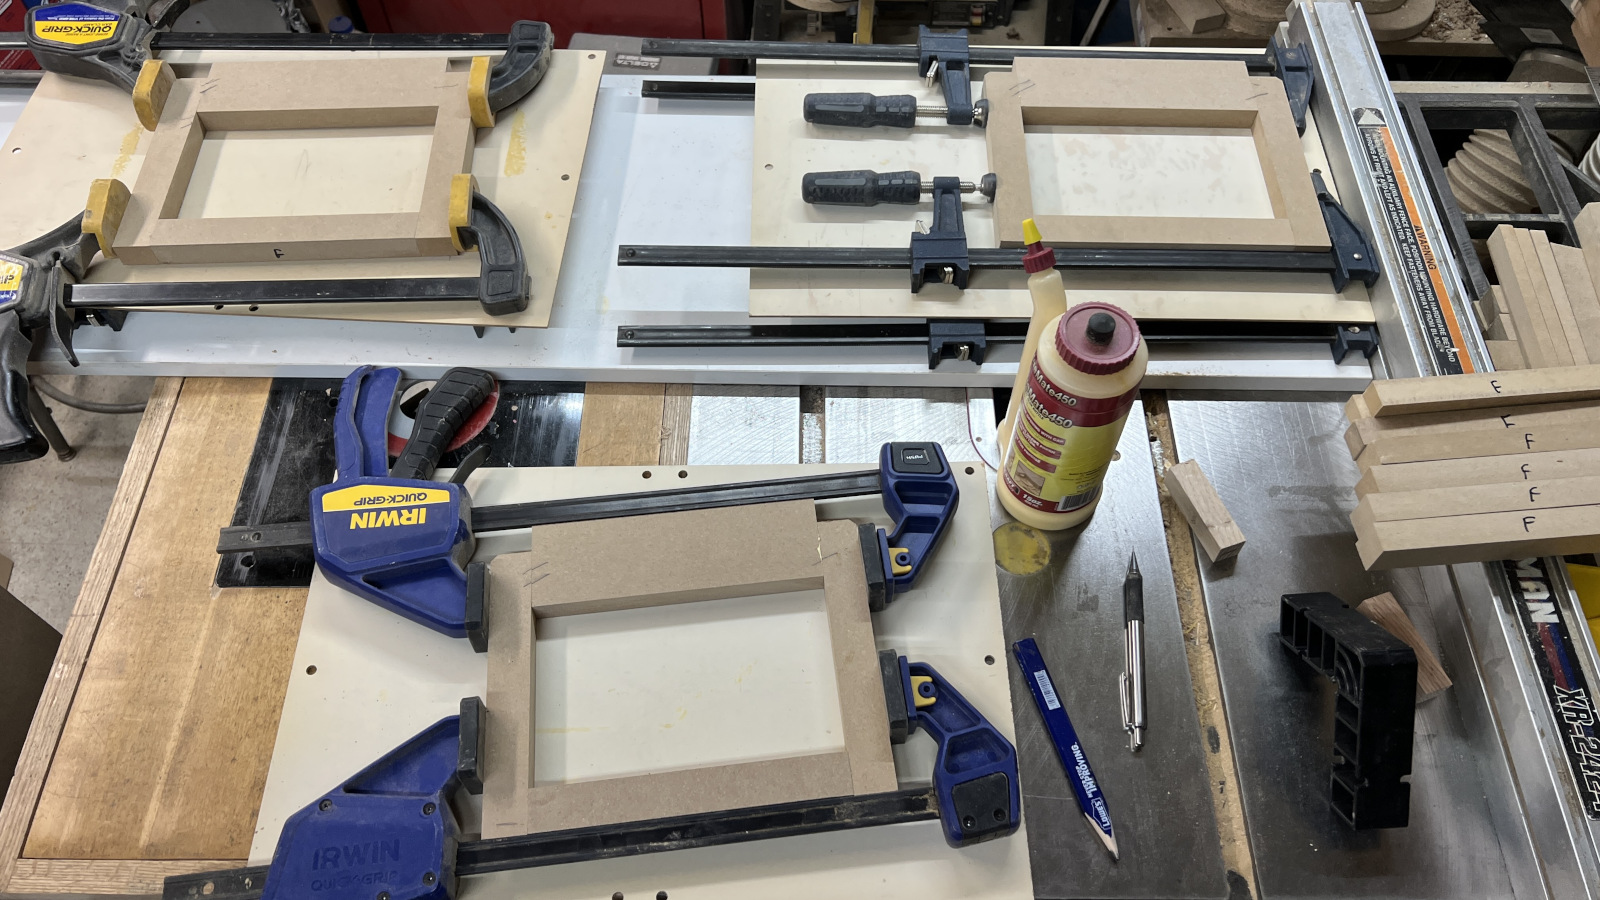
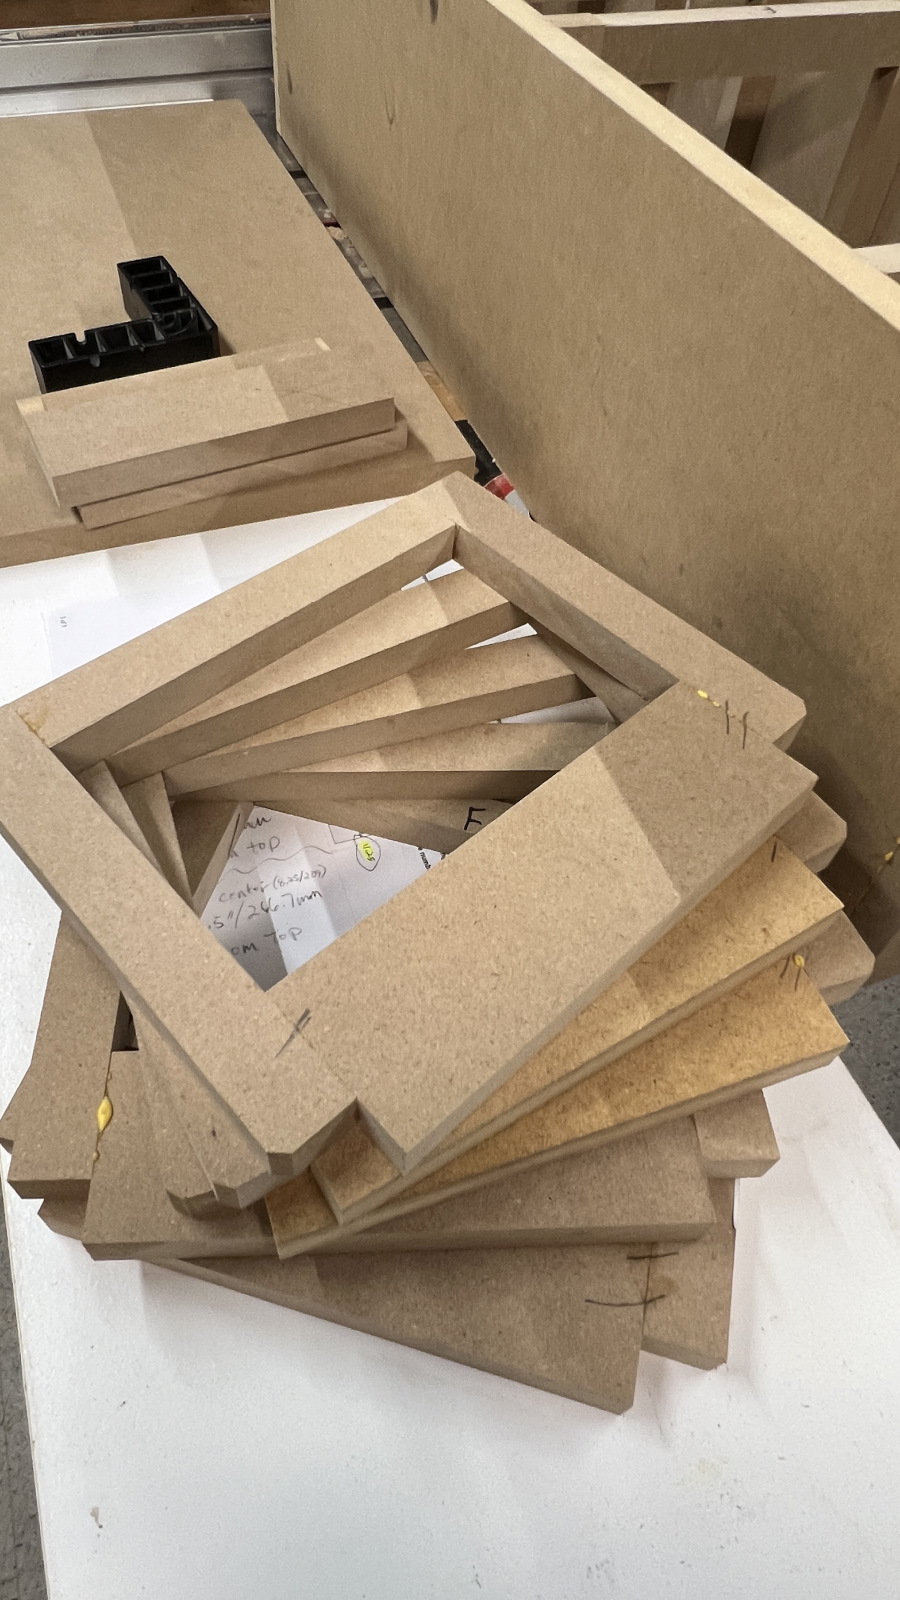
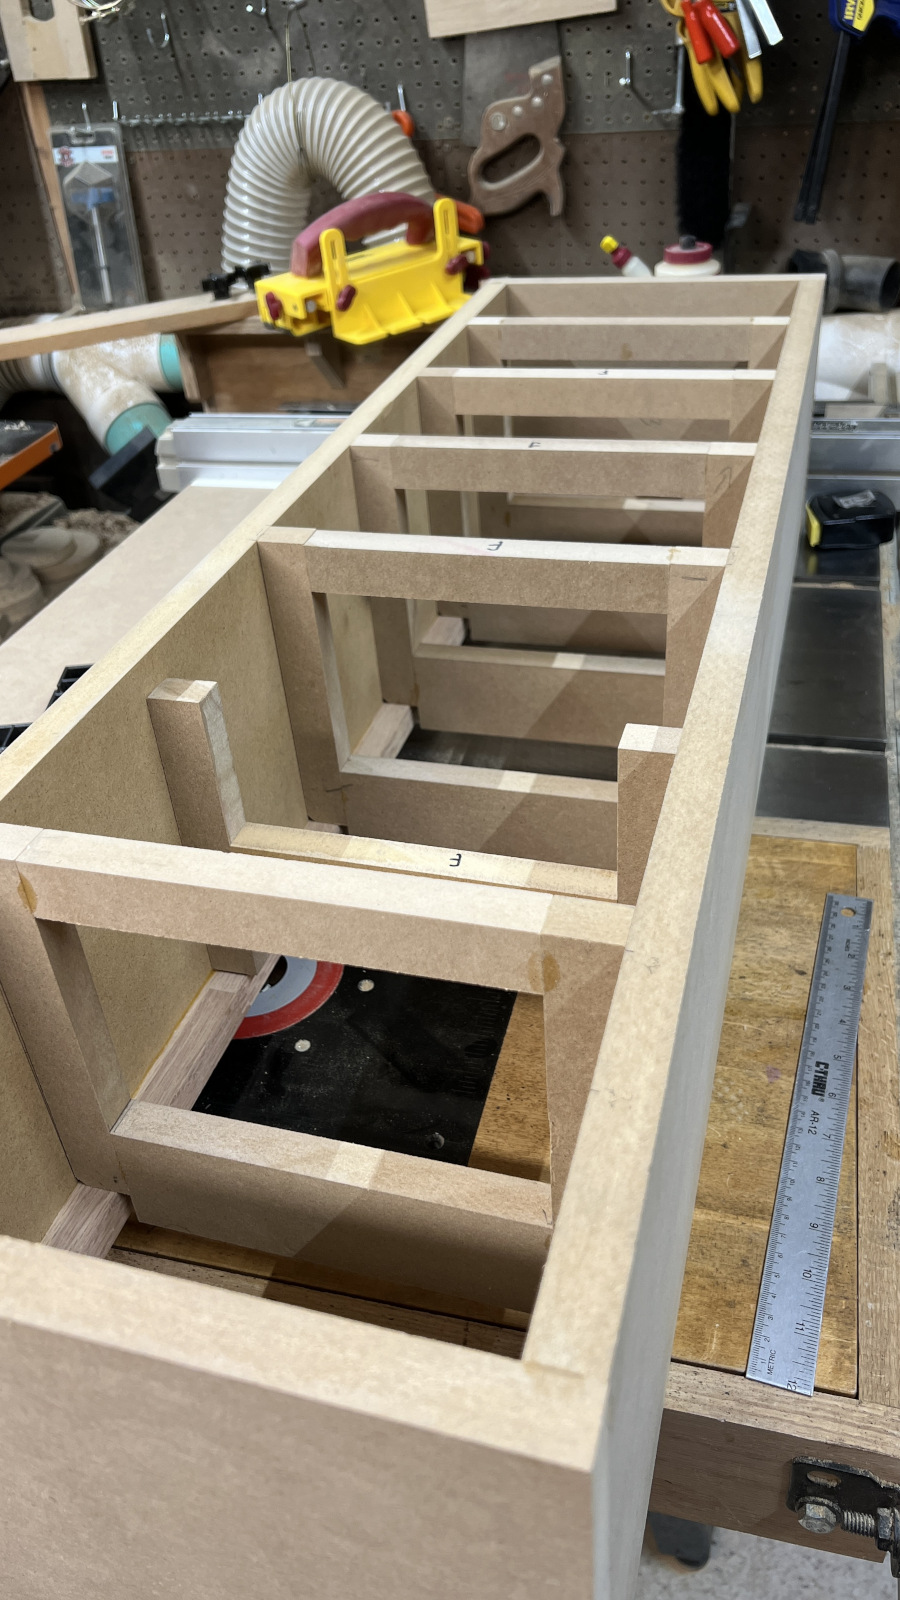
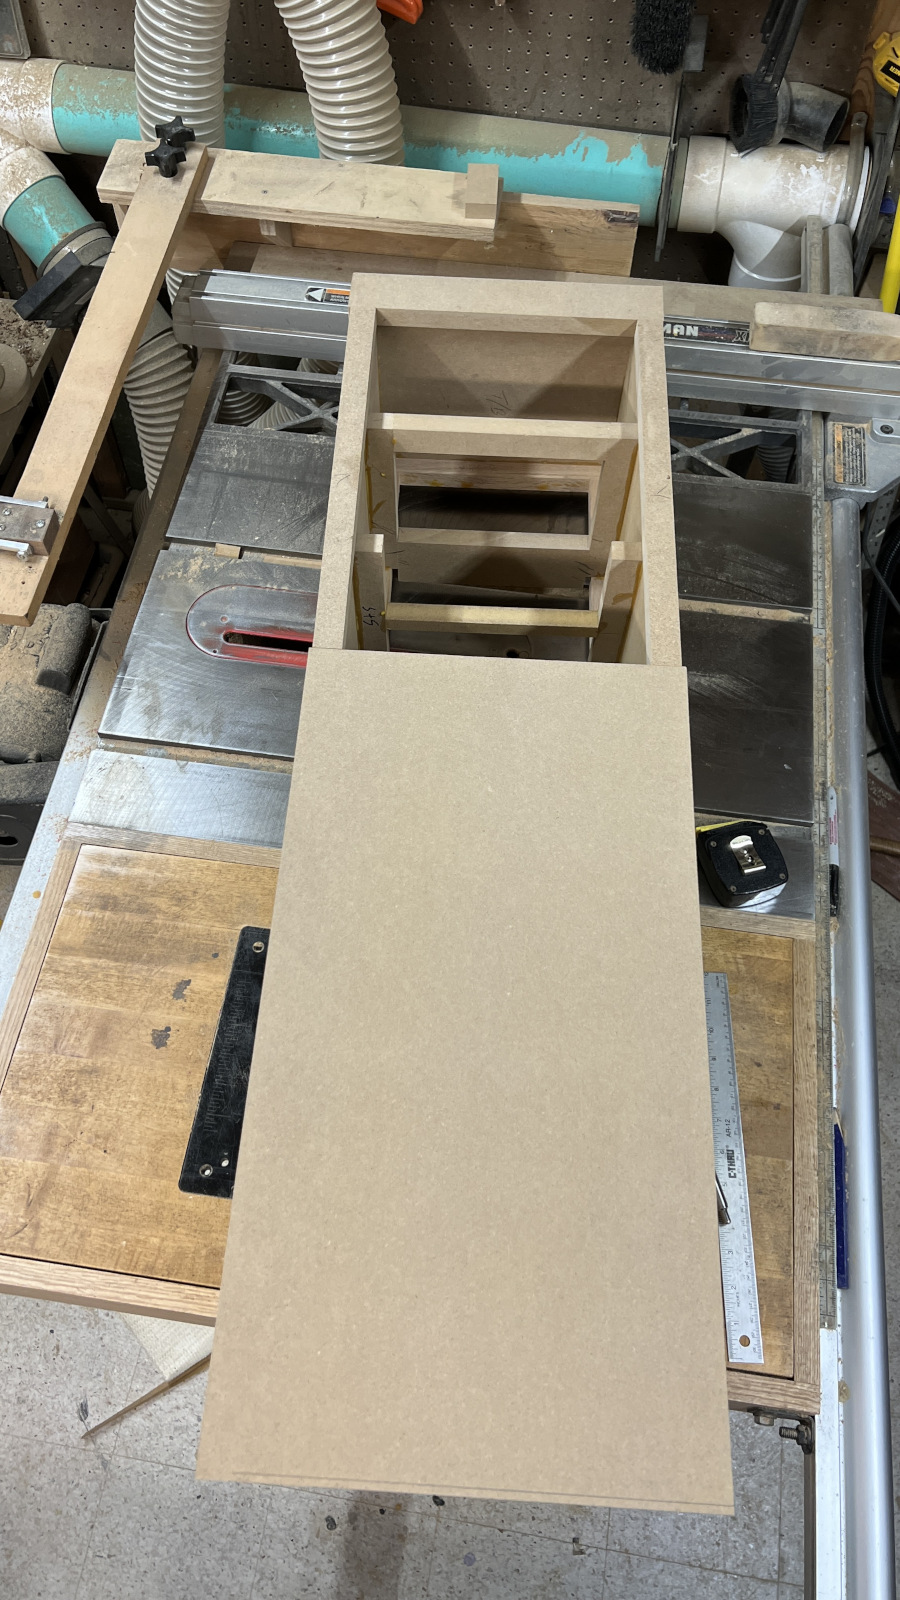
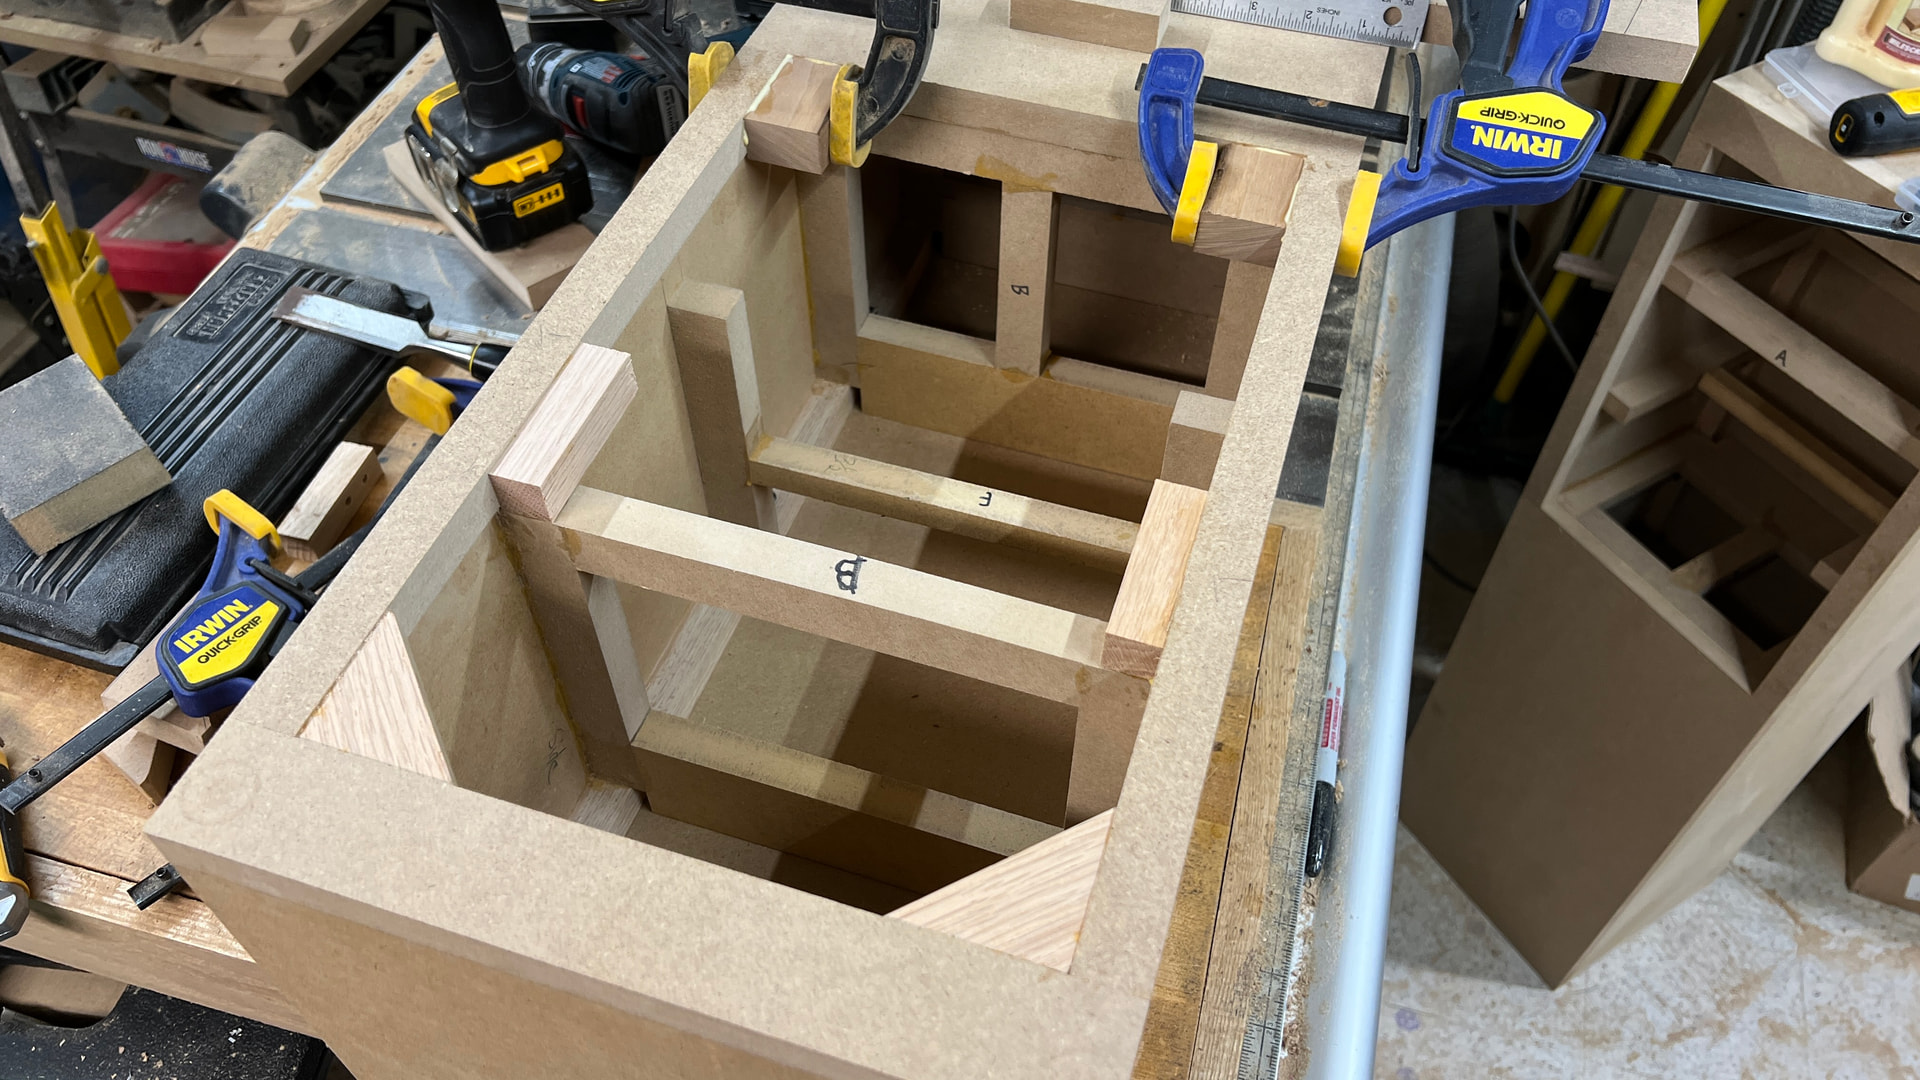
President’s Day is an observed holiday at our company for some reason, but not the day after Thanksgiving. Oh well - it was a good day to work on the bracing for these. Just pieces of scrap MDF and more clamps.
6 Likes
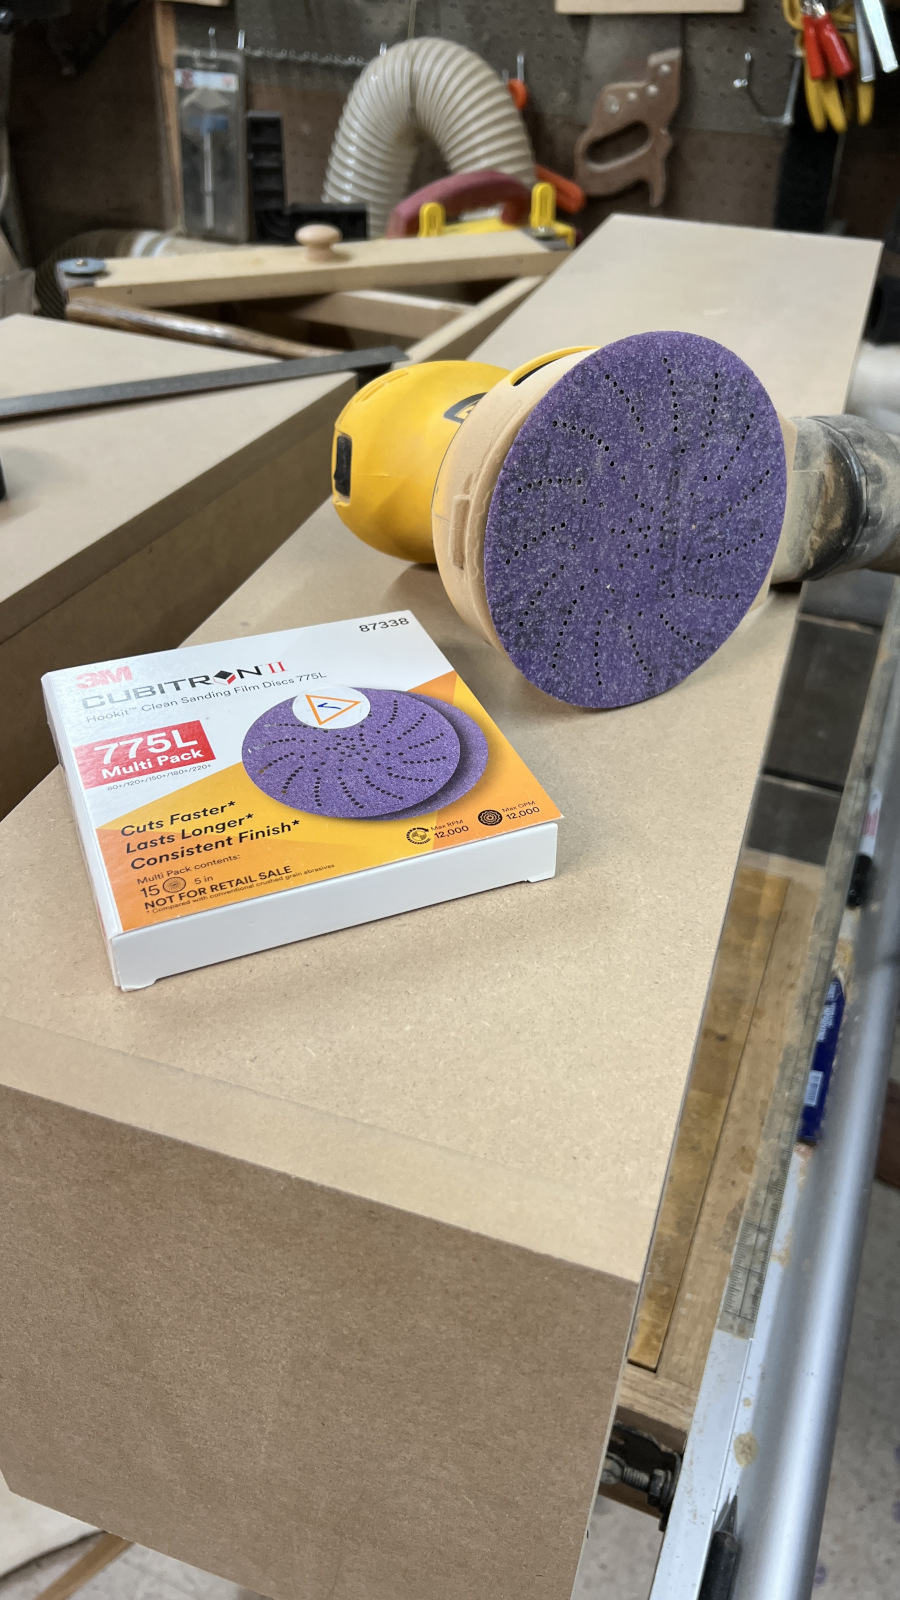
Back in the shop a bit this weekend. I bought a trial pack of 3M Cubitron sanding discs and I’m impressed so far. You can sure do some damage with 80 grit if you’re not careful. We’ll how these hold up.
I hope to have the fronts & removable baffles ready for the driver cutouts sometime tomorrow. If I don’t screw that up, the next task is attaching the backs.
4 Likes
Incredible bracing
1 Like
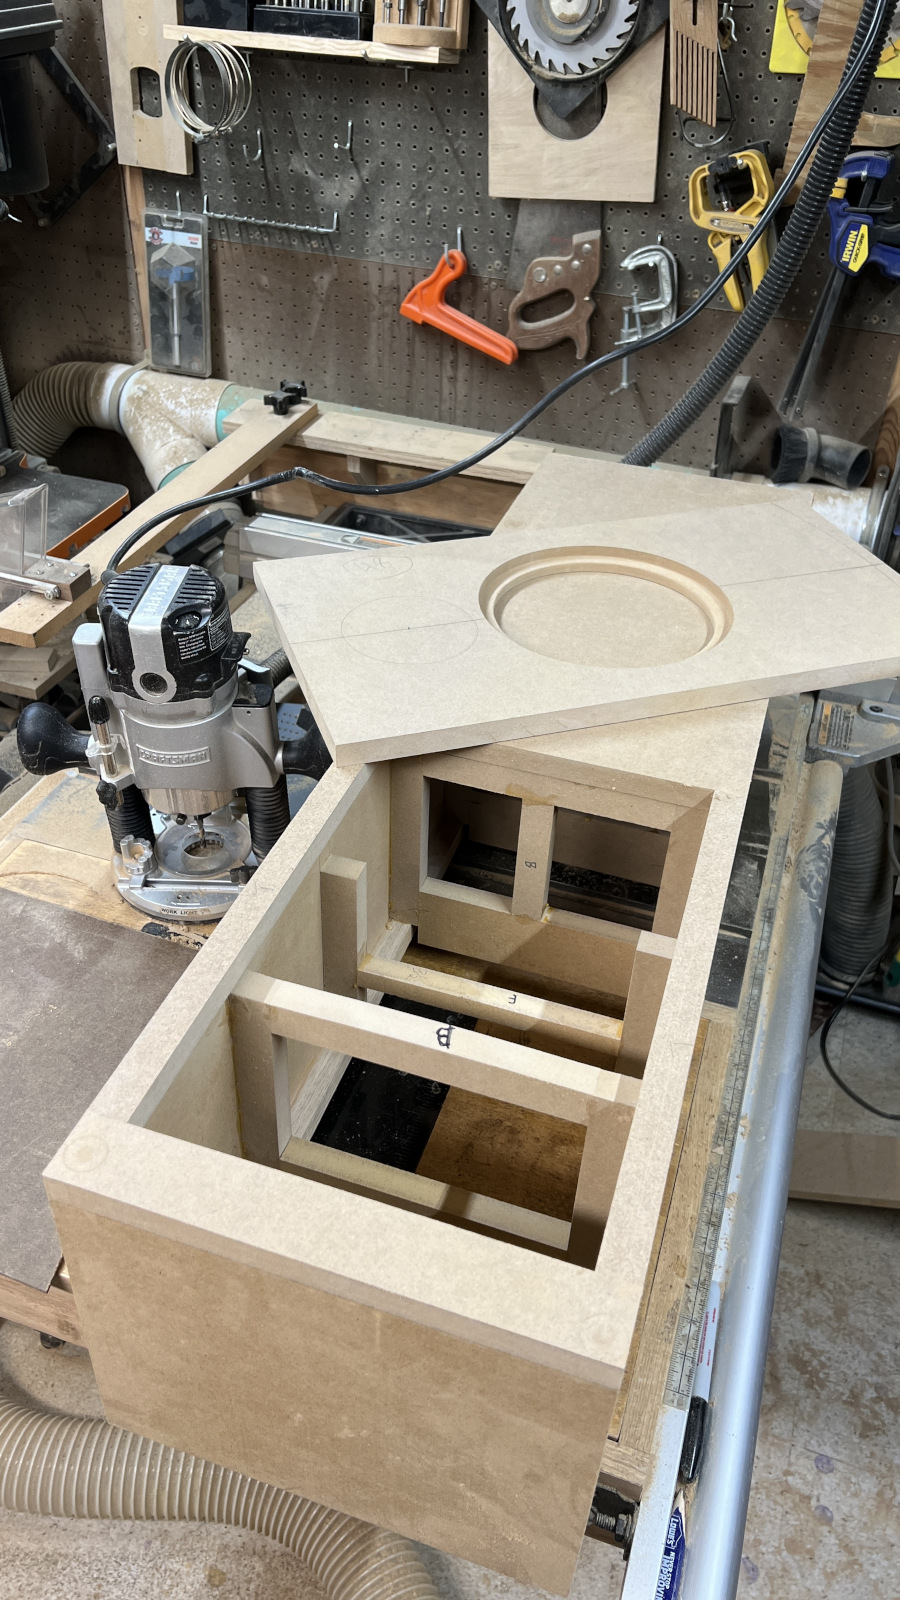
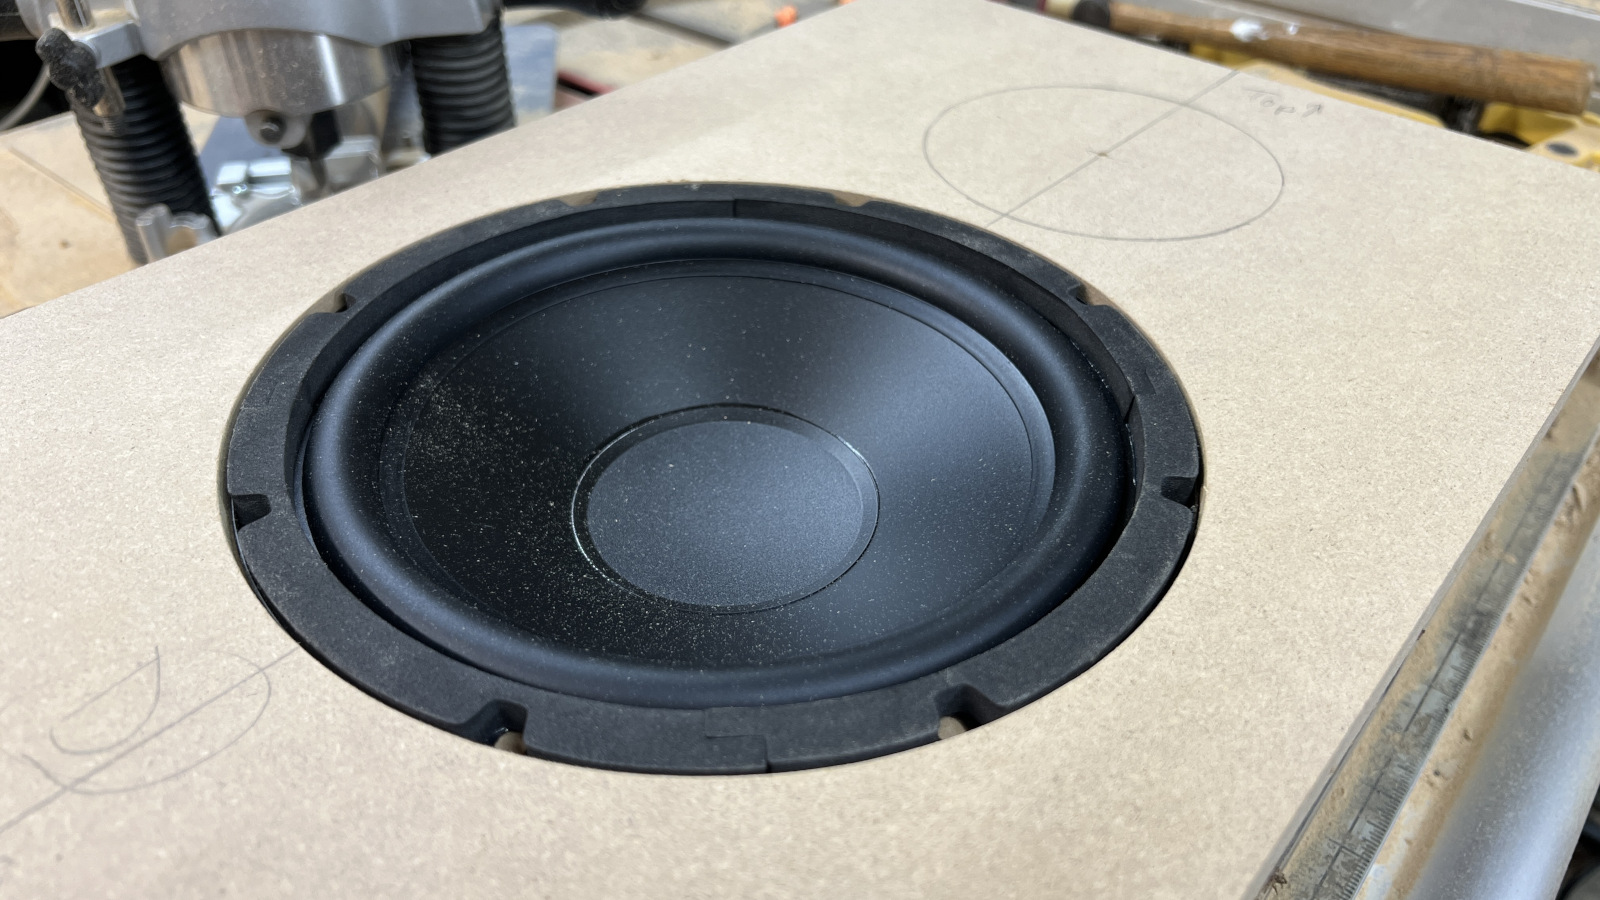
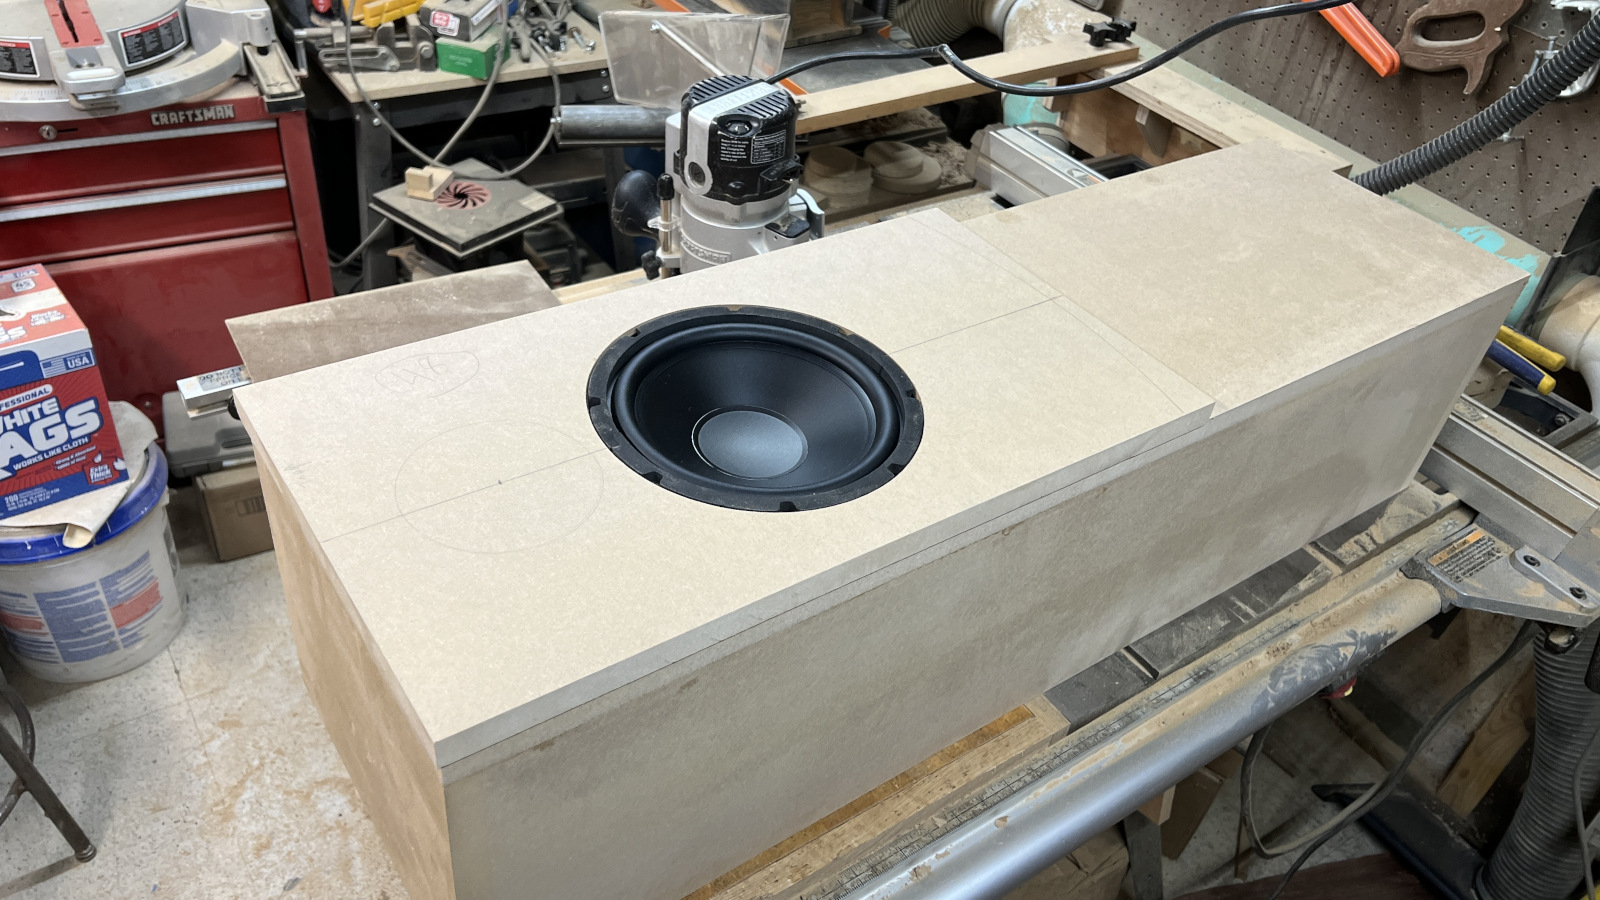
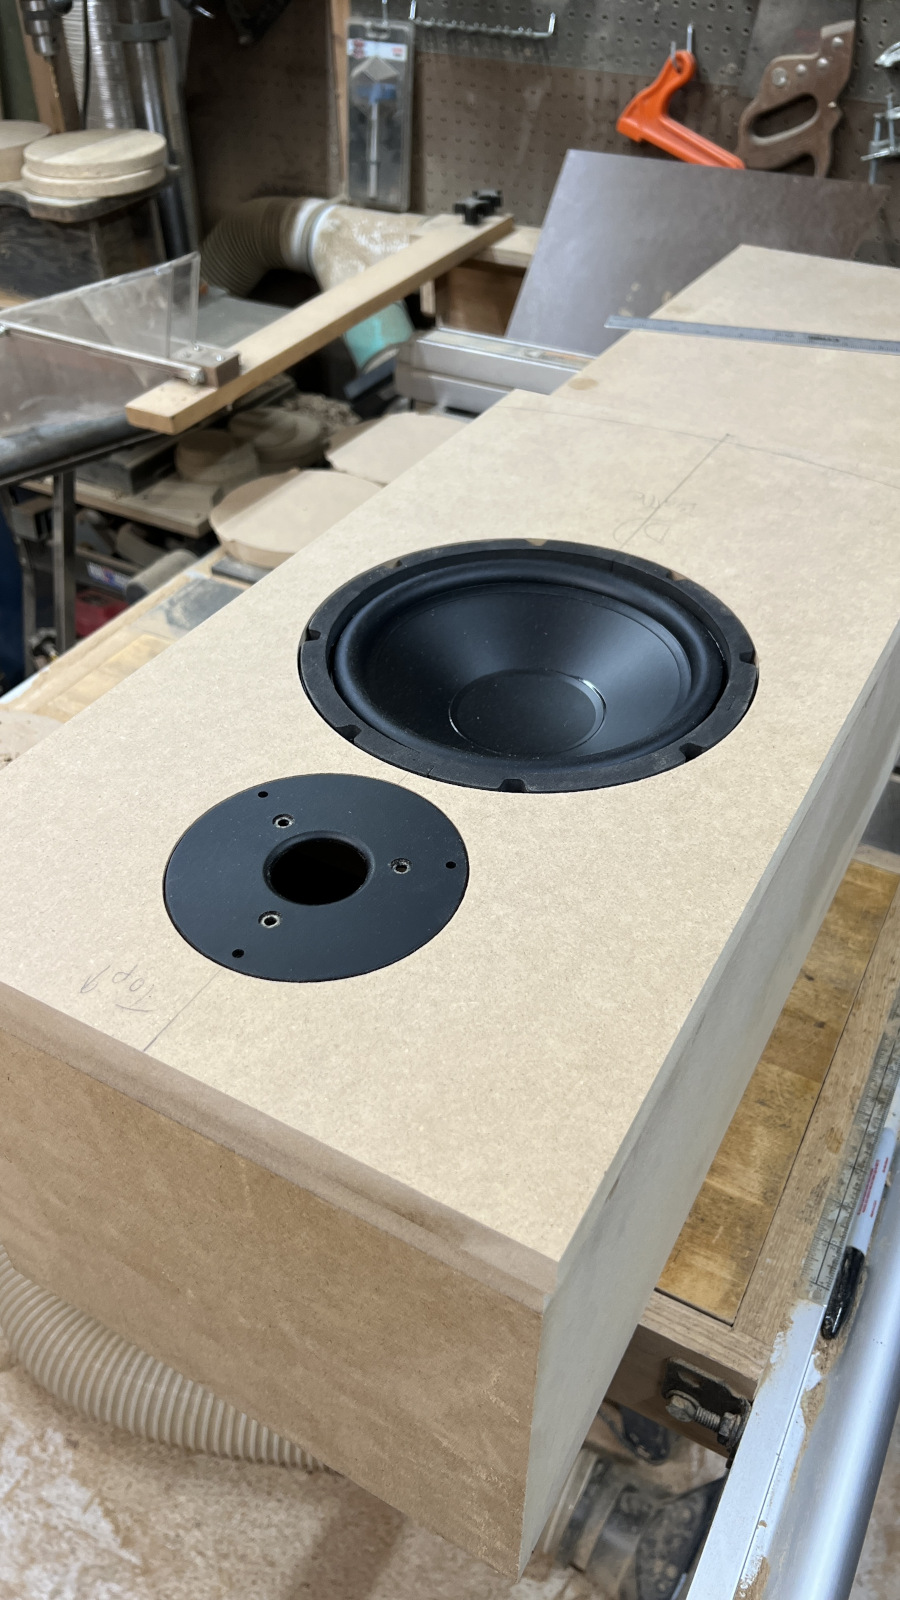
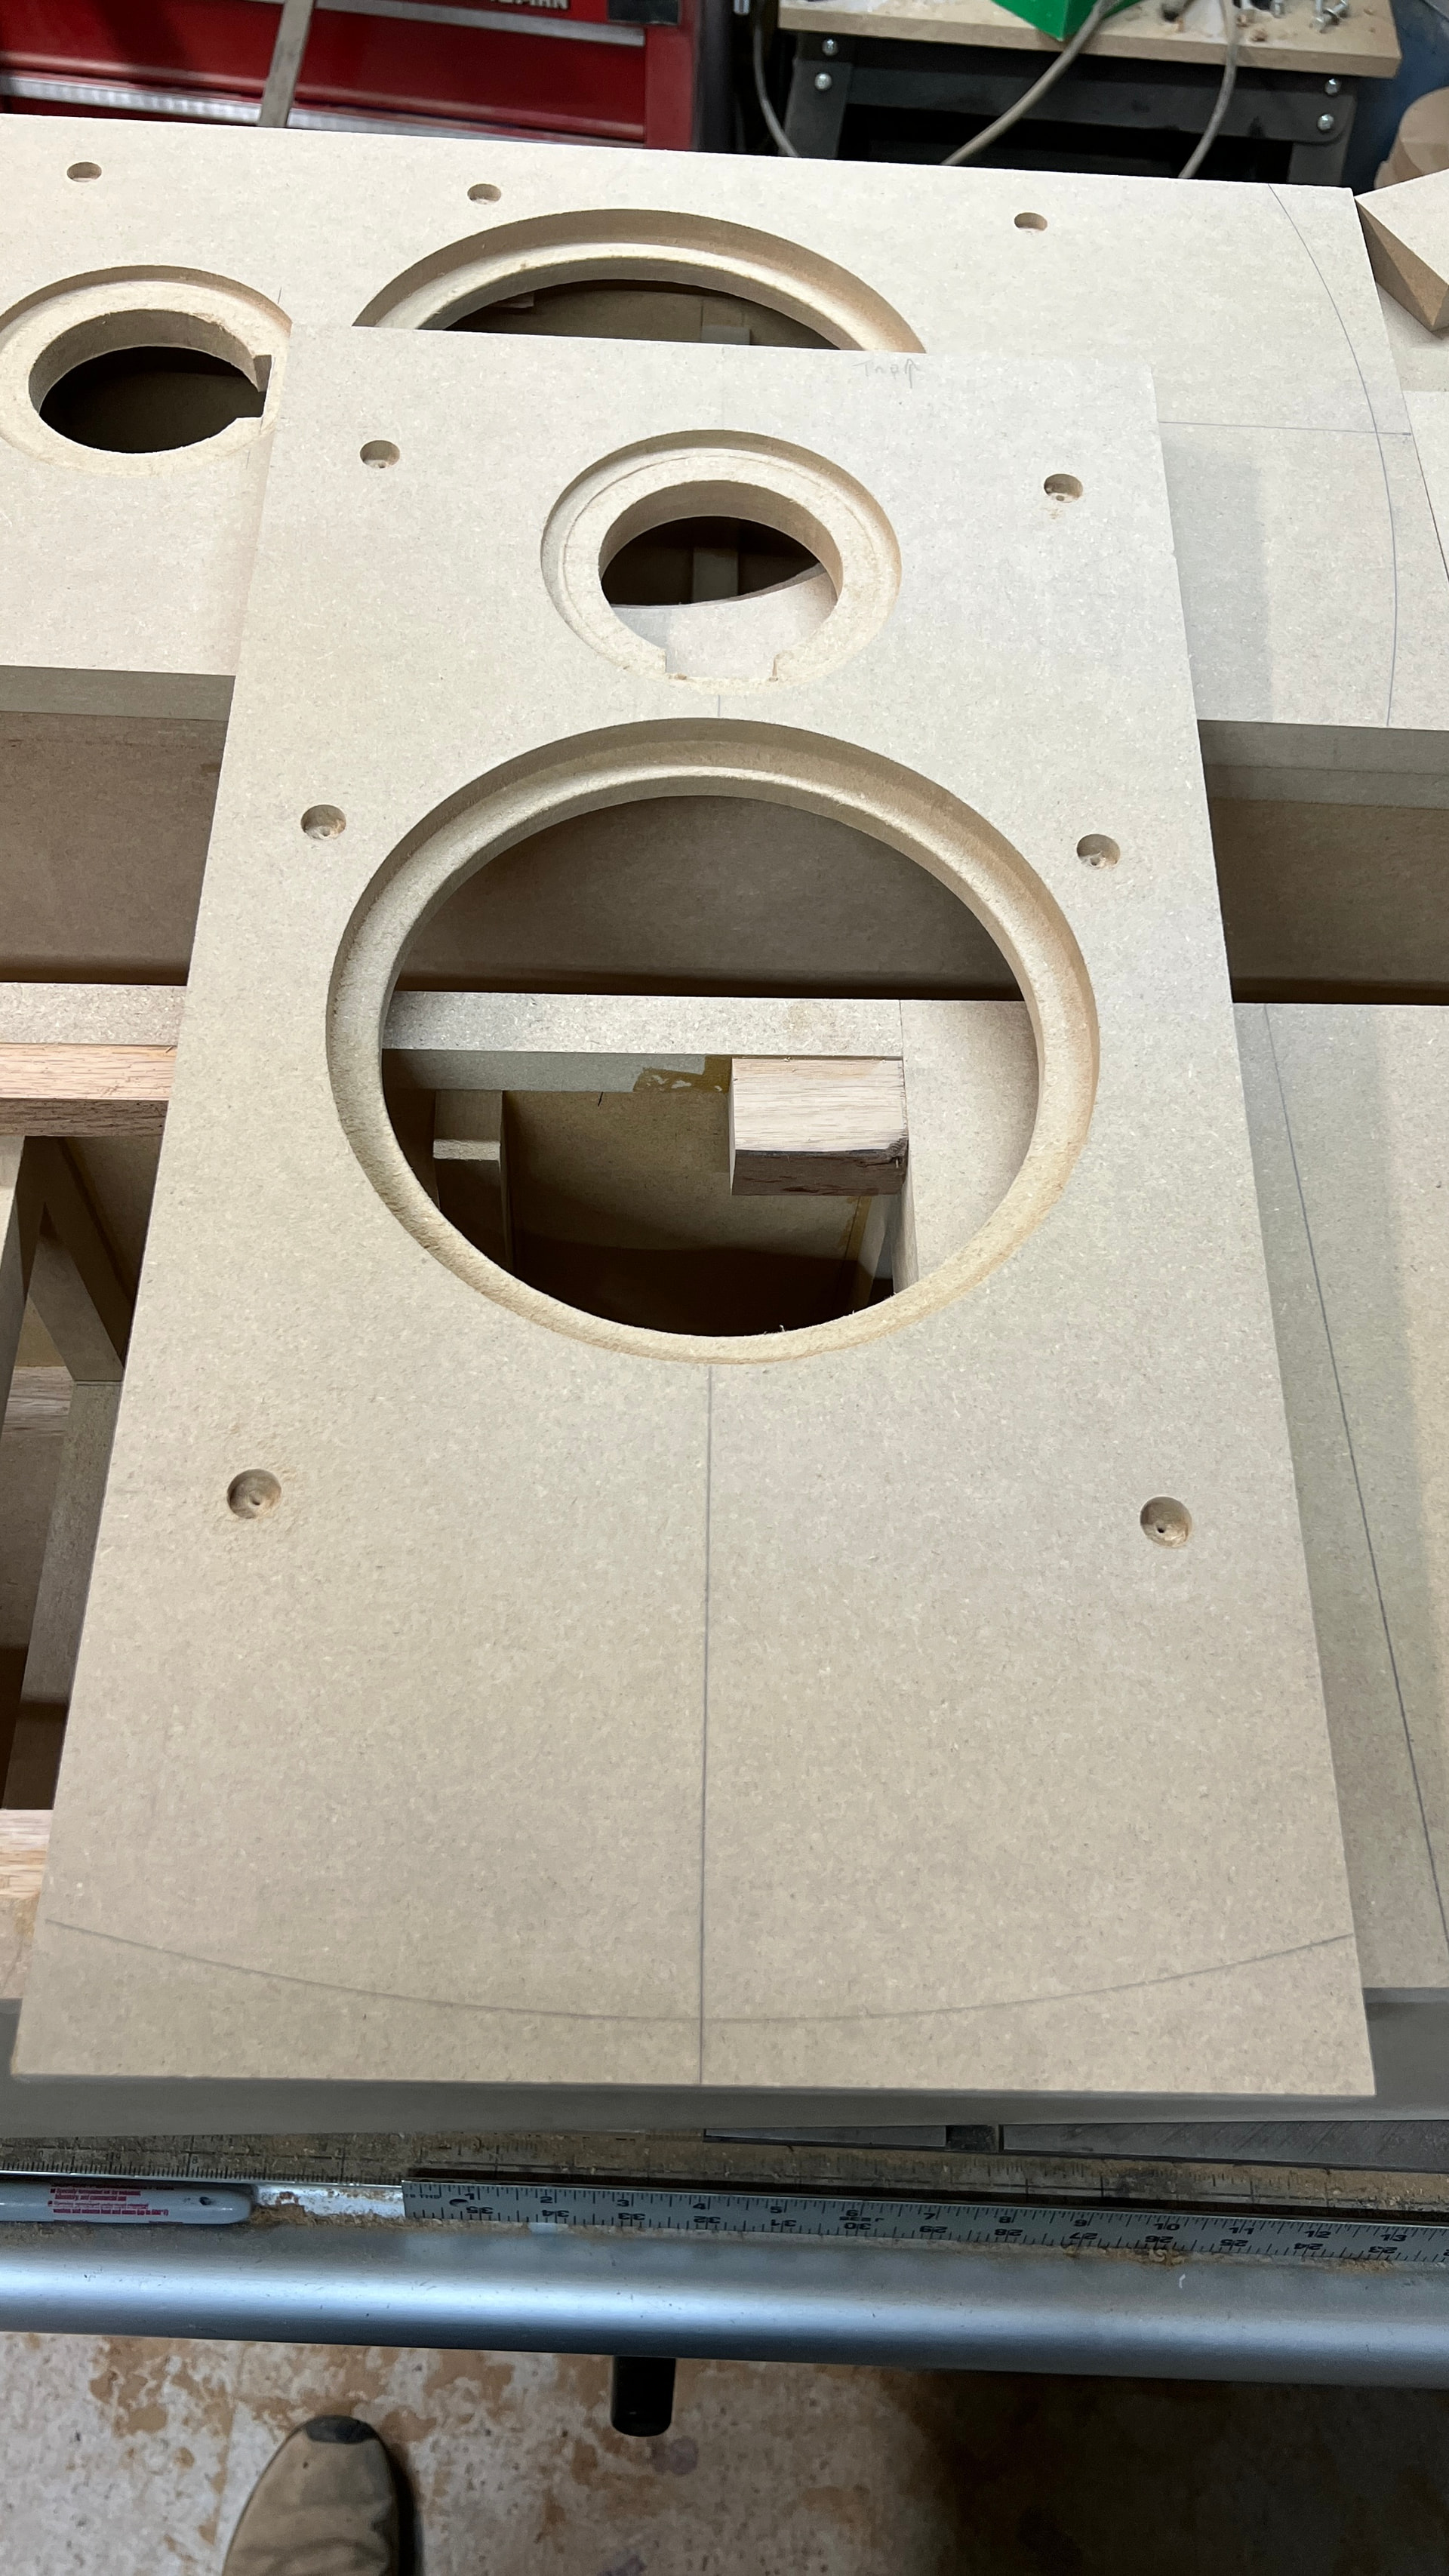
Started on the baffles today. Got them sized up, laid out the driver placement and got the woofer holes cut before dinner. I haven’t managed to screw anything up on this one yet, but I still have quite a bit of work left, so I’m not going to rush things. Measure twice - maybe even twice again!
4 Likes
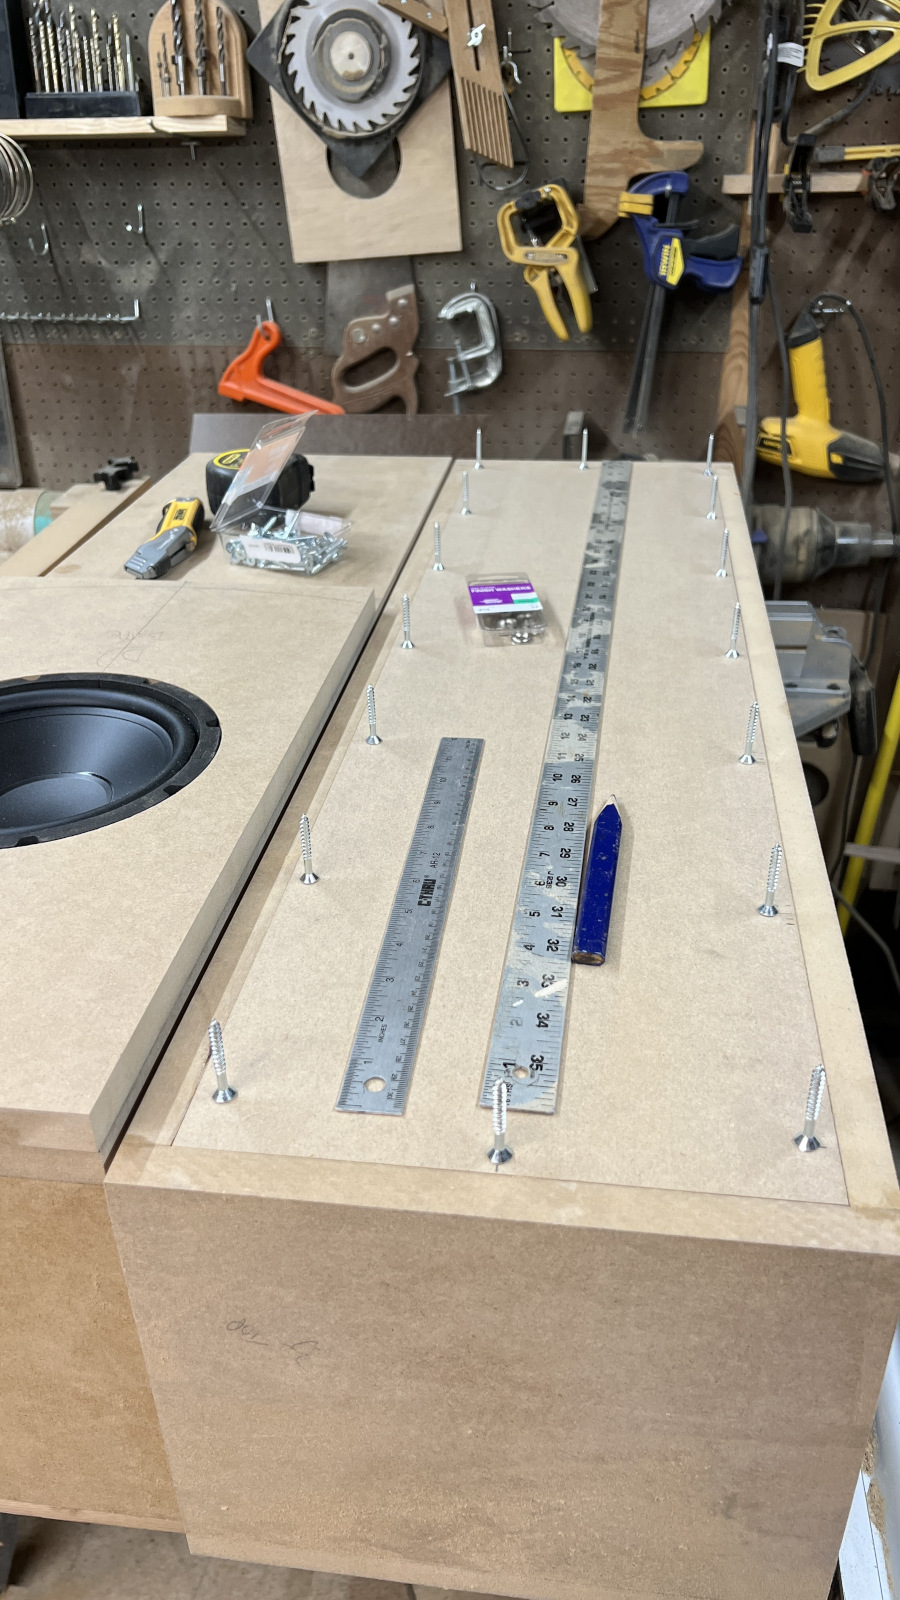
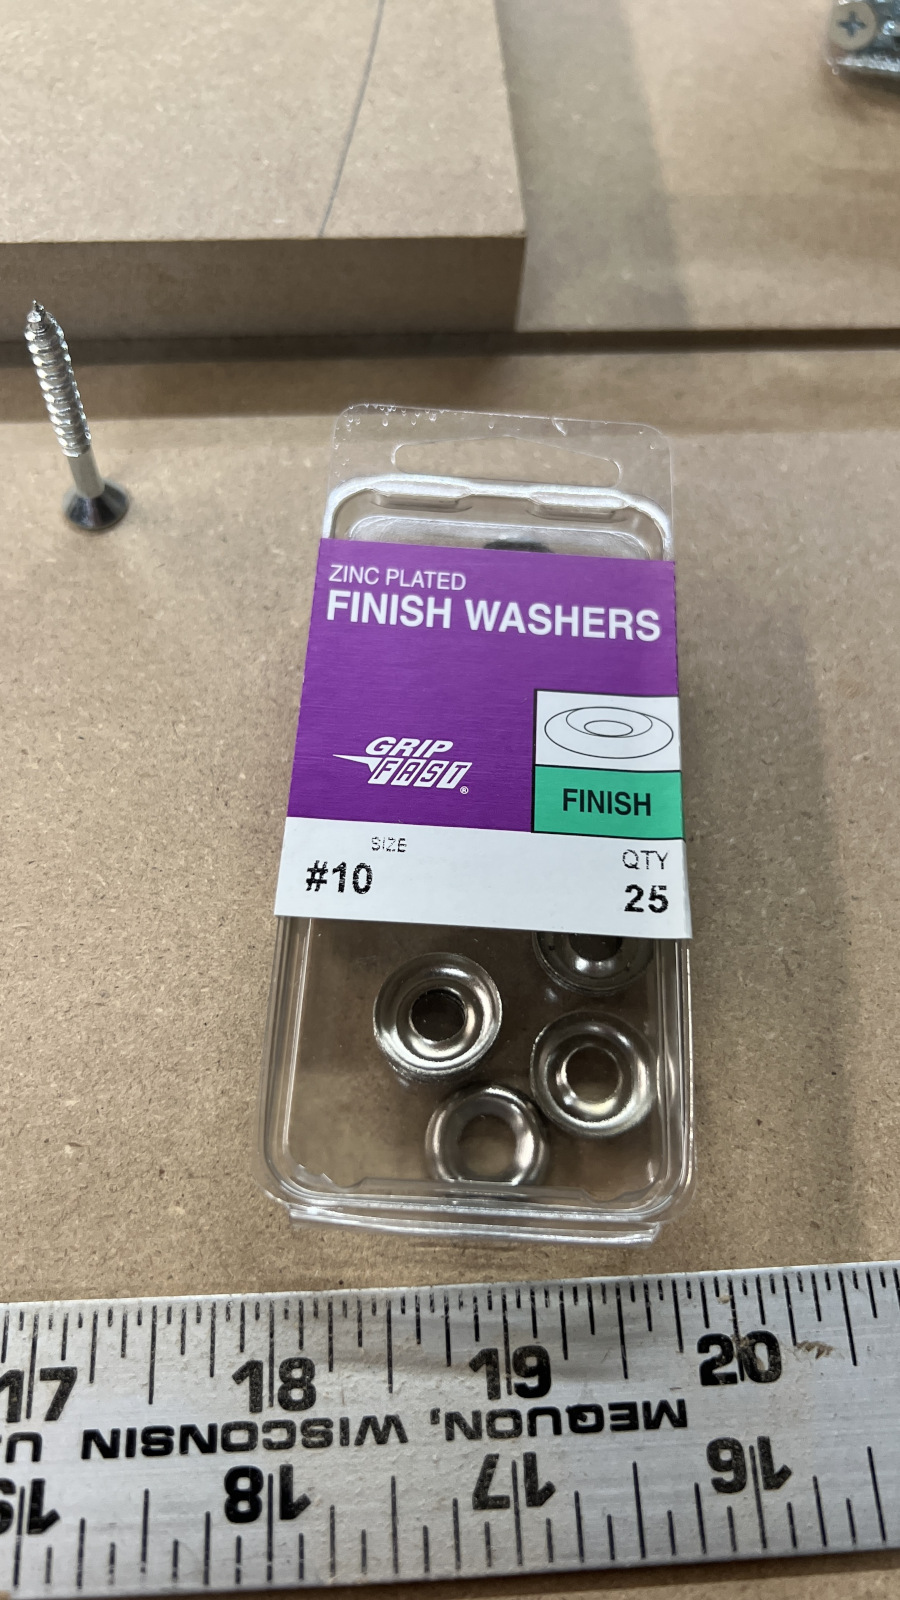
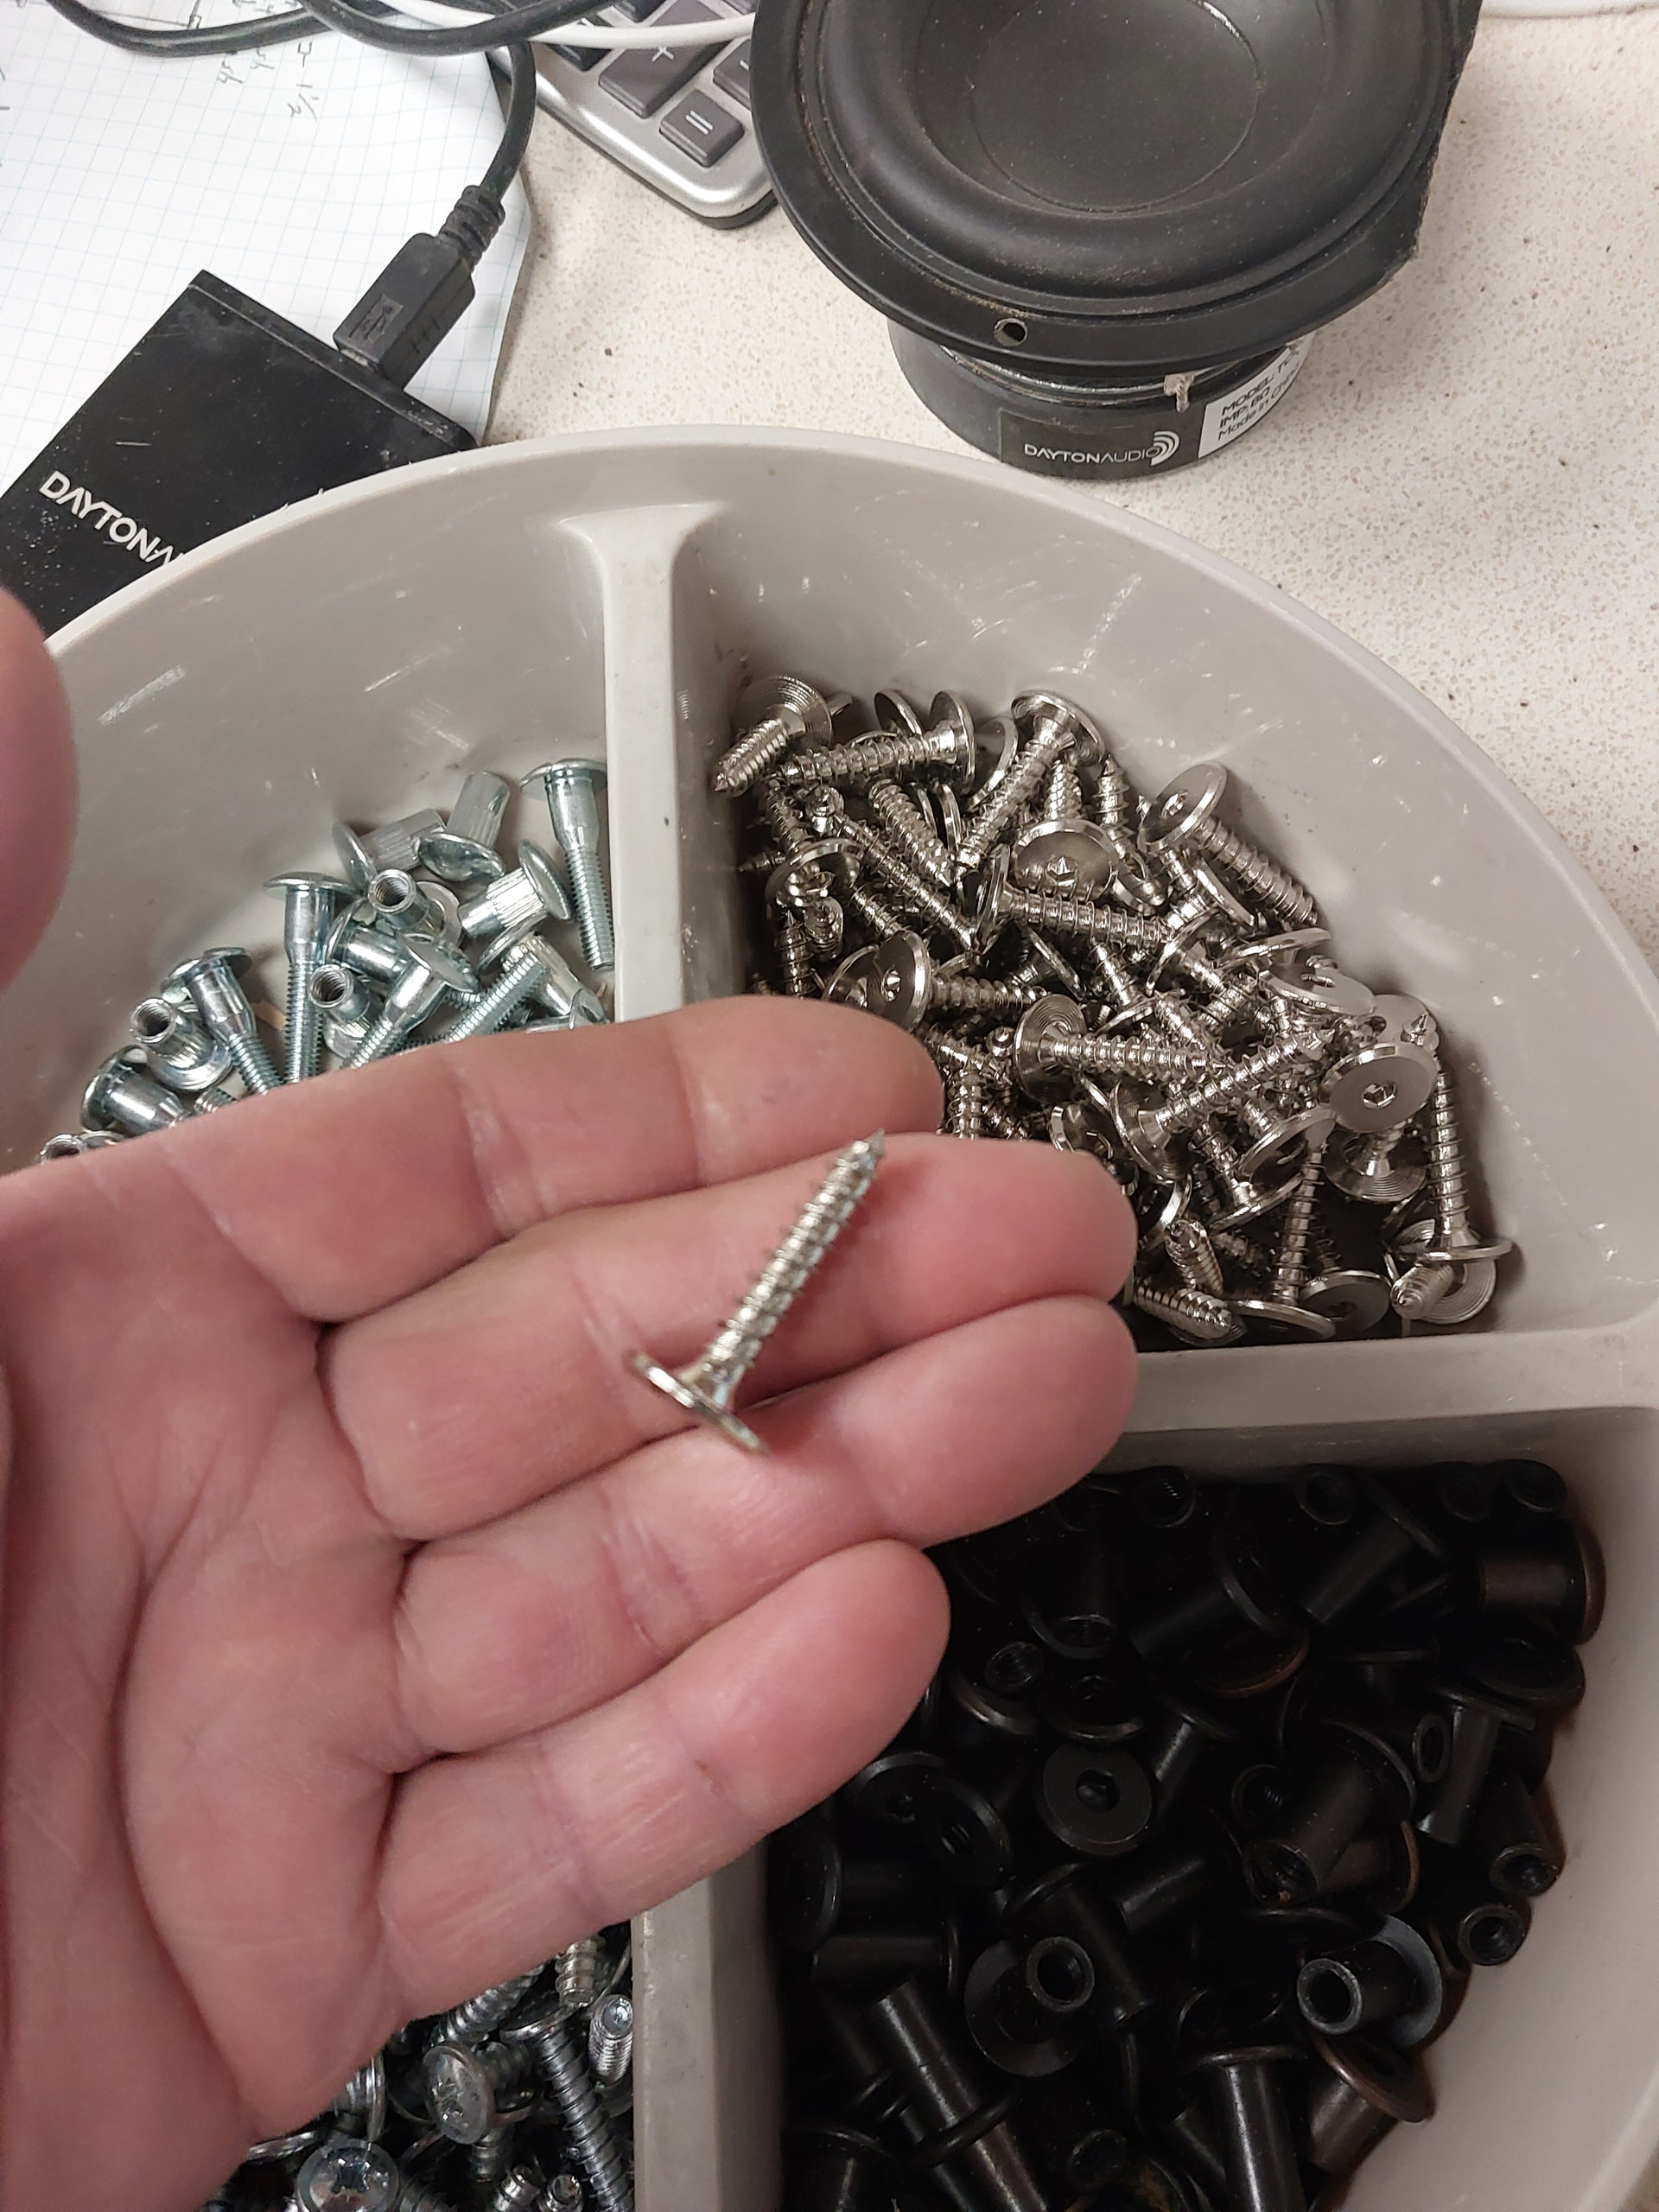
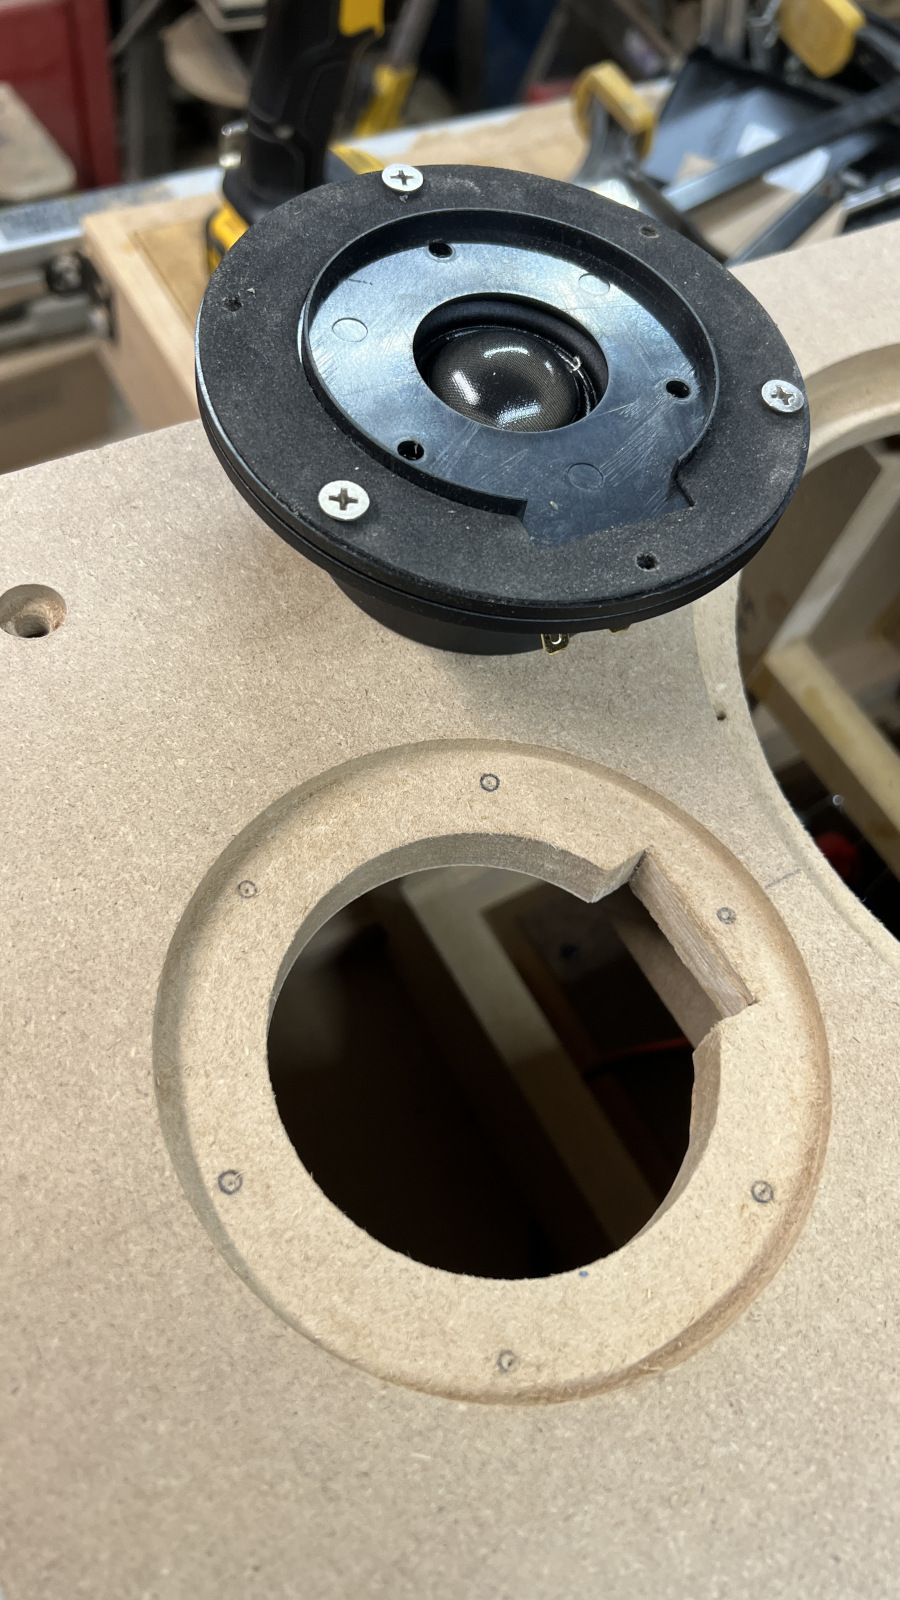
Made more sawdust - tweeters should fit just right after painting. I’m rethinking using #10 screws for the back. With only a 3/4” lip inside, there’s not much room if I countersink the finish washers.
1 Like
The back is removable, why?
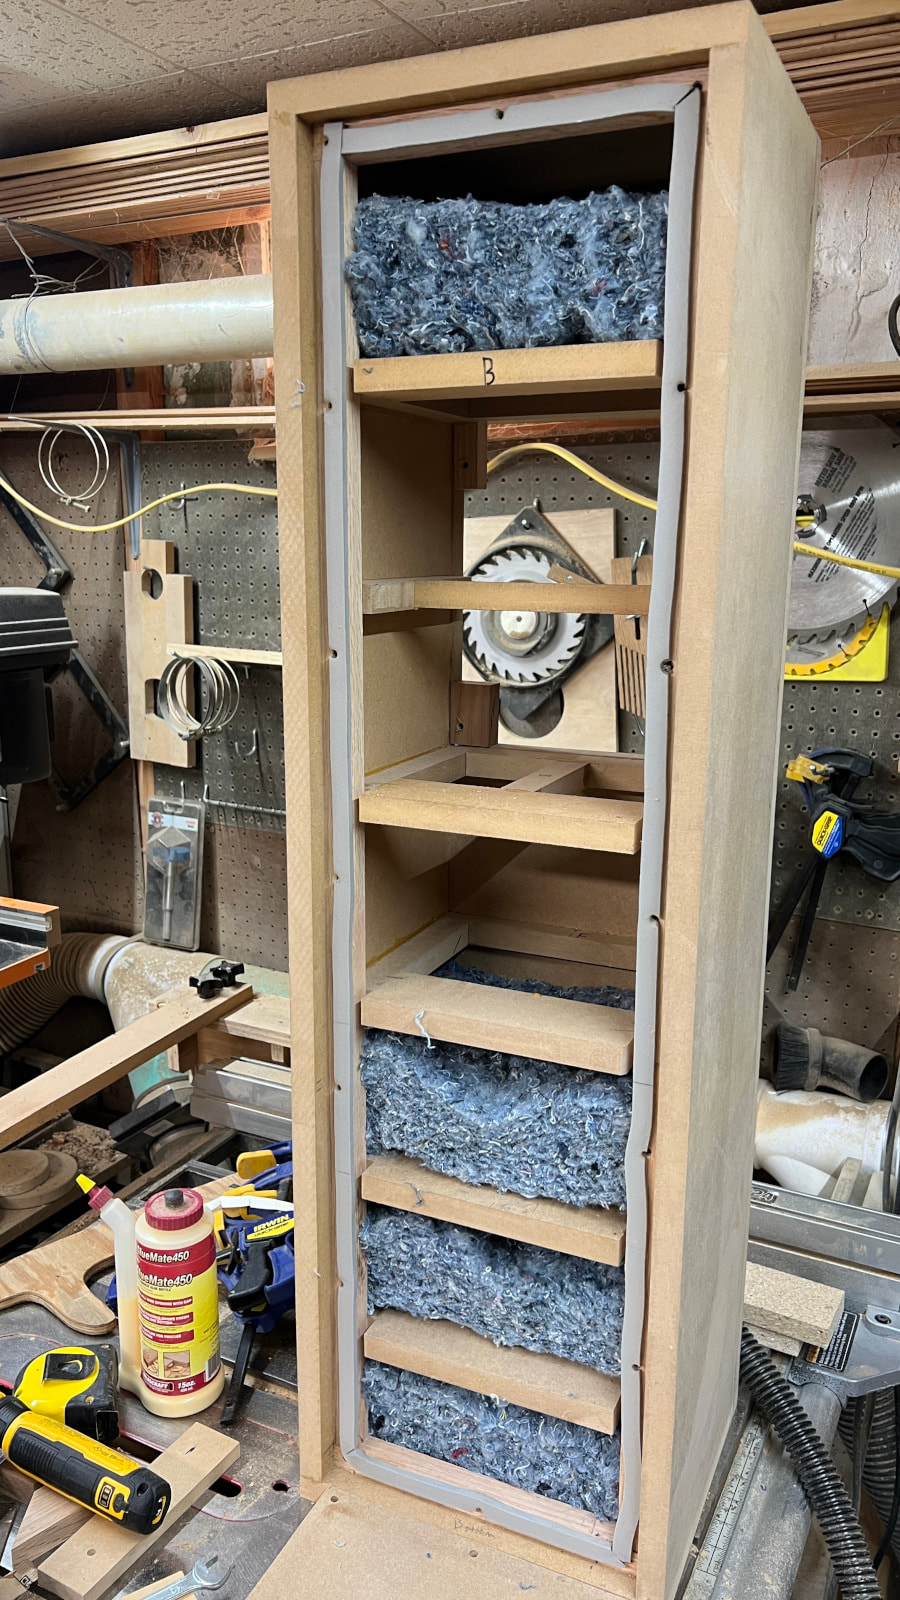
I think I’ll need to stuff the bottom to eliminate possible pipe resonances. With all the bracing, I thought a removable back would make that easier to adjust.
5 Likes
Would much of that escape the cabinet since it is sealed? I’ve had issues with that in ported towers where the port was near one end, but it came as an altered port response.
Not entirely sure if it will actually be an issue, so that’s why I decided to make the back removable. I’ve never even built a sealed design. I’m also making the baffles removable, so that might allow me to test other driver combos without building a whole new box.
3 Likes
I vote for finishing washer with matching screw. Package says zinc plated on the washers but they appear to be chrome or nickel plated. I know its on the back but I bought 100 of these for a job and didnt use them. I doubt I ever will. They are #10x 1.25
2 Likes
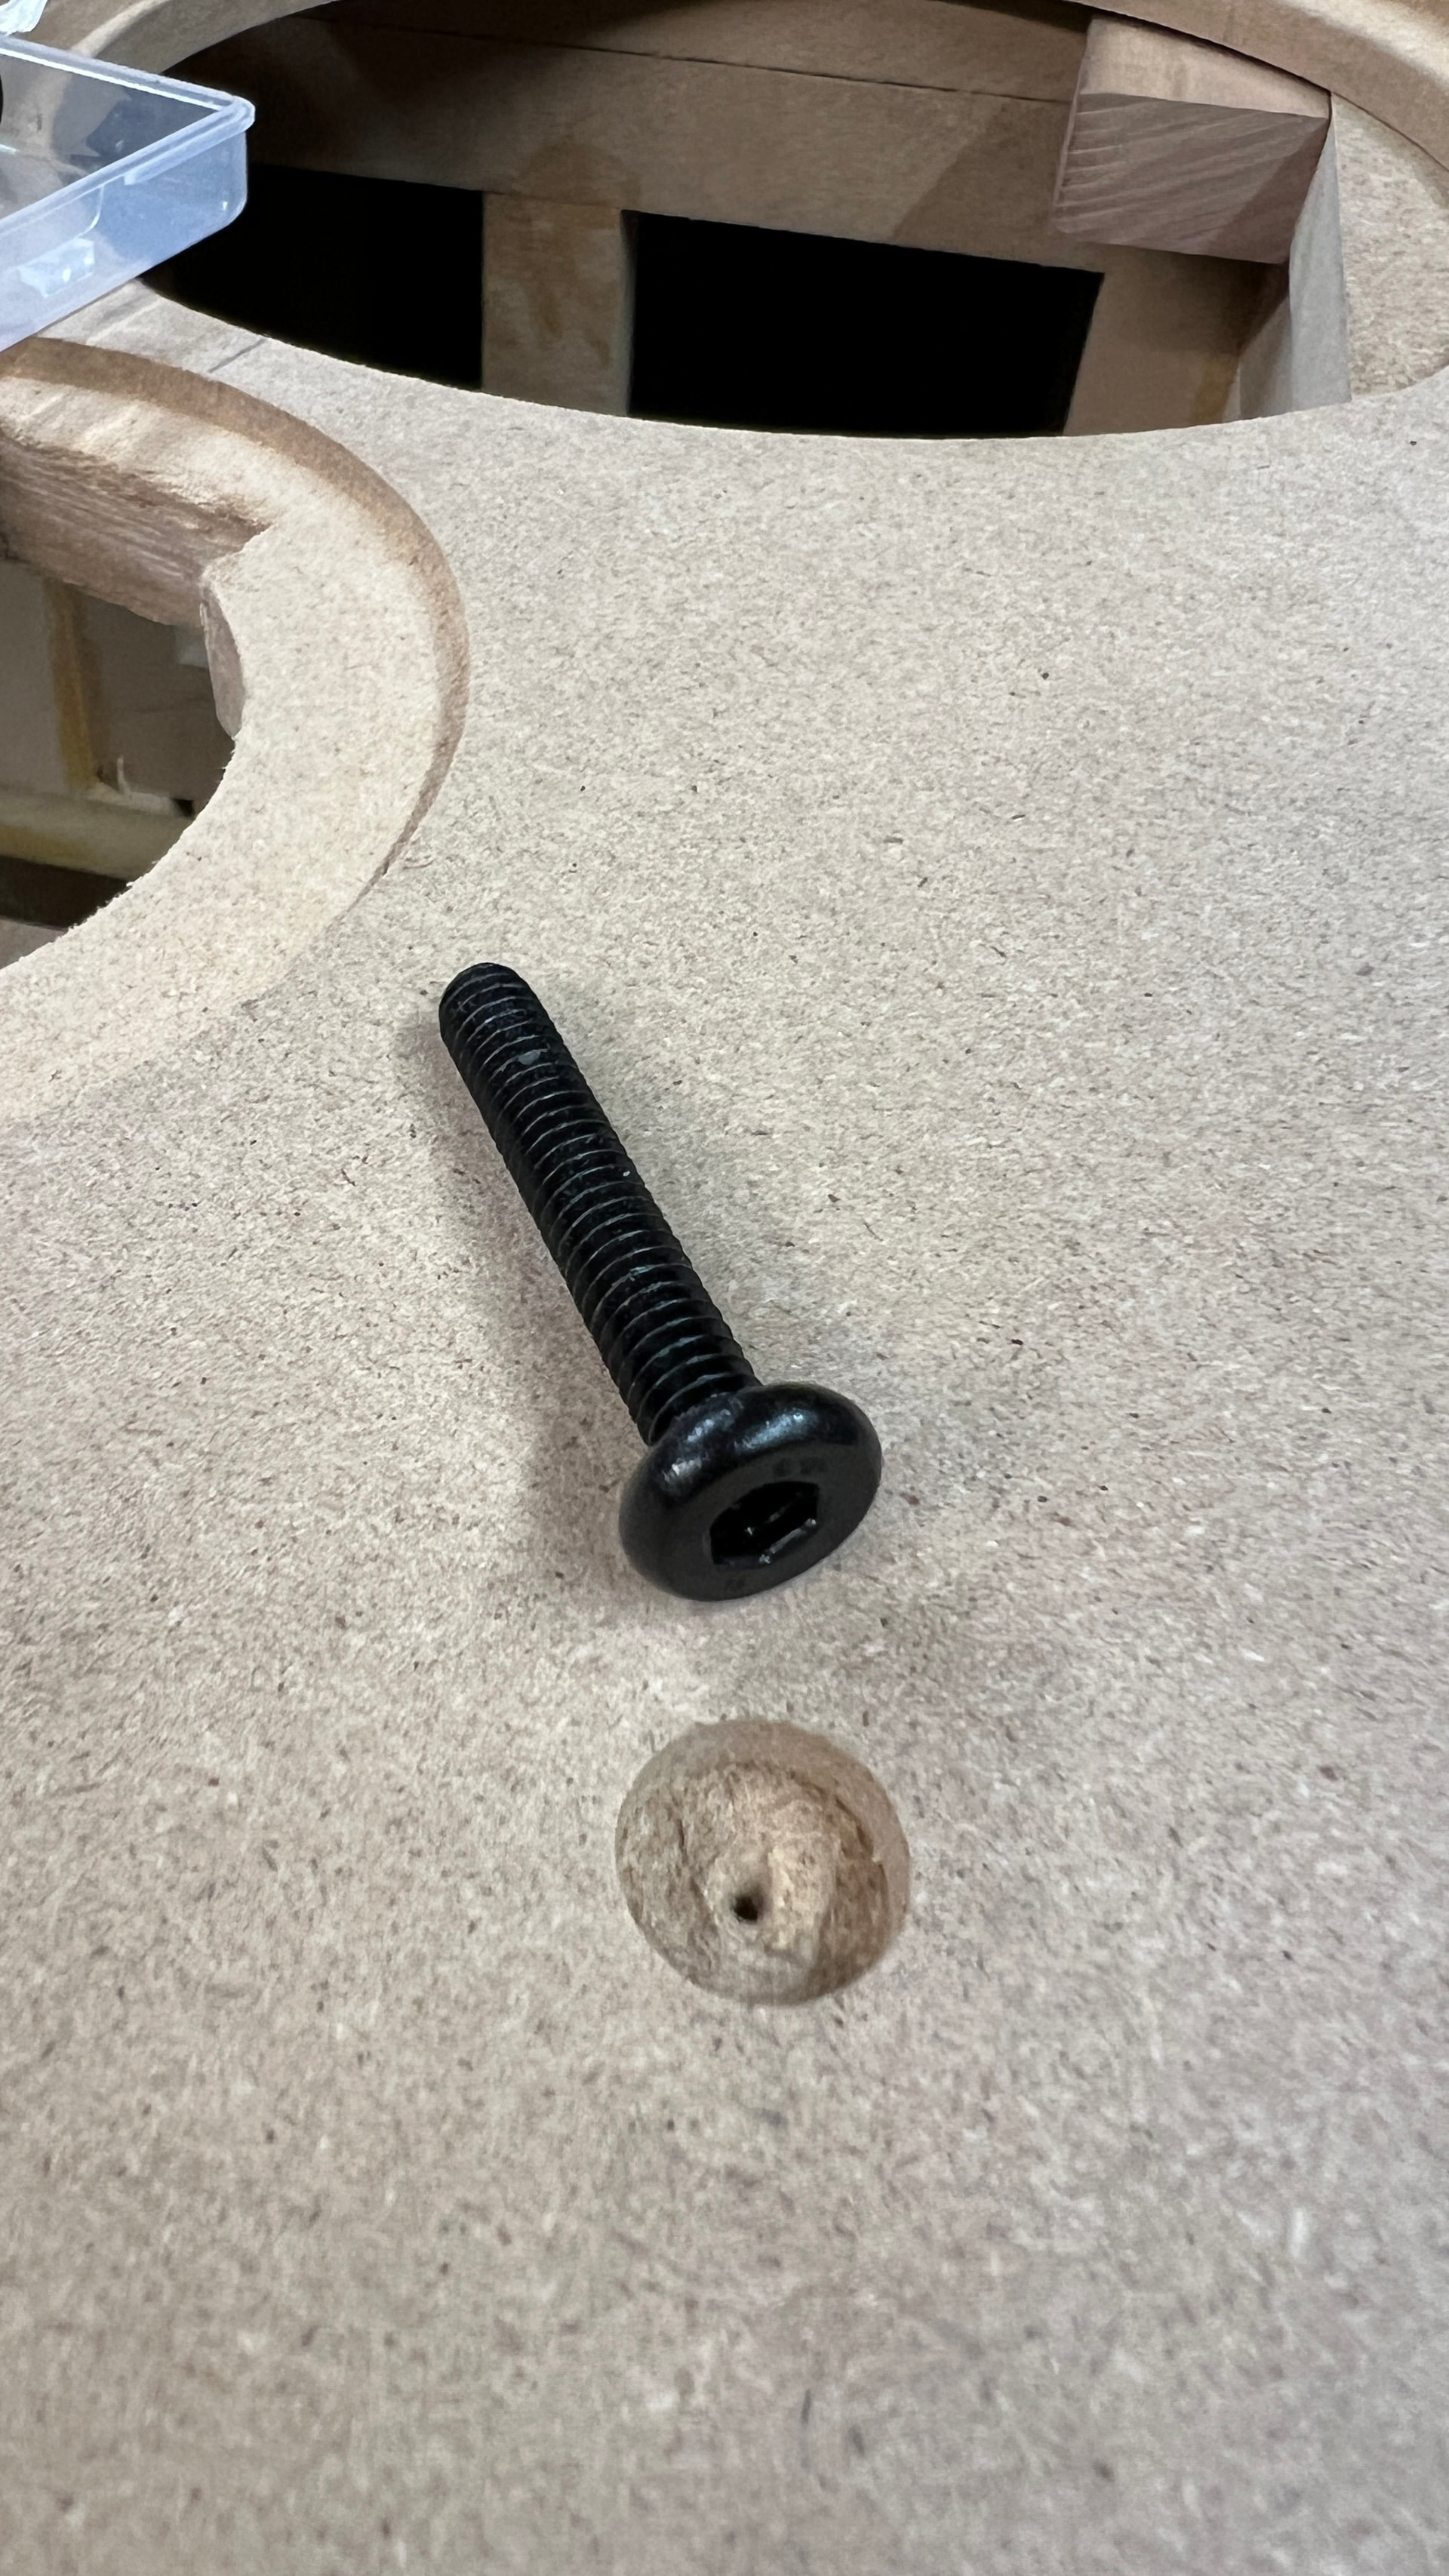
I think the heads on those are too big for where I’ll be drilling. I ordered some flat 1/4-20 bolts and matching black washers. I’m going to tap the oak inner runners so I won’t have to deal with T-nuts. I did something similar on my Rival/SB design in 2024.
2 Likes
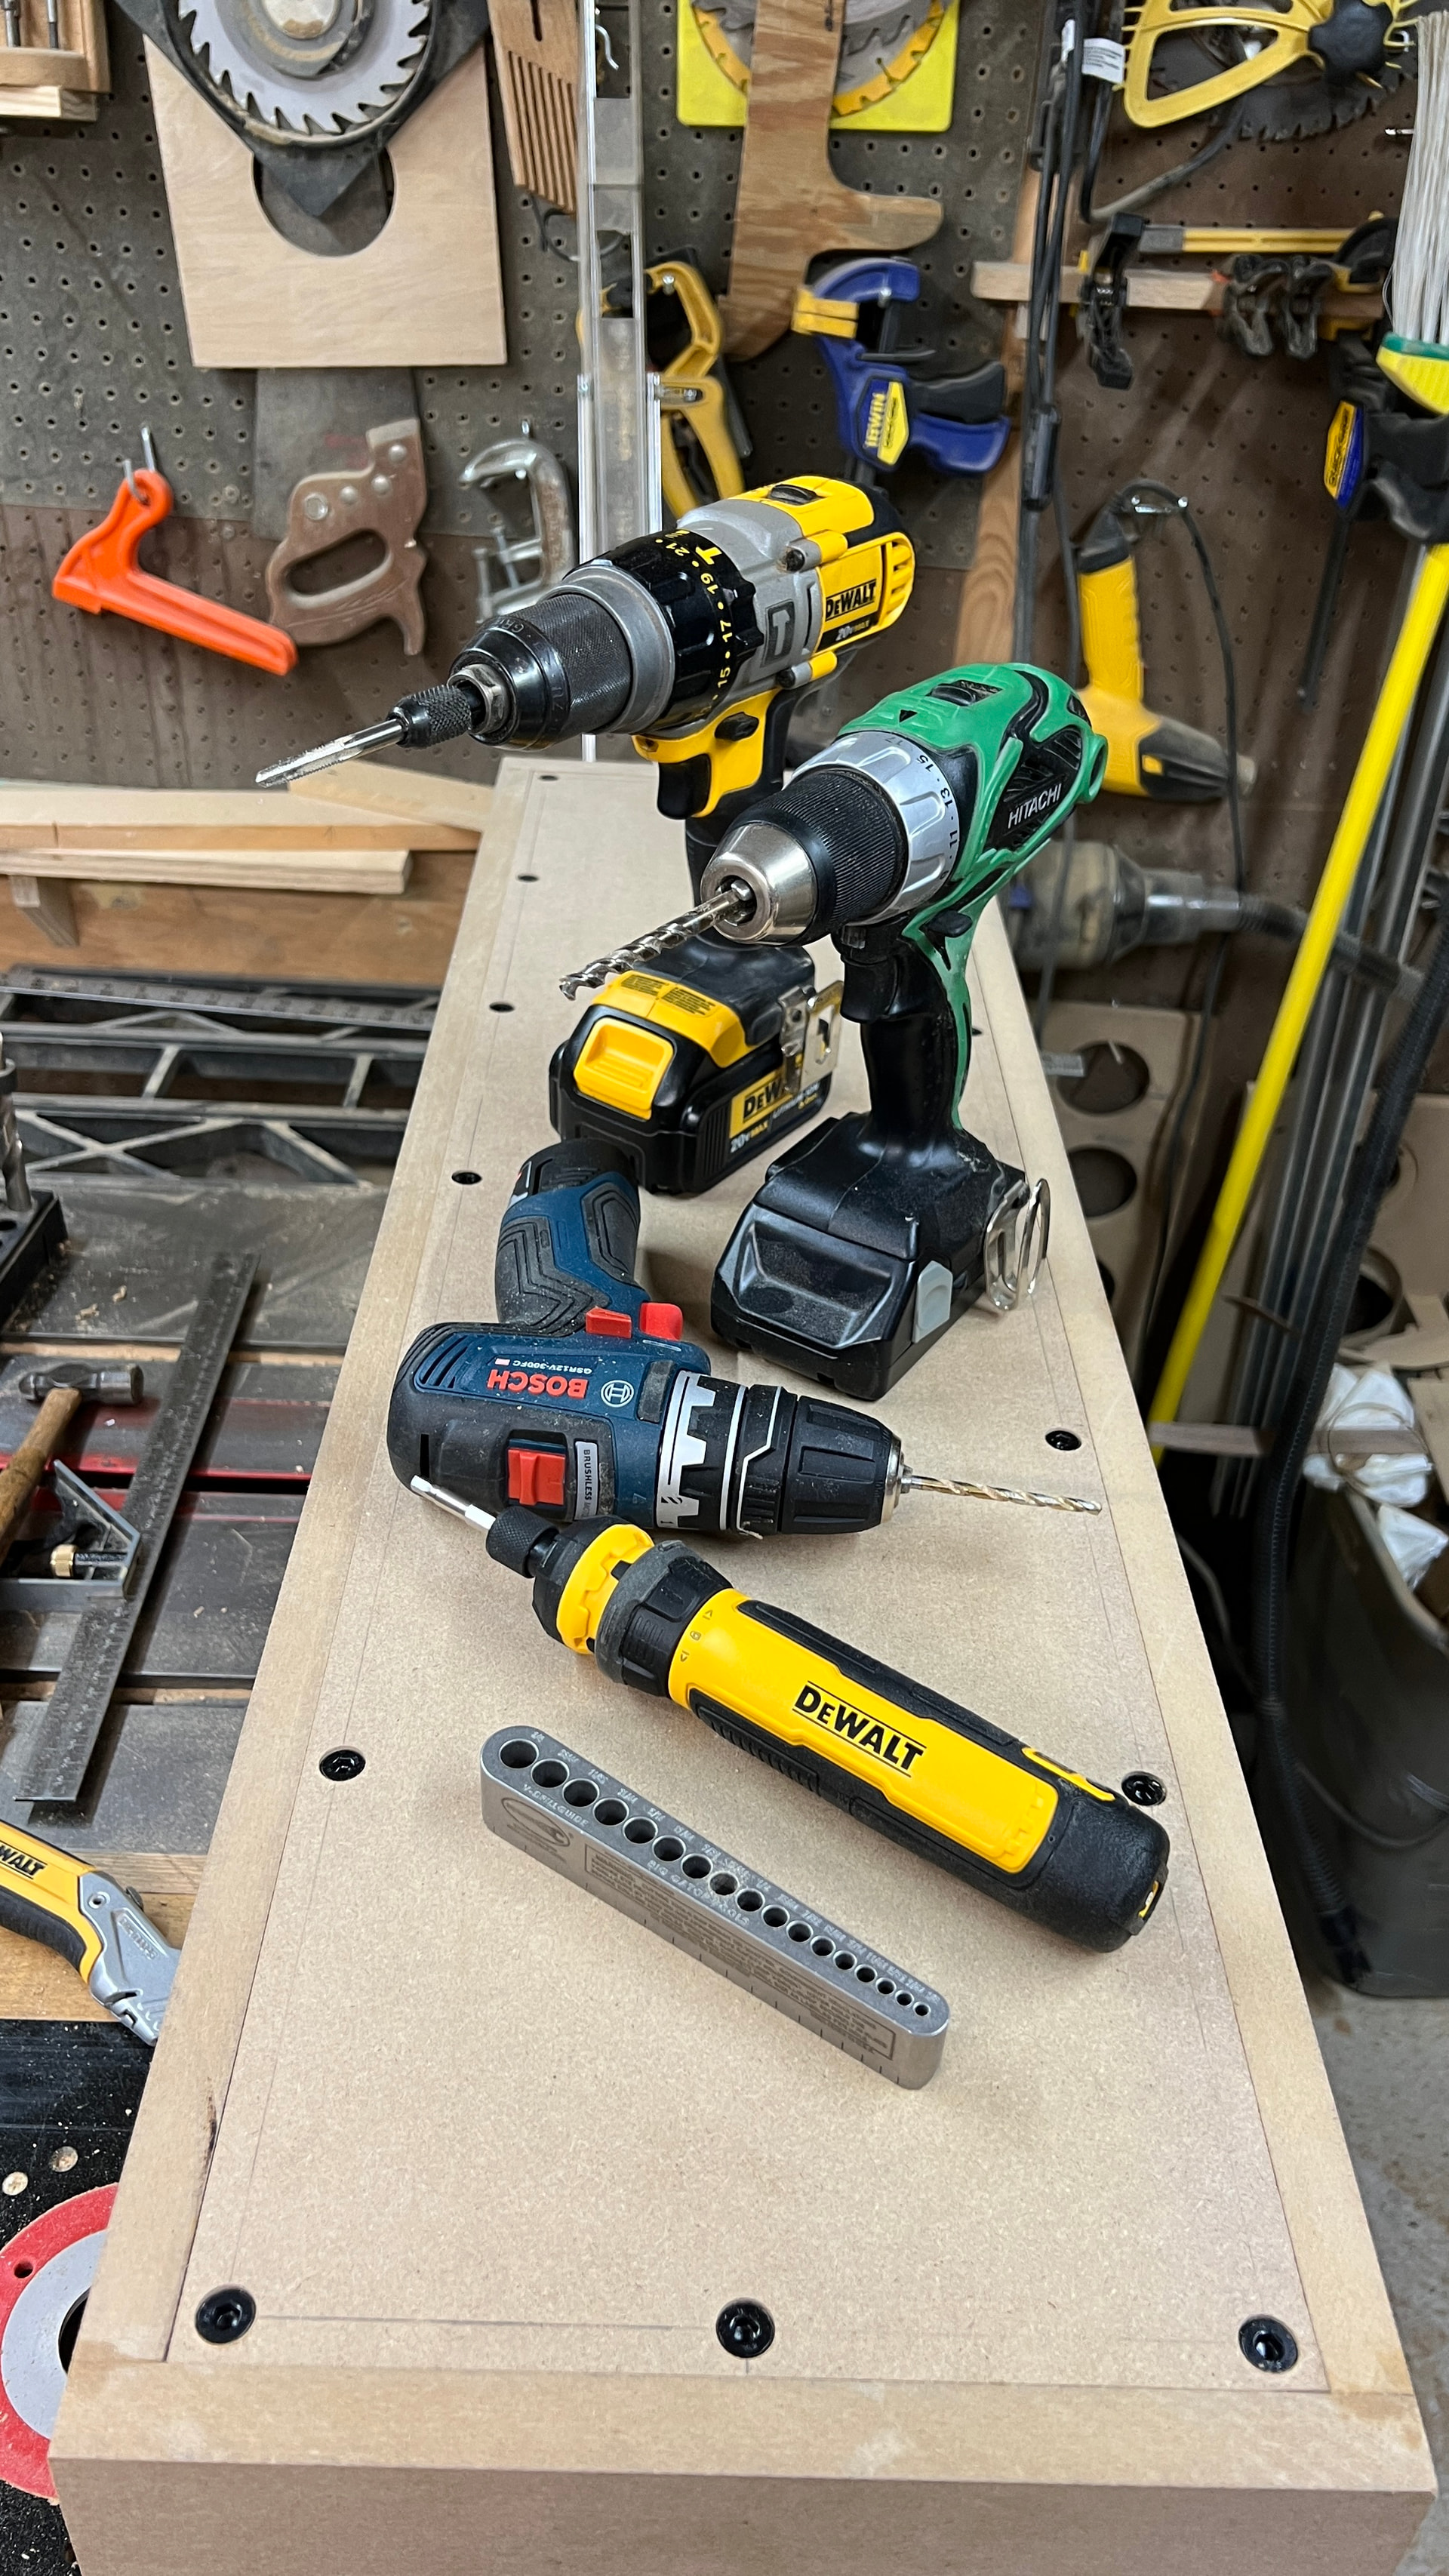
Apparently you can never have too many drills.
I woke up at 3am yesterday. Drilling is quiet enough and my shop is at the other end of the house, so my wife didn’t hear a thing, despite the 5-step process. Started at the drill press with a Forstner bit and then 3/16’s pilot holes in the back panels. Then with the backs in place, used a drill guide and the little Bosch to drill down through the oak runners. Tapped the holes with the 20v Dewalt on low speed, then finished by opening up the holes in the panels with the old Hitachi. The little Dewalt screwdriver has enough torque to pull the backs into place.
4 Likes
I can almost see the finish line.
I got the hardwood blocks glued in place to mount the baffles.
The backs worked out so well that I decided to use the same approach on the baffles.
Double-checked my measurements, but we’ll find out today if my ruler made any mistakes.
8 Likes
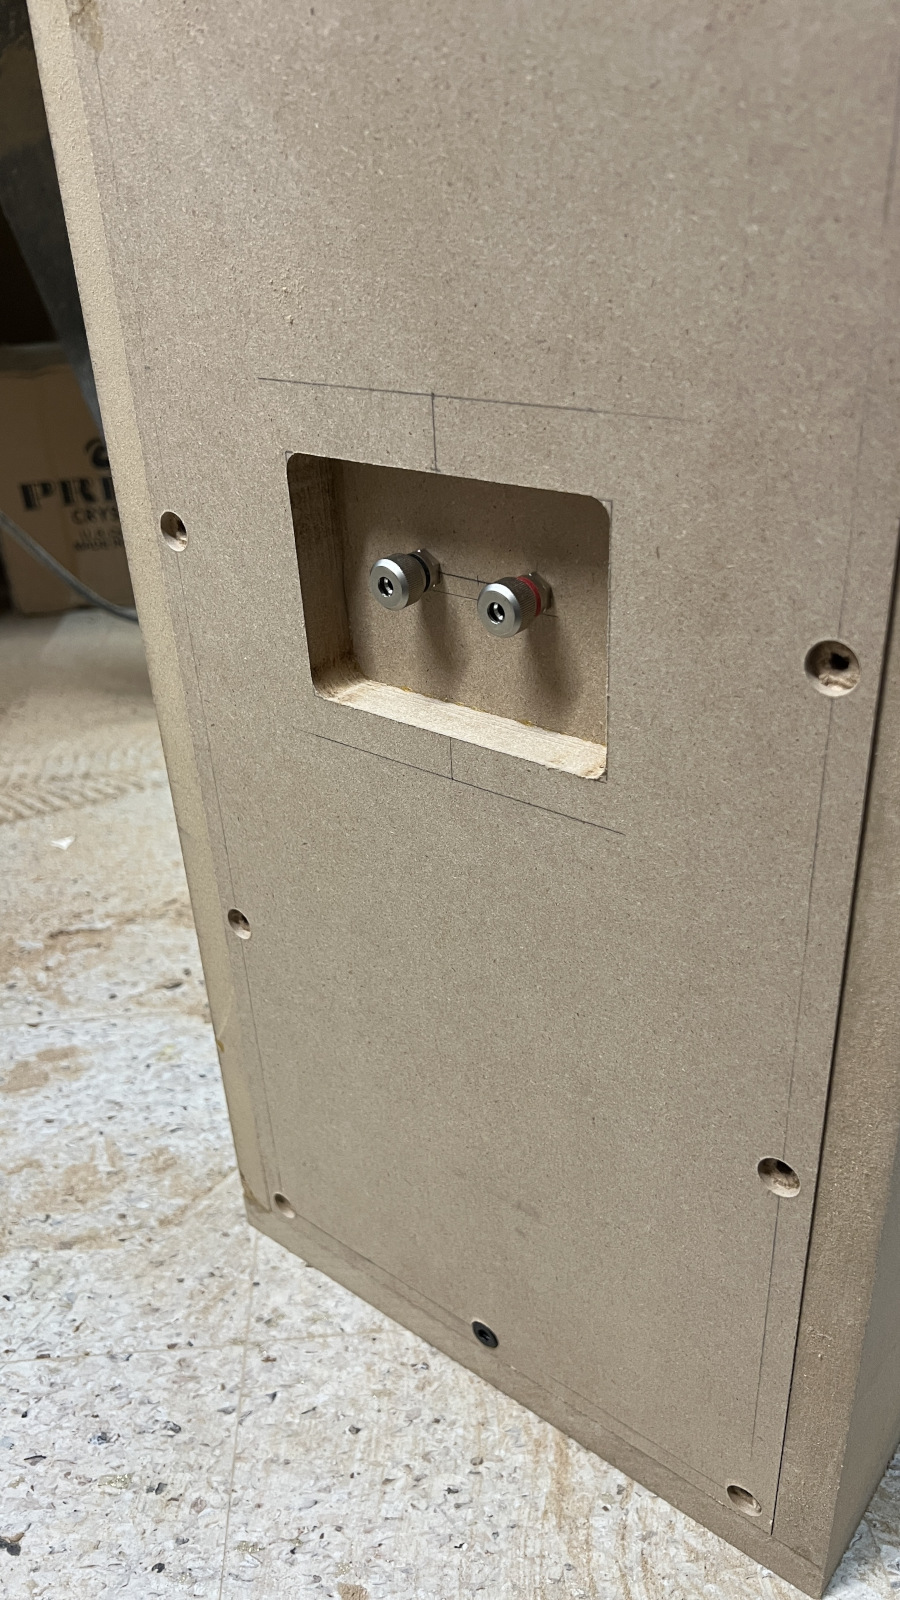
Craig used some hardwood on the back of the baffles on one of his builds not long ago. I have lots of little scraps around, so I stole that idea. Mine doesn’t look as nice, but it’ll do the job. “Steal the best, leave the rest” is my motto. I’ll cut the recess for the binding posts after dinner, mount the drivers and might even get to listen to these later tonight.

2 Likes

I got the basic boxes done on these today and was able to give them a listen for a few hours. Very nice sounding design. JR hit this out of the park! I’ll listen to the bare MDF boxes for a while and then start on the veneer and painting. I plan to make some bases for these too. They need a wider footprint and some spikes to be stable on my carpet.
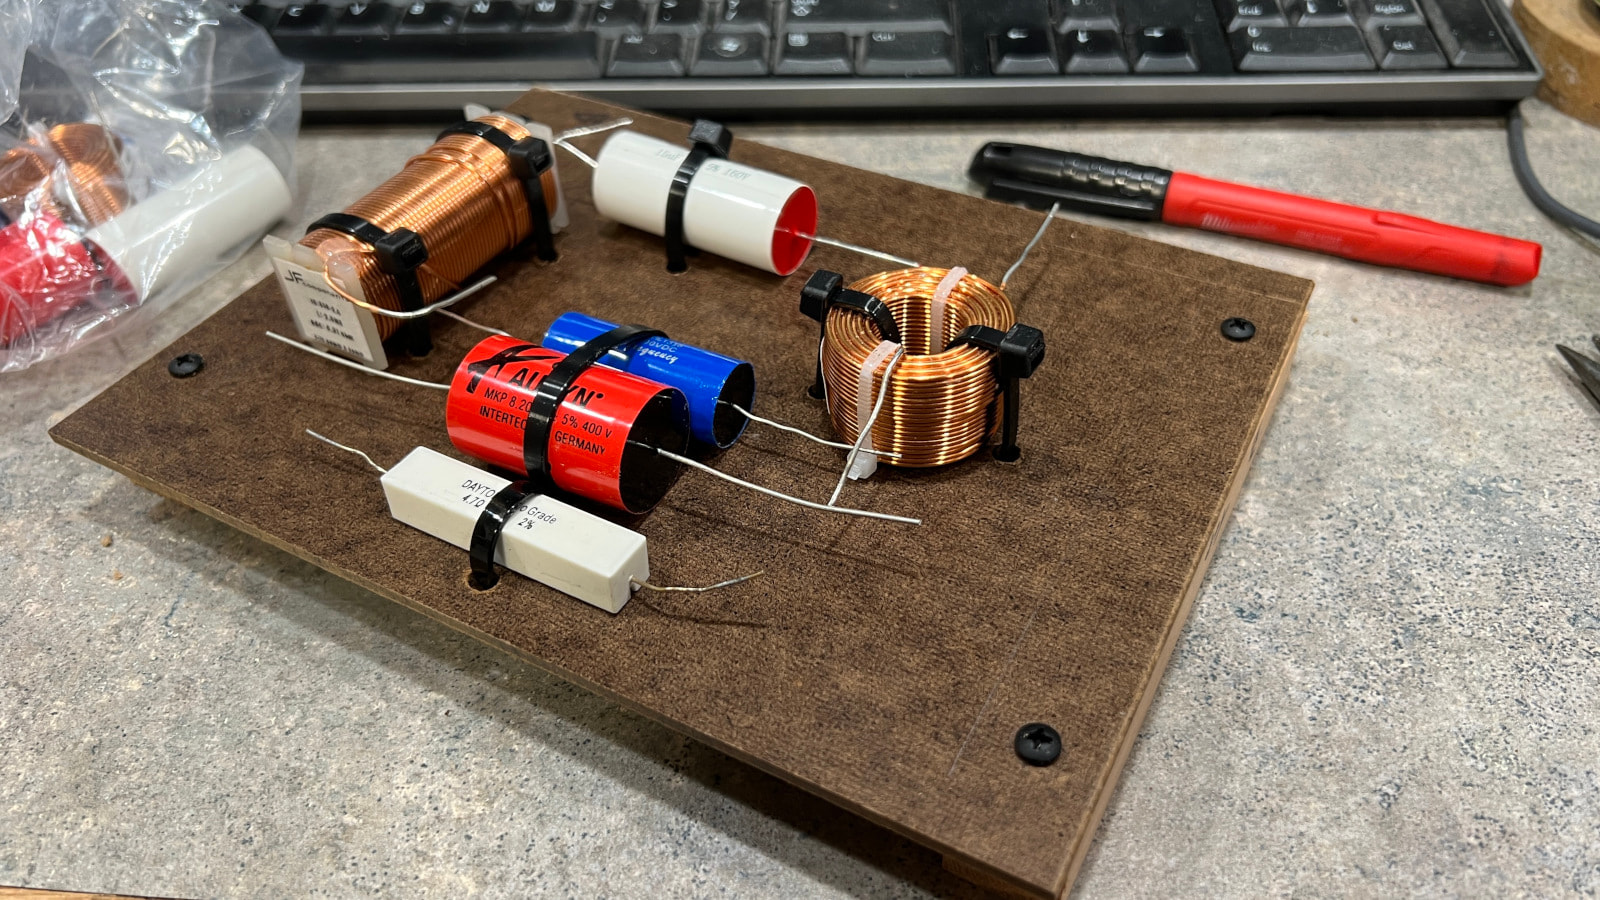
Here are a few more construction pics -
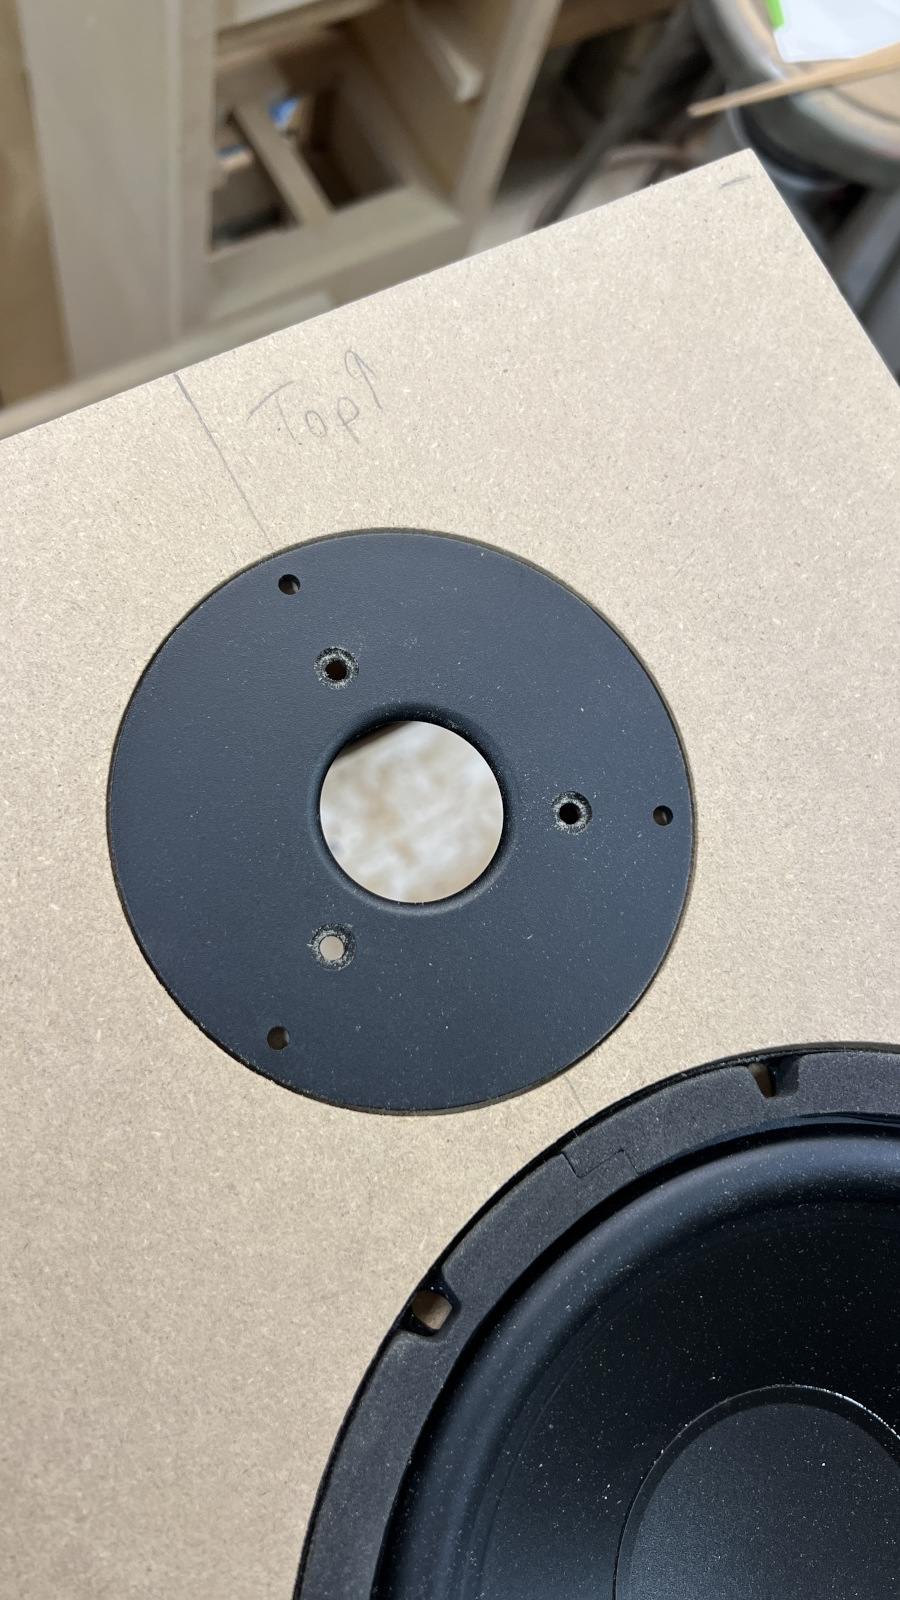
Craig had said he drilled 3 more holes in his Silkies. Sounded like a good idea so I took the faceplate from one of the duds PE had replaced and used it as a template to drill out the good pair without taking them apart. I used the plastic shield from the packaging to keep junk from getting on the domes.

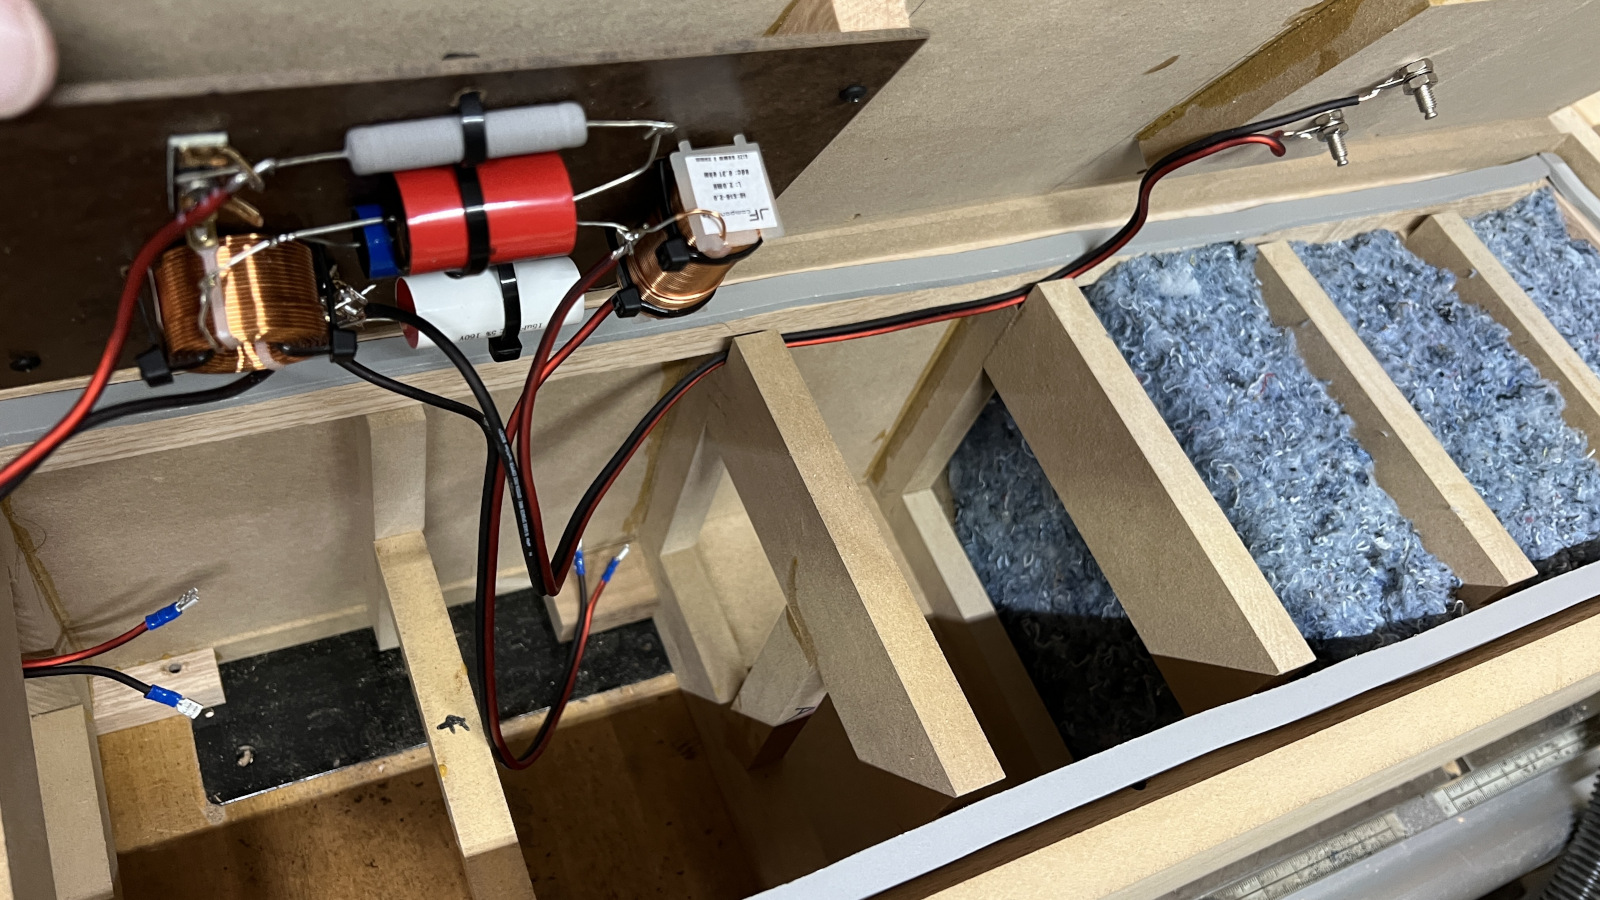
I used some of the insulation I bought from Mark in Ankeny to stuff the bottoms of the cabinets. Maybe too much?? Routing the cables from the binding posts to the crossovers along the gaps in the bracing was not something I planned - just dumb luck!
5 Likes
Really nice progress and construction.
What is the deal with the Sears Wobble Dado blade inside the cabinet (if I may inquire)?
You are seeing through the cabinet to the wall behind.
Aha!
Thanks for the perspective shift . . .
![]()
1 Like
It really cuts up the standing waves nicely…lol.
4 Likes